Plan plate layout, Plan plate layout 8 – Bio-Rad Bio-Plex Pro™ Human Isotyping Assays User Manual
Page 10
8
1. Plan Plate Layout
Prior to running the assay, determine the total number of wells in the
experiment using the Plate Layout Template on page 33 or the Plate
Formatting tab in Bio-Plex Manager
™
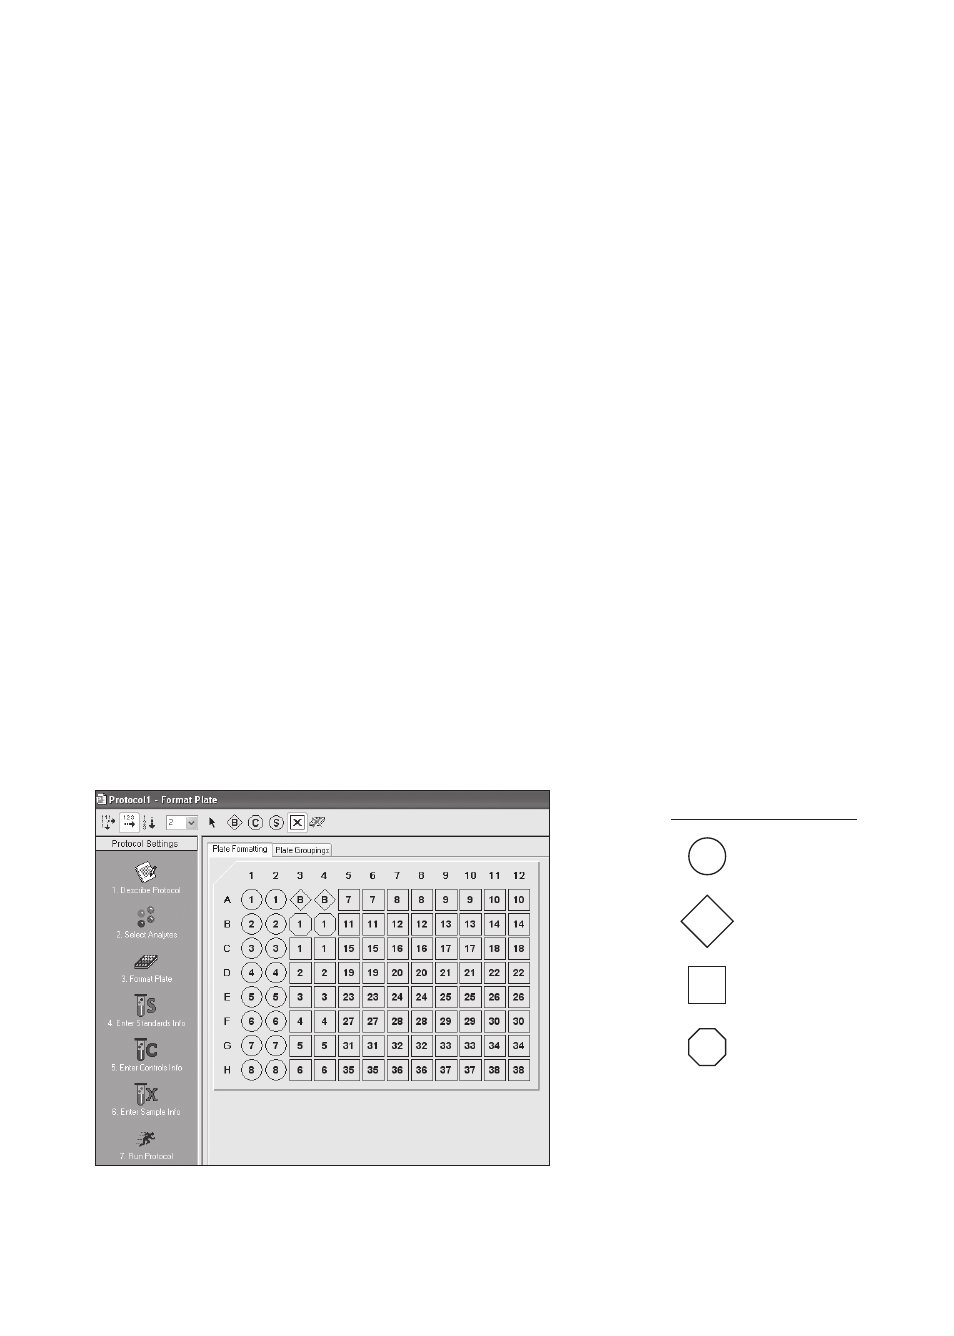
software. A suggested plate layout is
shown in Figure 2, with all conditions in duplicate.
1. Assign standards to columns 1 and 2, with the highest
concentration in row A and the lowest concentration in row H.
2. Assign the blank to wells A3 and A4. The blank should consist of your
chosen isotyping diluent or a diluent similar to your final sample type
or matrix. Note that Bio-Plex Manager automatically subtracts the
blank (B) MFI value from all other assay wells.
3. Controls, either user-specified or the quality controls supplied, are
assigned to wells in columns 3 and 4.
4. The remainder of the plate is available for samples.
5. once the total number of wells is known, calculate the required volumes
of beads, detection antibody, and streptavidin-PE needed. Use Tables 6,
8, and 9, respectively, or the Calculation Worksheet on page 34.
Legend
S Standard
B Blank
X Samples
C Controls
Fig. 2. Suggested plate layout. For detailed instructions on plate
formatting in Bio-Plex Manager software, see section Read Plate.