Marker setup, Re h s – Great Plains 3S-3000HDF Operator Manual v2 User Manual
Page 110
106
3S-3000HD
Great Plains Manufacturing, Inc.
195-068M
2014-02-11
Marker Setup
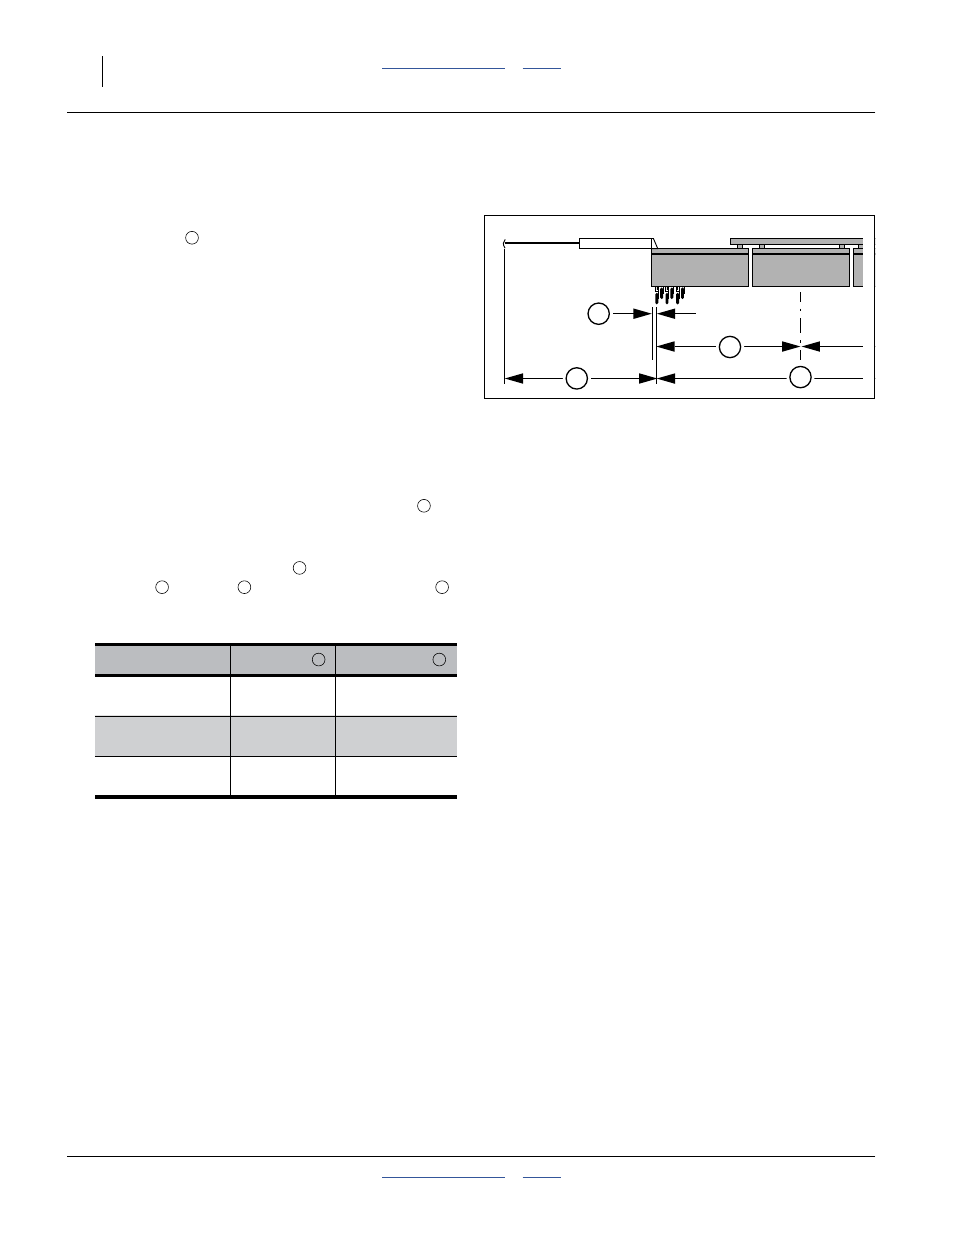
Refer to Figure 95
Markers are field-installed, but usually do not have their
extension length
precisely set. The drill must be
leveled per “Center Box Frame Leveling” on page 74,
and marker(s) must be in correct working order per
“Marker Maintenance” on page 80.
Row unit centerline stations on 3S-3000HD drills are
symmetrical about machine center, so left and right
extensions are normally identical, for both opposing and
concentric passes.
Set the initial length of the marker(s) as follows:
1.
Lower drill and openers to field position (“Raising
and Lowering Openers” on page 23).
2.
Extend a marker on one side. Pull forward several
feet to leave a mark.
3.
Sighting parallel to the main tool bar, measure
from the centerline of the left outside row unit to the
mark.
4.
Adjust the marker extension
so that the mark is
one half
the span
plus one row unit spacing
.
See “Marker Adjustments” on page 59 for setting
marker extension.
5.
Pull forward several feet, and re-measure to verify
any adjustment. Validate the mark by making a pass
to one or both sides.
6.
Fold marker. Extend other side and adjust.
Note: If field conditions require inverting the marker disk
(page 61), the mark moves, and the extension
needs to be re-measured and reset. Marking also
changes slightly if the opener frame trunnion posi-
tion is changed (page 53).
End of Appendix B - Initial Setup
Model
Spacing
Extension
3S-3000HD-3610
10 in
185.0in
(469.9cm)
3S-3000HD-4875
7.5 in
184.75in
(469.3cm)
3S-3000HD-6006
6 in
185.5in
471.2cm
R
E
H
S
FigureSpacer
Figure 95
Marker Extension
E
E
E
H
S
R
R
E