Great Plains SR5030 Operator Manual User Manual
Page 23
21
Section 5 Maintenance and Lubrication
4/12/05
SR5030 Split-Row Planter 401-140M-A
Great Plains Mfg., Inc.
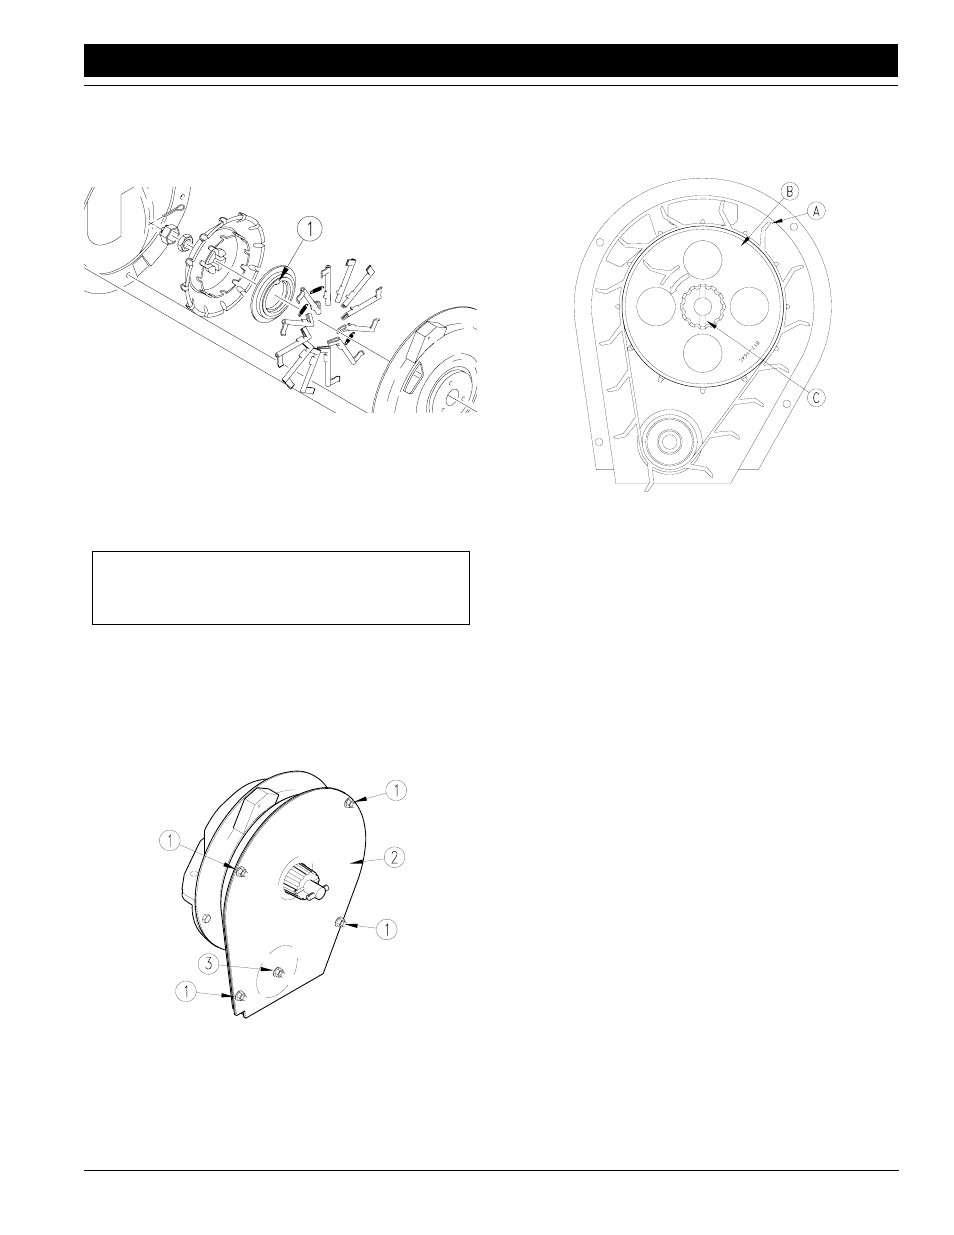
4.
Reassemble finger housing onto carrier plate. When
reassembling, align notch in finger-housing cam (1)
with notch on bearing housing so finger housing is
flush with the carrier plate. The meter will function im-
properly if the notches are not aligned.
17745
Figure 5-4
Meter Reassembly
5.
With finger assembly against carrier plate, tighten ad-
justing nut until it is snug, then turn an additional one-
third turn. Proper torque is 22 to 25 inch-pounds at the
meter-input shaft.Turn meter by hand to make sure
the meter is not over tightened.
IMPORTANT: Check tightness of the adjusting nut
on the meter after the first day of operation and peri-
odically thereafter.
6.
Reassemble cage nut and cotter pin. Reassemble
baffle and attach meter to hopper.
Periodically check the meter belt. Refer to Figure 5-5.
1.
Remove four bolts (1) from belt housing (2). Remove
bolt holding the belt roller (3). Remove belt housing.
2.
Inspect belt. Replace belt if necessary.
14966
Figure 5-5
Belt Inspection
3.
To replace a worn or broken belt, refer to Figure 5-6.
Be certain paddles (A) are oriented as shown. Belt
drive wheel (B) may be removed by removing spring
pins (C).
15049
Figure 5-6
Belt Installation
4.
Reassemble meter in reverse order.
Opener Disks, Scrapers and Gauge Wheels
1.
Remove side-gauge-wheels from arms to access
opener disks and scrapers.
2.
With the unit raised, check blade spreader (1) for
wear. Replace spreader if it is 1/2 inch wide or narrow-
er. To replace, remove disk blade. Drive out roll pins
(2) and install a new spreader.
3.
Check disk blades (3) for wear.Replace blades if worn
to a diameter of 14 1/2 inches or less.
4.
When reinstalling disk blades, put two shims between
bearing and shank on one blade. Tighten bolt. On op-
posite side, reinstall blade with two (4) shims between
bearing and shank. Tighten bolt.
5.
Check contact point between disk blades. Place a
piece of paper in top gap between disks blades. Bring
paper down until it stops. In lower gap place another
piece of paper. Bring paper up until it stops. Measure
the distance between two pieces of paper. The dis-
tance must be between 1/2 and 1 3/4 inches. Add or
remove shims as needed to get the correct contact
point.
6.
Check that outside disk scrapers (5) are formed to
disk blades to help remove any mud. Bend and twist
scrapers to fit blades as necessary. After every 200
acres of planter operation, check outside scrapers for
proper adjustment and wear. Replace outside scrap-
ers as necessary.