Pre-assembly preparation, Work location, Install arm mechanisms – Great Plains NTA2007HD Assembly Instructions User Manual
Page 3: Install arm mounts, Install left mount
Great Plains Mfg., Inc.
Installation Instructions
3
2013-10-10
113-850M
Pre-Assembly Preparation
Work Location
4.
Move the air drill to a location with:
5.
Raise drill. Unfold drill. Lower drill. This eases
access to the frames.
6.
Set all hydraulic remote circuits to Float (to ensure
that pressure is relieved). Shut off tractor or hydrau-
lic source.
Install Arm Mechanisms
Install Arm Mounts
Install Left Mount
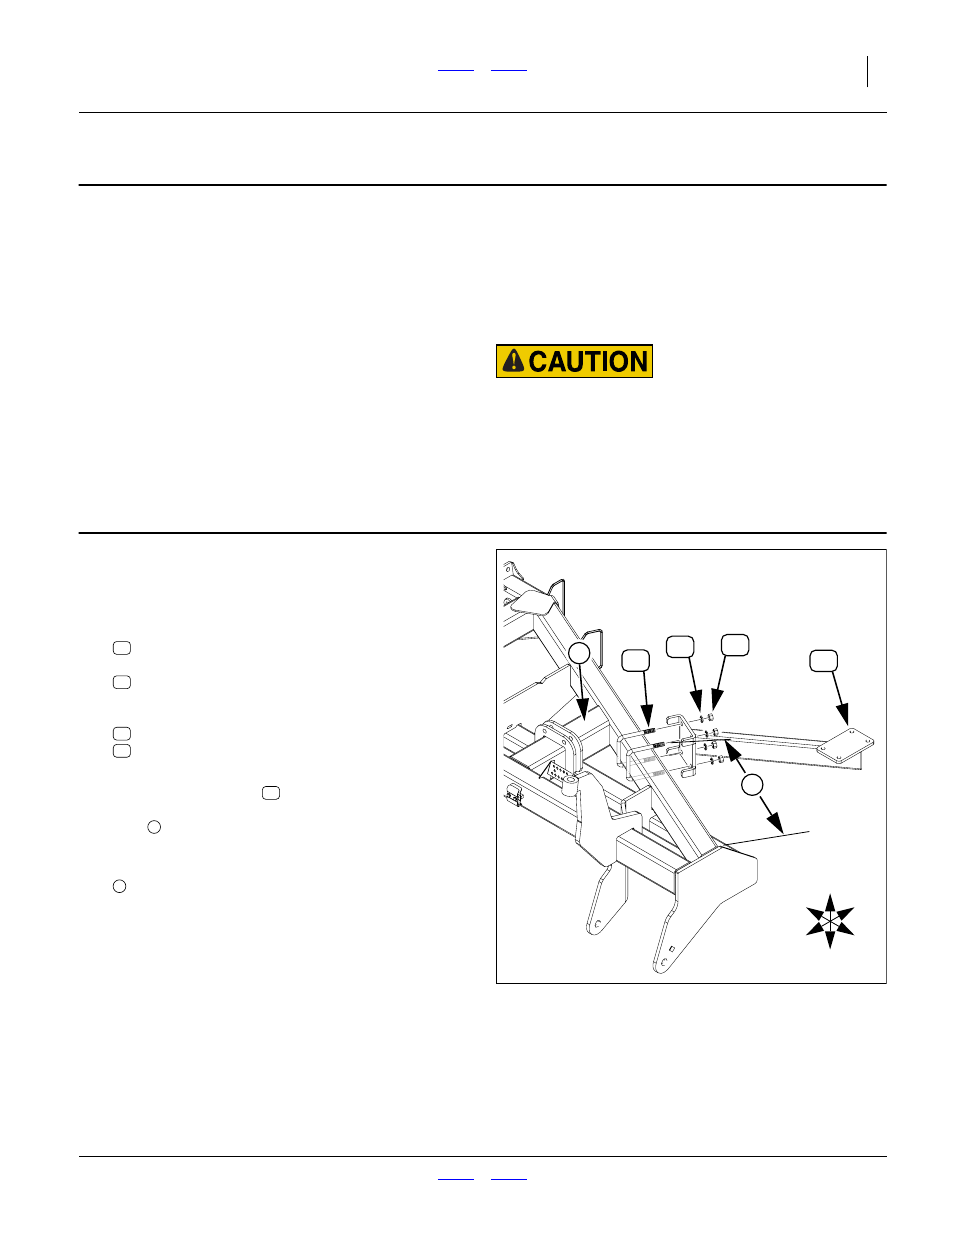
Refer to Figure 4
7.
Select one new:
SFM-8670 Mounting Bracket Left SFM
two new:
FNS-024346 806-044C 5/8x5-1/16x5-1/2"
U-bolt U-BOLT 5/8-11 X 5 1/32 X 6
and four sets new:
8.
With the arm to the rear, flat plate up, loosely install
the mounting bracket
just outboard (left) of the wing cylinder mount
tube
.
9.
Adjust the initial position of the bracket for a dis-
tance:
74.0 cm (29
1
⁄
8
in.)
measured from the left outside face of a mount tab
to the left rear end of the rear tool bar (due to weld
fillets, this measurement is approximate).
Leave fasteners finger-tight until step 20.
Null4:
• room to fold it;
• access to tractor or hydraulic power;
• adequate illumination; and,
• clear surface beneath for recovery of any falling
or dropped parts - if the surface is not clear, have
a tarp or drop cloth available.
Crushing Hazard:
Lower drill or support wing ends with gauge wheel lock chan-
nels. Although the center section may be held at raised by the
lift lock, unfolded wing ends slowly lower over time unless cyl-
inder lock channels or external supports are used.
Null4:
Figure 4
Install Left Mount
31337
22
U
D
F
B
L
R
1
2
22
1
2