Charge and bleed system – Great Plains NTA2007HD Assembly Instructions User Manual
Page 12
12
2013- Single Fold Marker
Great Plains Mfg., Inc.
113-850M
2013-10-10
Charge and Bleed System
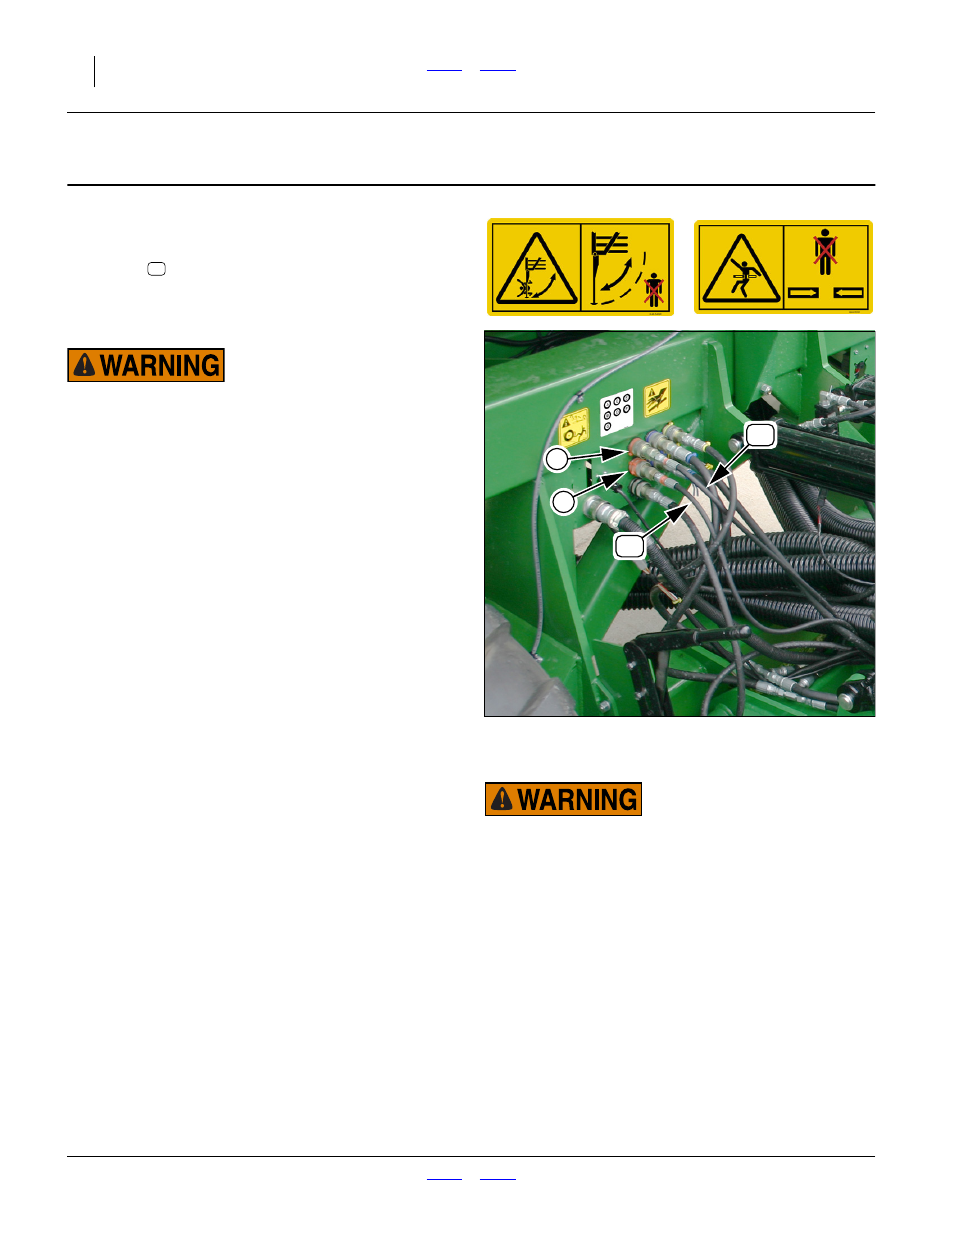
Refer to Figure 16
71. Put on gloves and safety glasses.
72. Connect the QD ends of the marker supply
hoses
to cart outlets A and B. Either hose may
be connected to either port.
73. Remove any strapping that holds the marker arms
closed.
Pinch / Crush / Striking Hazards:
Clear all objects from the sweep arcs of the marker arms.
Have all persons stand clear. The next steps fully deploy the
arms, and the motion may be sudden and irregular due to air
in the system.
74. Set the remote circuit assigned to the markers to
Neutral. Activate hydraulic power.
Note: Implement is still lowered. Normally, the imple-
ment is raised for marker operations. With no third
stage arm or disk assembly installed, the markers
are short enough and light enough that they will
not strike the ground during initial exercising.
75. While charging the system, bleed the markers per
the instructions in the 166-283M Operator Manual,
Maintenance topic.
76. Slowly move the marker circuit lever to Extend.
Observe which marker begins to move, and if nei-
ther, slowly reverse the lever to Retract.
77. Continuing slow operation, gradually extend a
marker arm on one side. When it reaches full exten-
sion, slowly reverse the lever and fold the marker.
When fully folded, set lever to Neutral.
78. Slowly reverse the lever. The other marker should
begin to deploy. Fully extend the marker, then fully
fold it.
79. Set circuit to Float and shut off hydraulic power.
Inspect the system for hydraulic leaks.
80. Repeat step 76 through step 78 two more times.
81. Perform another leak inspection.
82. Fold both markers. Set circuit to Neutral. Shut off
hydraulic power.
Null4:
Null4:
High Pressure Fluid Hazard:
Escaping fluid under pressure can have sufficient pressure to
penetrate the skin causing serious injury. Avoid the hazard by
relieving pressure before disconnecting hydraulic lines. Use a
piece of paper or cardboard, NOT BODY PARTS, to check for
leaks. Wear protective gloves and safety glasses or goggles
when working with hydraulic systems. If an accident occurs,
seek immediate medical assistance from a physician familiar
with this type of injury.
Figure 16
Cart Hose Connections
31349
72
A
72
B
72