Lock-out hub, Secure markers, Lock-out hub secure markers – Great Plains 1300 13-Foot Operator Manual User Manual
Page 22: Lock, Out hub
18
1300 and 1300F
Great Plains Manufacturing, Inc.
175-157M
2014-04-15
Lock
-
Out Hub
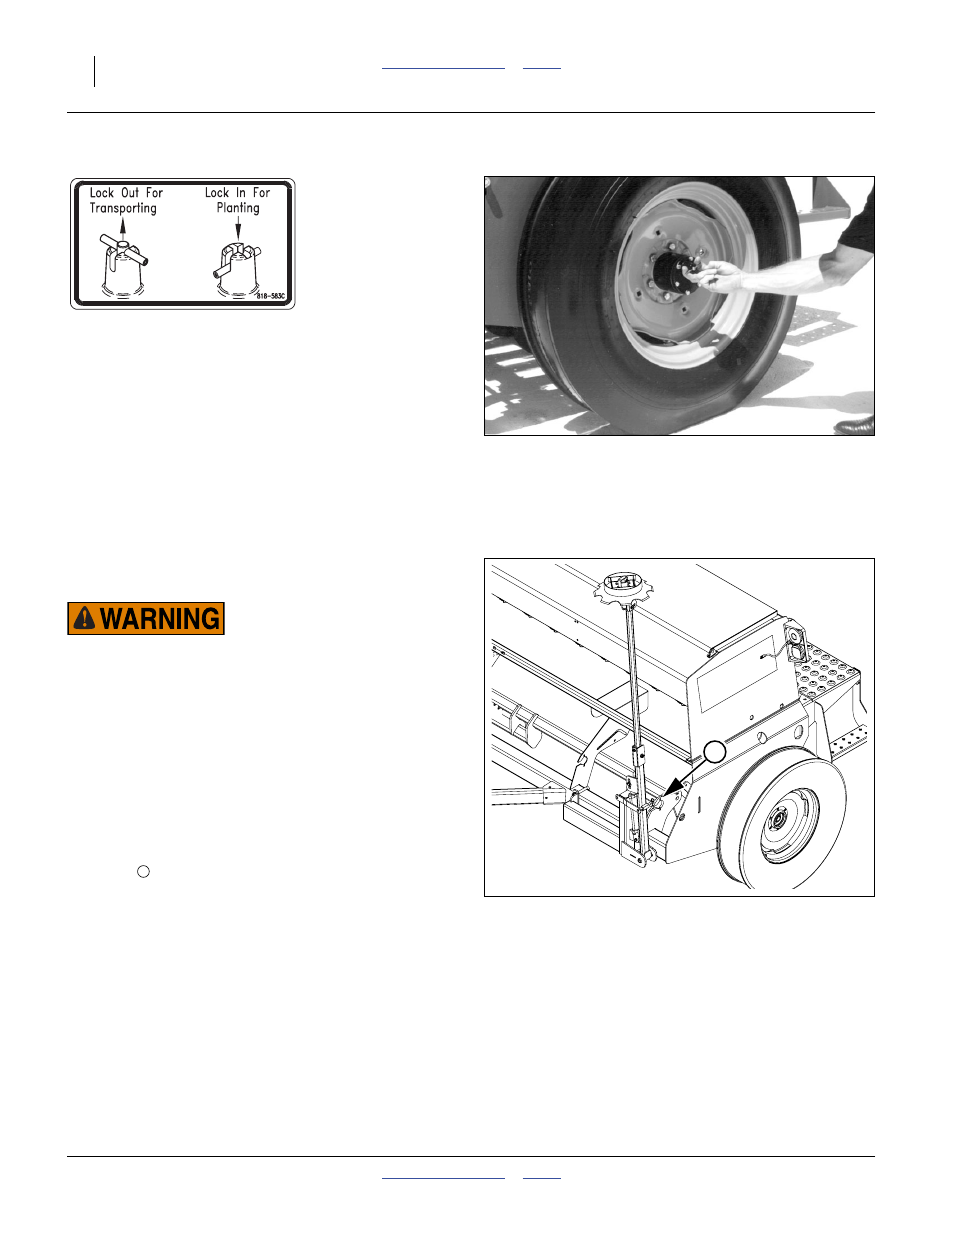
Refer to Figure 9
7.
Disengage the lock-out hub on the left end-wheel.
Pull out on the cross-pin, lifting it out of the deeper
detents. Rotate it 90 degrees and release it into the
shallower detents.
Note: To re-engage the lock-out hub for planting, reverse
the above step. Note that the cross-pin may not
fully seat when released into the deep detents. It
self-seats during the next rotation of the wheel.
Secure Markers
If markers are installed, they must be folded and locked
for transport.
Transport/Crush/Sharp Object Hazards:
Do not transport with markers unsecured by pins. A lowering
marker arm could cause a serious highway accident or strike
other objects and persons outside of the lane. A circuit in
Float, a disconnect at the hitch, or hydraulic hose damage
could result in a marker arm descending. Secure markers
before transport.
1.
To avoid excess wear on opener discs, raise openers
and secure at raised with opener pivot stop
(page 17).
Check that marker transport pins are not in transport
holes
3.
As needed, fold a marker on each side using the lift
circuit (page 30). As each marker reaches fully
folded, set the lift circuit to Neutral.
4.
Insert and secure the lock pin.
Figure 9
Wheel LockOut Hub
16654
818583C
Figure 10
Marker Transport Pin
36274
1