Install rear hitch (optional), Extended rear hitch, A-frame hitch – Great Plains 9756PP Predelivery Manual User Manual
Page 17: Extended rear hitch a-frame hitch, Rear hitch (optional)
Great Plains Manufacturing, Inc.
Assembly
13
02/17/2014
580-043Q
Install
Rear Hitch (optional)
Note: The rear tow hitch will be shipped with big compo-
nents banded together and bolts will be in a box.
Carefully un-band the components. There are two dif-
ferent types of rear hitches, rear hitch extended or a-
frame style. See appropriate mounting directions list-
ed below. Do not tighten any bolts until every thing is
installed.
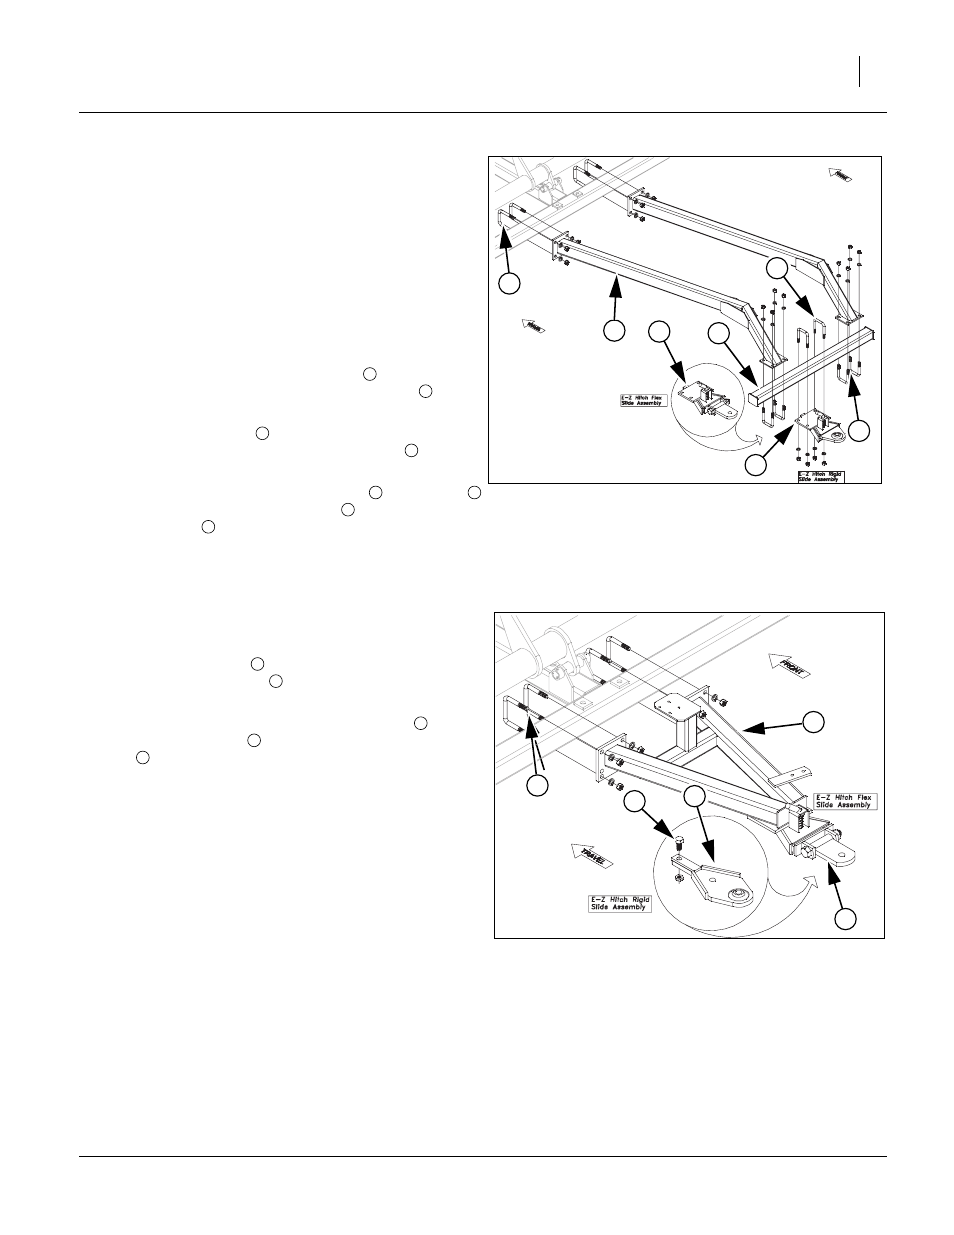
Extended Rear Hitch
Refer to Figure 12
48. Attach front plates of rear hitch arms
to rear tube of
center frame with 3/4 x 4 1/32 x 5 3/8 u-bolts
, 3/4
lock washers and 3/4 nuts.
49. Attach 46” cross arm
to bottom side of rear hitch
arm plates with 5/8 x 3 1/32 x 4 1/2 u-bolts
, secure
with 5/8 lock washers and 5/8 nuts.
50. The bolt on sleeve assembly with rigid
or flex slide
may be fastened to 46” cross arm
using 5/8 x 3 1/32
x 4 1/2 u-bolt
, secure with 5/8 lock washers and 5/8
nuts.
51. Tighten all bolts to specs, See “Torque Values Chart”
A-Frame Hitch
Refer to Figure 13
52. Attach a-frame hitch
to rear of center frame with 5/8
x 3 1/32 x 5 1/2 u-bolts
, 5/8 lock washers and 5/8
nuts.
53. Hitch will have either the flex slide assembly
or the
rigid slide assembly
. There will be a 3/4 x 1 1/2 hex
bolt
and 3/4 jam nut in front hole of assembly to keep
the slide assembly from sliding clear out.
54. Tighten all bolts to specs, See “Torque Values Chart”
1
Figure 12
Rear Hitch
43037
3
6
4
2
5
4
1
2
3
4
5
6
3
4
3
2
1
Figure 13
A-Frame Hitch
43038
5
4
1
2
3
4
5