Onnecting, Ideo, Onferencing – ClearOne CHAT Manual User Manual
Page 12: Evice
Chapter 2: Getting Started 9
5. Using the included power supply, connect the CHAt 170 Phone breakout box to a power outlet.
6. the blue LEd indicators on the CHAt 170 illuminate, indicating that the CHAt 170 is powered and ready for use.
7. Next, connect the CHAt 170 to your PC. this will allow you to use the CHAt software to configure the CHAt 170
for use with your enterprise telephone. Refer to Connecting the CHAT to a PC section at the beginning of this
chapter.
> NOTE: Press the Headset button on the phone breakout box to send audio from your phone to your
headset connected to the CHAt 170 breakout box. this will also disable audio going from the breakout
box to the CHAt 170—it will only be routed to the headset. the phone breakout box LEd indicator illu-
minates indicating that the headset audio is activated. the CHAt 170 LEd indicators remain lit, although
audio is not routed to the CHAt 170 from the breakout box (USb audio is still active). Press the Headset
button again to disable headset audio and reactivate audio from the breakout box to the CHAt 170. the
LEd dims out to indicate the change.
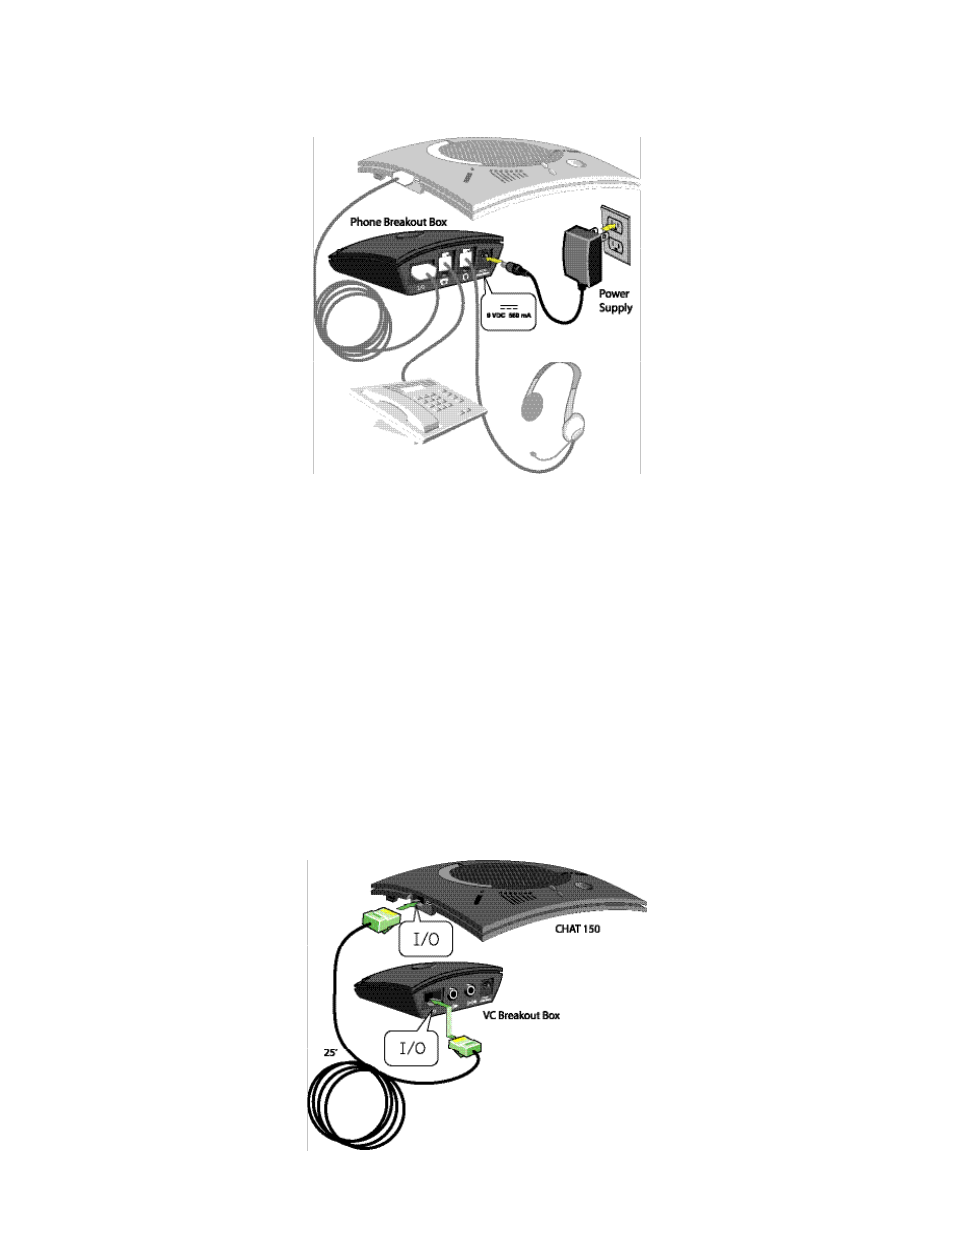
Connecting to a video Conferencing device
ClearOne provides configurations of the CHAt 170 that make it possible to connect your CHAt 170 to video conferenc-
ing systems. the CHAt 170 vC breakout box is the interface between the CHAt 170 and the video conferencing device.
Once you have properly connected the CHAt 170 vC breakout box to your video conferencing device and tv (using the
included RCA connection cable) all settings changes such as mute, microphone and speaker level adjustments, etc., are
controlled trough the CHAt software application. the breakout box itself has no buttons and no functionality for making
settings changes. the LEd indicates only that the device has power.
Using the included RJ-45 cable, connect the vC breakout box to your CHAt 170.
1.