Removal and replacement, type 2 module – Tweco 9-9418 User Manual
Page 6
6
Manual 0-4737
Removal and Replacement, Type 2 Module
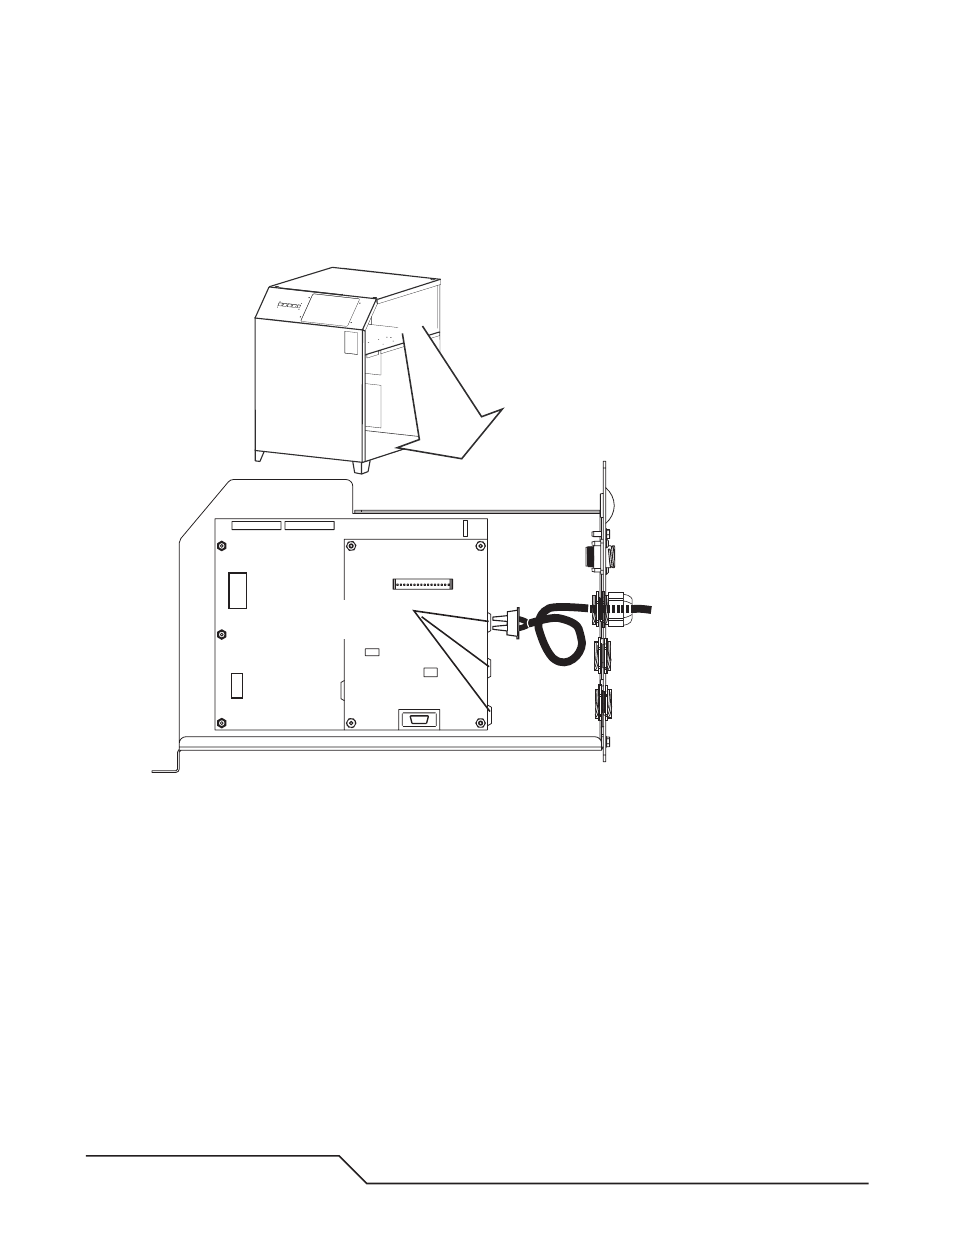
A. Disconnect and Remove Type 2 Module
1. A wire harness connects the module rear panel to the larger PC Board in the module. Leave this harness in
place. Carefully label and disconnect all other internal wire harnesses connected to the module. Take care to
label the harnesses connected to terminals J1 and J7 properly.
2. Carefully label and disconnect all external wire harnesses connected to the module.
To Gas Control Module
Profile Detail, Fiber Optic Cable Installation
Cable Receptacles
Use top ONLY
Art # A-06793_AB
3. Loosen, but do not remove, the internal bolt fastening the module to the power supply inner horizontal panel.
4. Remove the hardware holding the module rear panel to the power supply rear panel. Save the hardware for
re-use.
5. Carefully slide the module out of the power supply. Keep the module nearby to serve as a reference for setting
the switches on the replacement module.
B. Install and Connect Type 2 Module
1. Lift the internal wire harnesses to let the module slide under them. Carefully slide the replacement module
into the power supply. Ensure that the internal bolt engages the slot in the inner end of the module’s bottom
plate. Fasten the module back panel in place with the hardware removed previously. Tighten all hardware
securely. Do not overtighten.
2. Carefully connect all internal wire harnesses to the module according to the labels applied to the harnesses
previously.
3. Reconnect the external harness connections to the module.