19 connecting torch, 19 connecting torch -40, Ultra-cut 300 – Tweco 300 Ultra-Cut(March 2013) User Manual
Page 64
INSTALLATION
3-40
Manual No. 0-5134
ULTRA-CUT 300
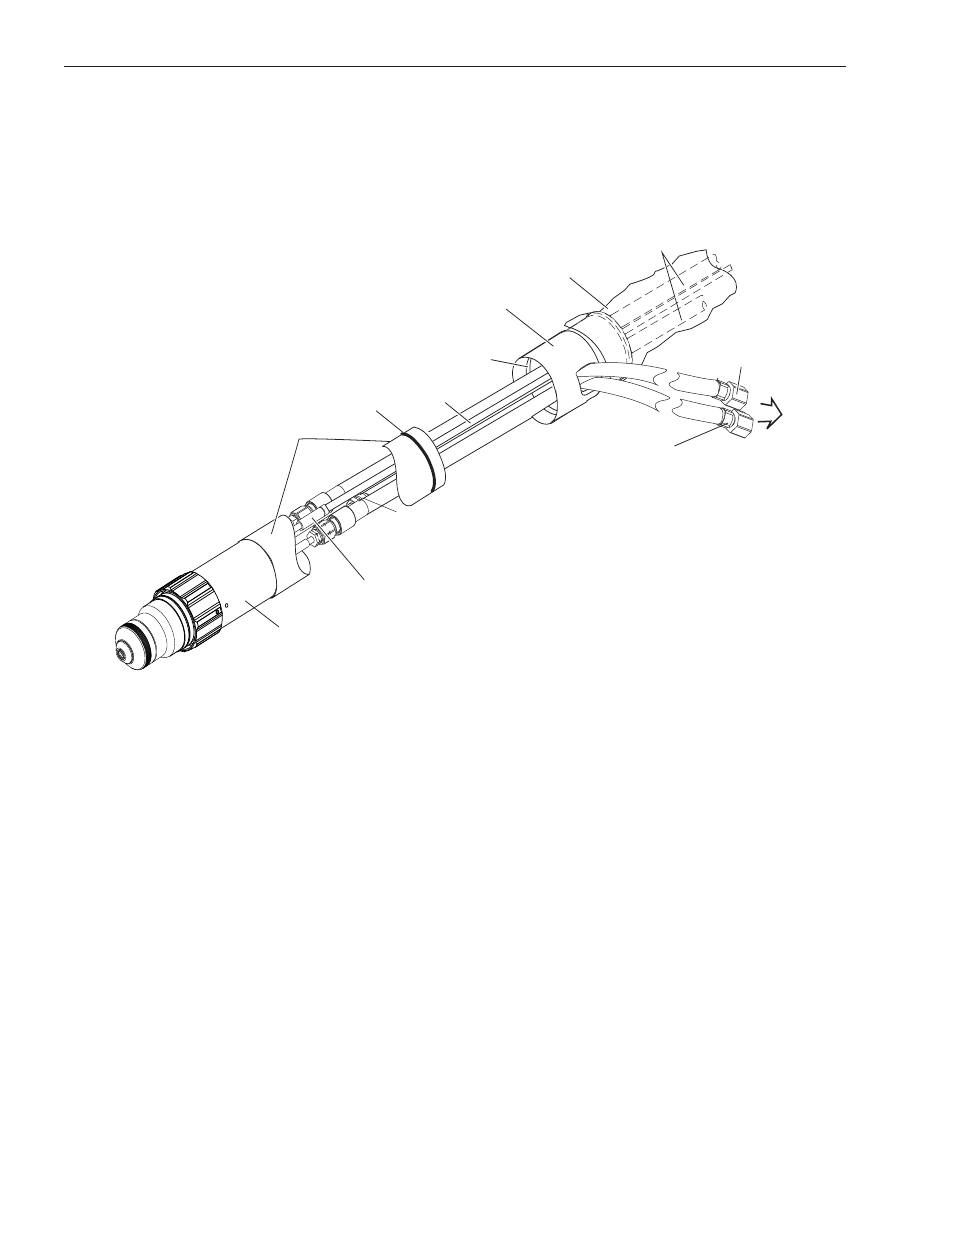
3.19 Connecting Torch
Connect the Torch as follows:
Art # A-09198
Pilot Lead Connector
Torch Head Assembly
Mounting Tube
O-Ring
Torch Leads End Cap
Plasma Gas
(Left Hand Thread)
Shield Gas
(Right Hand Thread)
Coolant Supply
&
Power Lead (-)
Pilot Lead
Coolant Supply,
Coolant Return,
and Pilot Leads
Leads Cover
Groove for O-Ring
To Torch Valve
1. Lay out the torch leads on a clean, dry working surface.
2. Hold the Torch Leads End Cap stationary. Pull approximately 18" (0.5 m) of leads through the End Cap.
3. Remove and discard the protective end caps from the Mounting Tube.
4. Install the O-ring in the groove at the upper end of the Mounting Tube.
5. Install the Mounting Tube as follows:
a. Position the Mounting Tube at the end of the leads assemblies as shown.
b. Slide the Mounting Tube upward onto the leads assemblies.
c. Press the upper end of the Mounting Tube into the lower end of the Torch Leads End Cap. Ensure that
the O-Ring on the Tube engages the mating groove inside the Torch Leads End Cap.
d. Ensure that the Mounting Tube is free to rotate within the Torch Leads End Cap.