14 torch head installation and connection, Torch head installation and connection -16, Auto-cut 300 xt – Tweco 300 XT Auto-Cut 480V User Manual
Page 40
AUTO-CUT 300 XT
3-1�
INSTALLATION
Manual 0-5300
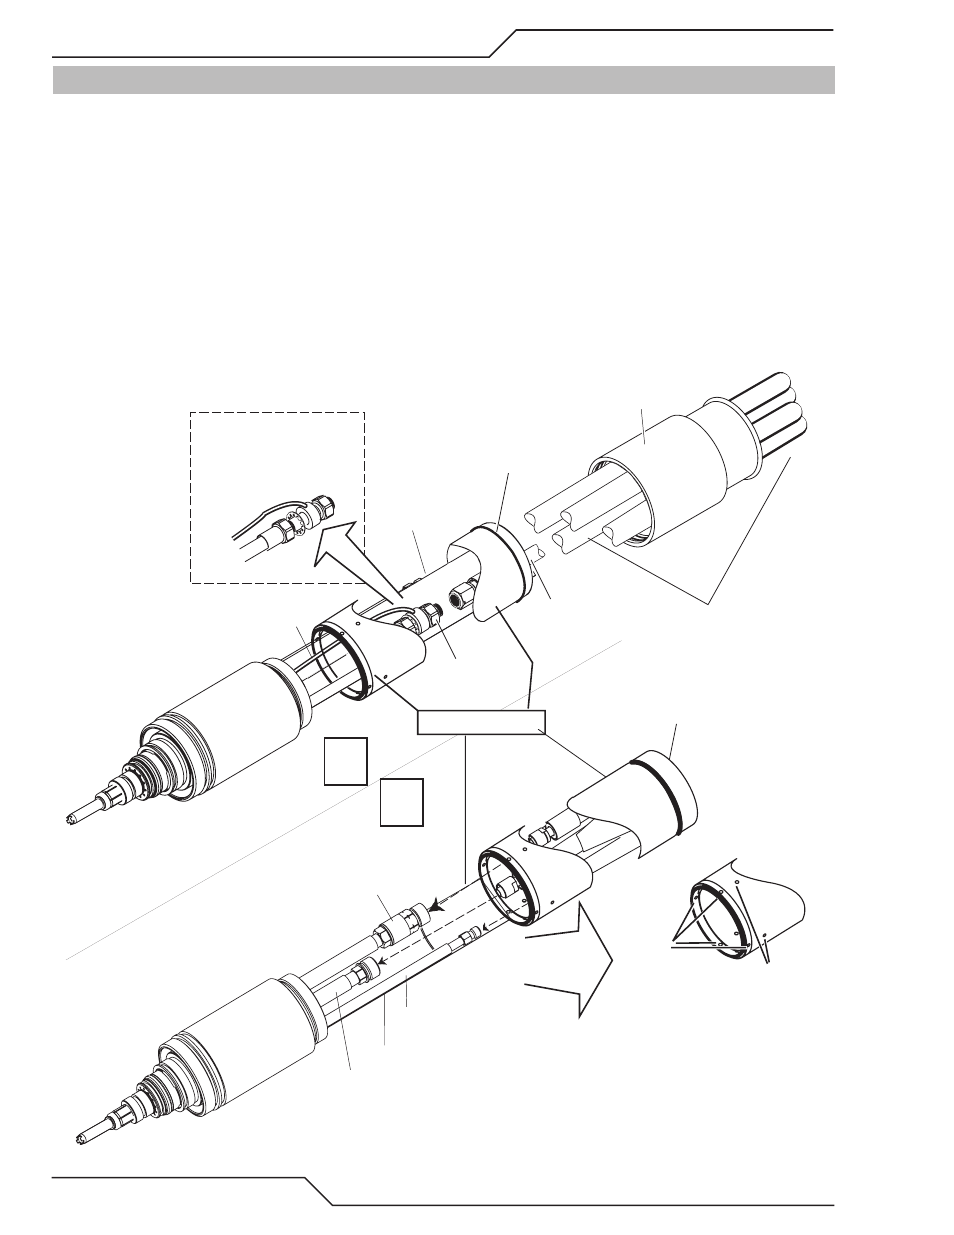
3.14 Torch Head Installation and Connection
Install the Torch as follows:
1. Install the torch mounting block on the cutting table (gantry). Fasten the block in place.
2. Leave the end cap in place on the torch leads. Remove and discard the protective end caps from the Mount-
ing Tube.
3. Install the O-ring in the groove at the upper end of the mounting tube. Slide the torch mounting tube onto
the leads far enough to expose the fittings on the ends of the leads.
4. Connect the Torch Head to the torch leads. Follow the sequence shown. Do not let the leads twist.
Shield ('Secondary')
Gas Connector
Coolant Supply Connector
Coolant Return
Check Valve
and Connector
Plasma Lead
Connector
Pilot Lead
Plasma Lead
Art # A-06258
Insulating Paper
Insulating Paper
2
Shown to illustrate
assembly order only;
parts must remain
secured tightly.
1
Positioning Tube
End Cap
O-Ring
O-Ring
Torch Leads
Threaded
Holes
Drain Holes
Positioning Tube
Detail