Kessler MOUNTING & GRIP: Kwik Release System User Manual
Page 4
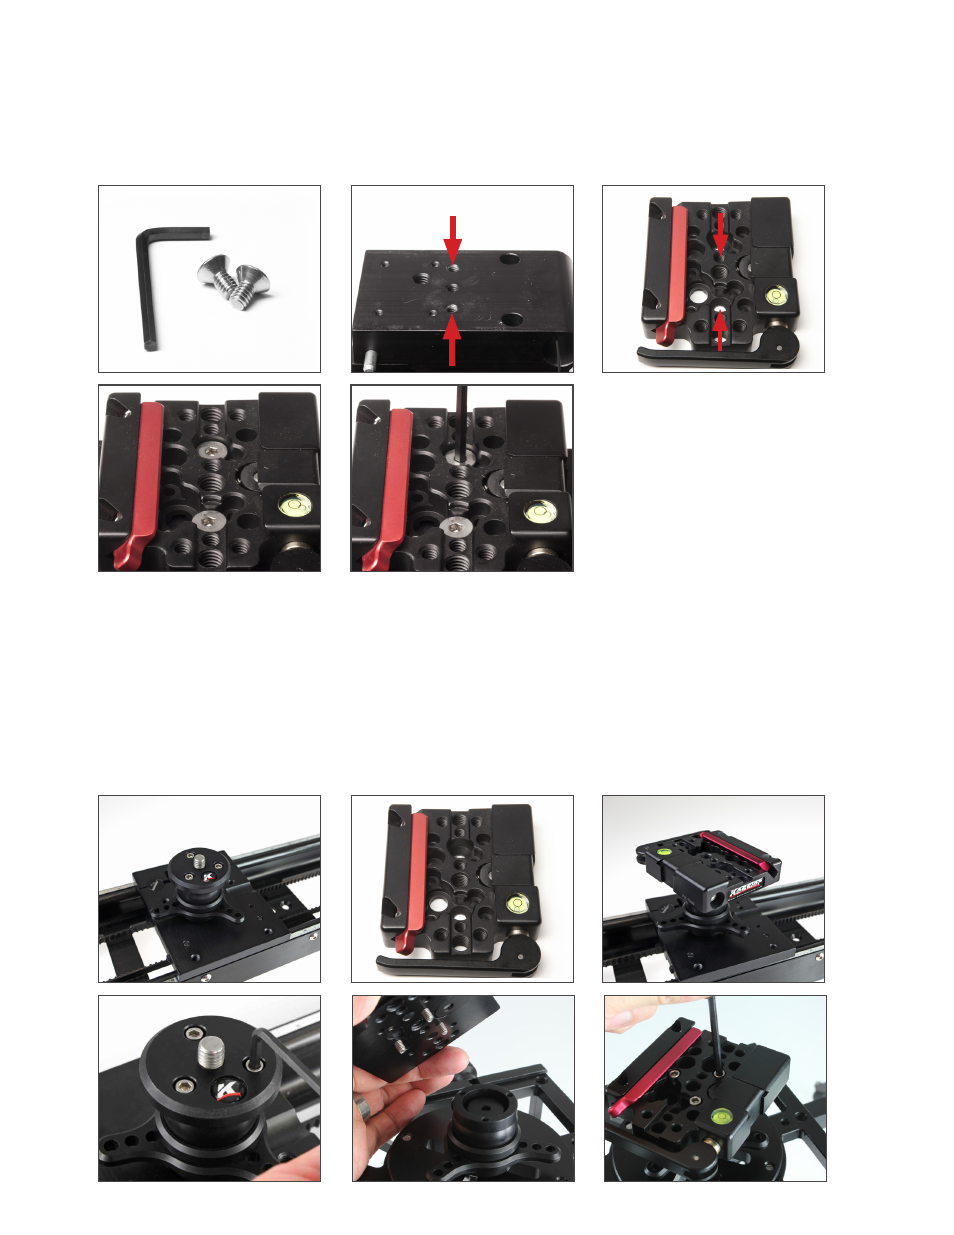
Kwik Release with Hercules 2.0 Head
1. Locate the 5/32” allen key and two 1/4”-20 x 1/2” Countersunk Screws in the
Kwik Release Tool Kit
2. Line up the Kwik Release receiver with the holes on the head as shown below.
3. Screw the two 1/4”-20 x 1/2” screws through the receiver and into the head as shown.
Kwik Release with Low Profile Ball Head (3/8”-16)
1. A great way to mount the Kessler Kwik release plate is with our Low Profile Ball Head.
This allows for quick angle adjustments with minimal effort.
2. The easiest way to mount the Kwik release plate to the Ball Head is to attach it onto
the 3/8” male thread that is installed by default on the Low Profile Ball Head.
3. For a more permanent mounting solution, you can optionally remove the top plate of
the Low Profile Ball Head (1/4”-20 or 3/8”-16) and use the three #8-32 x 1/2” screws to
affix the Kwik release plate directly to the Ball head with the corresponding mount holes.