Installing the flight battery, Control surface direction test – E-flite Carbon-Z Yak 54 PNP User Manual
Page 10
EN
Installing the Flight Battery
Note: Before flying and after centering control
surfaces, rebind the aircraft so control surfaces are
neutral when you plug in the flight battery.
CAUTION: Install receiver and connect the speed
control into the throttle channel (for PNP) before
installing the flight battery.
1. Install the flight battery in the aircraft.
2. Secure the flight battery using the hook and
loop
straps.
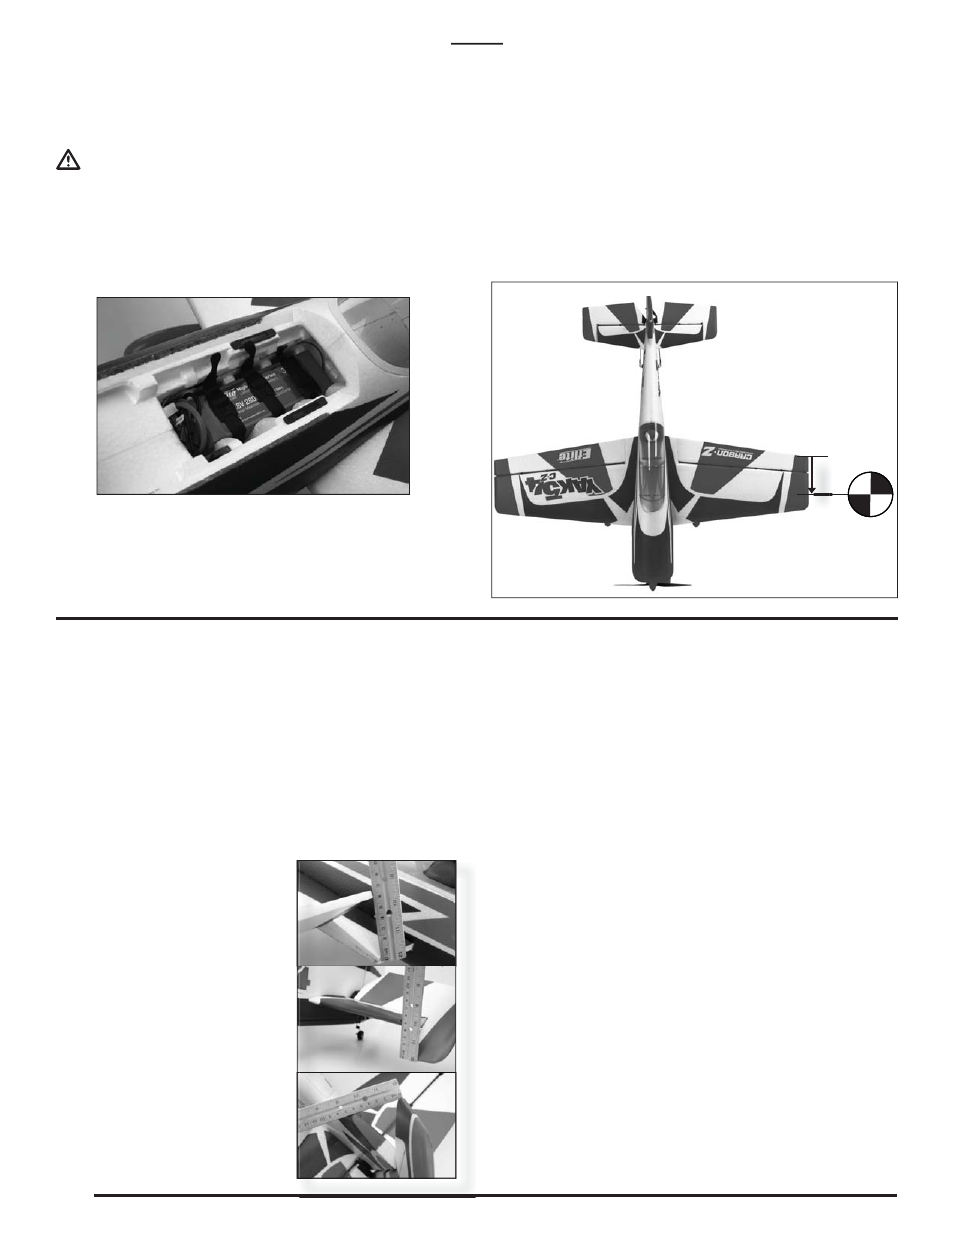
Adjusting Center of Gravity (CG) by Moving
the Battery
The CG location is 6-inches (153mm) forward from
trailing edge of the wing tip +/- 1/4inch (6.4mm). This
CG location has been determined with the E-flite
14.8V 2800mAh 30C Li-Po battery installed in the
middle of the cavity (see picture) and the aircraft
positioned upright.
Note: Due to the round wing tips, it is more accurate
to measure the CG from the trailing edge. If you
want a nose-heavy (forward) or tail-heavy (rear)
condition, move the battery forward or to the rear.
Control Surface Direction Test
Aircraft and transmitter binding should be done
before the control direction test. Move the controls
on the transmitter to make sure aircraft control
surfaces move correctly.
Controls in Reverse in Control Direction Test
If controls respond in the opposite direction reverse
the direction for operation of flight controls. Refer to
your transmitter’s instructions for changing direction
of transmitter flight controls.
Setting for Control Surface Travel
Adjust ATV/travel adjustment
on your transmitter until you
obtain the following control
surface travel. Do not adjust
dual rates until you have
correctly adjusted the total
travel:
Ailerons: 60 to 70mm left and
right (both ailerons), measured
at the aileron root.
Elevator: 48 to 50mm up
and down, measured at the
counterbalance leading edge.
Rudder: 60 to 65mm left
and right, measured at the
counterbalance leading edge.
For information on more
advanced programming, please visit
www.e-fliterc.com
Control Surface Travel
Exponential Settings
Following are Quique Somenzini’s dual rate and exponential settings
for intermediate flyers of the Carbon-Z Yak 54. The settings are based
on the ATV set in the previous step.
High
rate Expo
Elev. 100%
(or 48 mm to 50mm up and down)
50%
Ail. 100%
(or 60 mm to 70 mm left and right both ailerons)
60%
Rud. 100%
(or 60 mm to 65mm left and right)
50%
Low
rate
Expo
Elev. 22%
(or 15mm up and down)
25%
Ail. 30%
(or 30mm left and right both ailerons)
30%
Rud. 60%
(or 45mm left and right)
25%
Mix: Rudder to Elevator
Full left rudder -2%
(up elevator)
Full right rudder -2%
(up elevator)
Note: These control throws were developed by Quique Somenzini for
the best performance of the Carbon-Z Yak 54. The small amount of
elevator throw on low rate is capable of extreme aerobatics.
Note: only switch to high rate when the plane is flying at slow
speed. Never fly at high rate at full airspeed. This airplane is very
responsive and pilot can easily lose orientation. Get familiar with the
plane first and then try high rate.
Note: for take off and landings, low rate in all control surfaces is
strongly recommended.
For Quique’s advanced setup, visit www.e-fliterc.com.
6 In
In
6 I
10