E-flite F-16 400 DF ARF w/Motor & Fan Unit User Manual
Page 12
12
E-flite F-16 ARF Assembly Manual
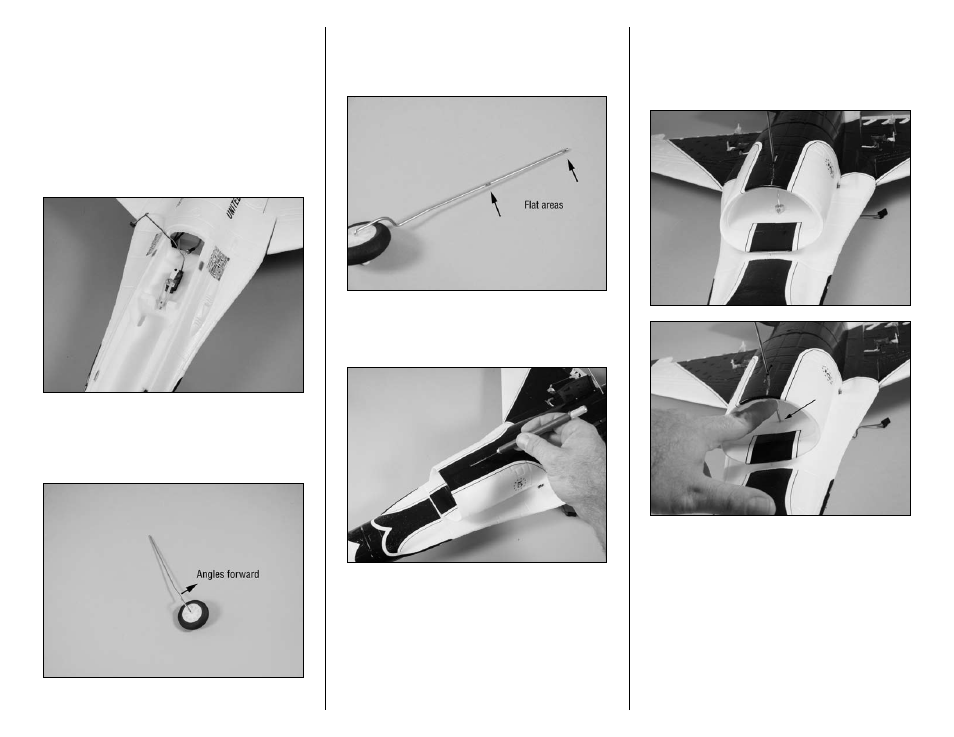
13. Test fit the steering servo into the pocket inside
the fuselage. Note that the servo output faces to the
rear of the aircraft. Remove the servo and scuff the
surface of the servo that contacts the fuselage using
sandpaper. Clear any residue left from the sanding
process using a paper towel and rubbing alcohol.
Mix a small amount of 6-minute epoxy. Place a
small amount of epoxy in the servo pocket, then
install the servo, pressing it into the epoxy. This will
keep the servo secure in the fuselage during the
operation of your model.
14. Locate the nose gear. Notice there is a slight
bend to the gear wire. This bend will angle the
gear forward in a scale-like manner when it has
been installed.
15. There are also two small flat areas on the nose
gear that will face to the front of the aircraft. Please
remember these flat areas for later in the nose gear
installation.
16. Use a hobby knife and #11 blade to remove
the decal from the bottom of the fuselage to expose
the slot for the nose gear wire.
17. Slide the nose gear into the slot from the
bottom of the fuselage. You will need to slide the
gear wire through the 1/16-inch wheel collar
before it continues its journey into the fuselage as
shown in the following photos.