Control functions, Switch – E-flite Apprentice 15e PNP User Manual
Page 12
12
E-flite Apprentice PNP Assembly Manual
Control Functions
Required Parts
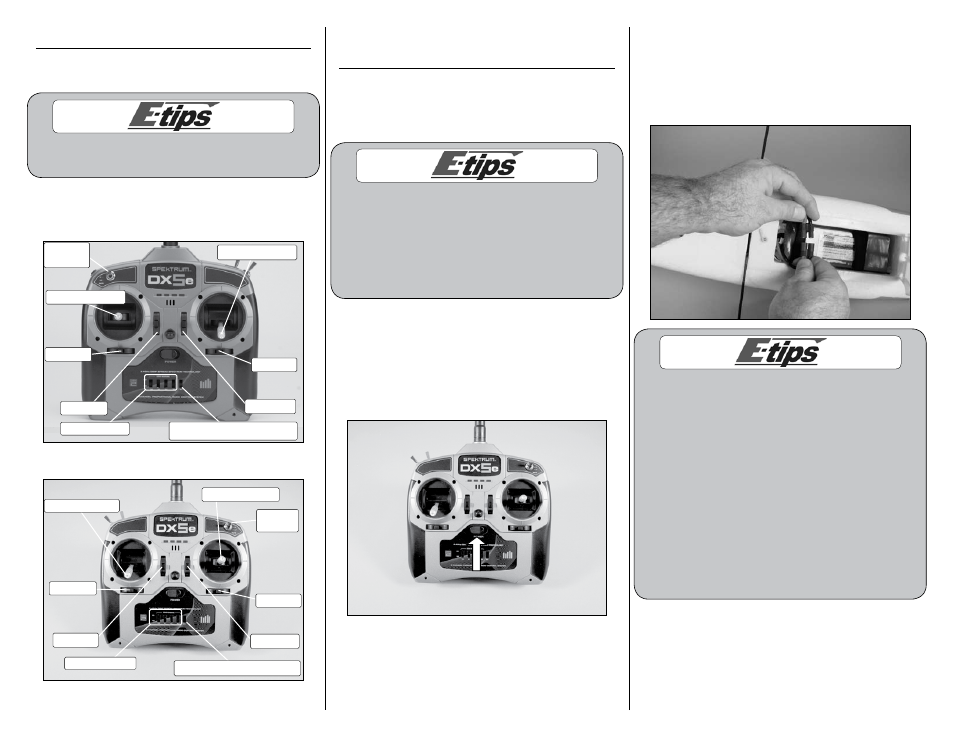
Transmitter
We have shown the Spektrum DX5e as an example
to illustrate the functions and setup of your model.
The following images are to identify the controls
for your Apprentice. Both the Mode 1 and Mode 2
options are shown.
Elevator/Rudder Stick
Throttle/Aileron Stick
Reversing Switches
Mix Switch (not used for Apprentice)
Elevator Trim
Rudder Trim
Aileron Trim
Throttle Trim
HI/LO
Rate Switch
Mode 1 Transmitter
Throttle/Rudder Stick
Elevator/Aileron Stick
Reversing Switches
Mix Switch (not used for Apprentice)
Throttle Trim
Rudder Trim
Aileron Trim
Elevator Trim
HI/LO
Rate Switch
Mode 2 Transmitter
Centering the Control Surfaces and
Checking Control Direction
Required Parts
Assembled airframe
Flight battery
Transmitter
This section is designed to help you become
acquainted with the operation of the radio
in correlation to the model. If a flight control
moves in the incorrect direction we will instruct
you how to change it in the next section. As
always, read through the radio manual which
explains the features of your radio system.
1. Turn the radio on using the power switch on the
front of the transmitter and check that the throttle
stick is at its lowest position. The throttle stick needs
to be in the idle/off position, otherwise the speed
control will not arm in the next step. The DX5e
transmitter features digital trims, so they should be
centered when the transmitter is powered on.
Switch
2. Plug the EC3 connector on the flight battery into
the speed control. You will hear a series of beeps
or tones when you plug the battery in. During this
process it is normal for the prop to pulse slightly as
the ESC powers up. Please ensure you are not in
line with the prop or in front of it during power up.
Always use extreme caution around the propeller
when the motor battery is plugged in. A spinning
propeller can cause serious damage or injury.
It is always best to stay behind the propeller
and keep it away from loose objects when the
battery and speed control are connected.
When the battery is connected, you will hear
one low long tone to indicate startup, then the
respective number of medium-length mid tones to
indicate the cell count or a musical tone, followed
by three rising tones to indicate the controller
is armed. For more information on your speed
control, refer to the included instructions.
The following steps will ensure your flight
controls are centered for the first flight.