Removing the valve assembly for servicing – Watts Autotrol 263 / 268 (400 Series) User Manual
Page 9
9
Removing the Valve Assembly for
Servicing
1. Unplug the power cord.
2. Shut off water supply or put bypass valve(s) into
bypass position.
3. Remove cover and with screwdriver, relieve tank
pressure by pushing open valve No. 7 (rear flapper)
on control as shown (Figure 10).
Figure 10
4. When used with a globe valve bypass, loosen and
detach the inlet, outlet, brine and drain lines from
the valve. If using the 1265 bypass, loosen and
remove valve from bypass as well as loosening and
removing the brine and drain lines.
5. Unscrew valve (counterclockwise) and remove
valve from tank.
6. To replace the control valve, reverse the above
procedure.
Removing 440i or 460i for Servicing
1. Unplug the power cord.
2. Remove cover.
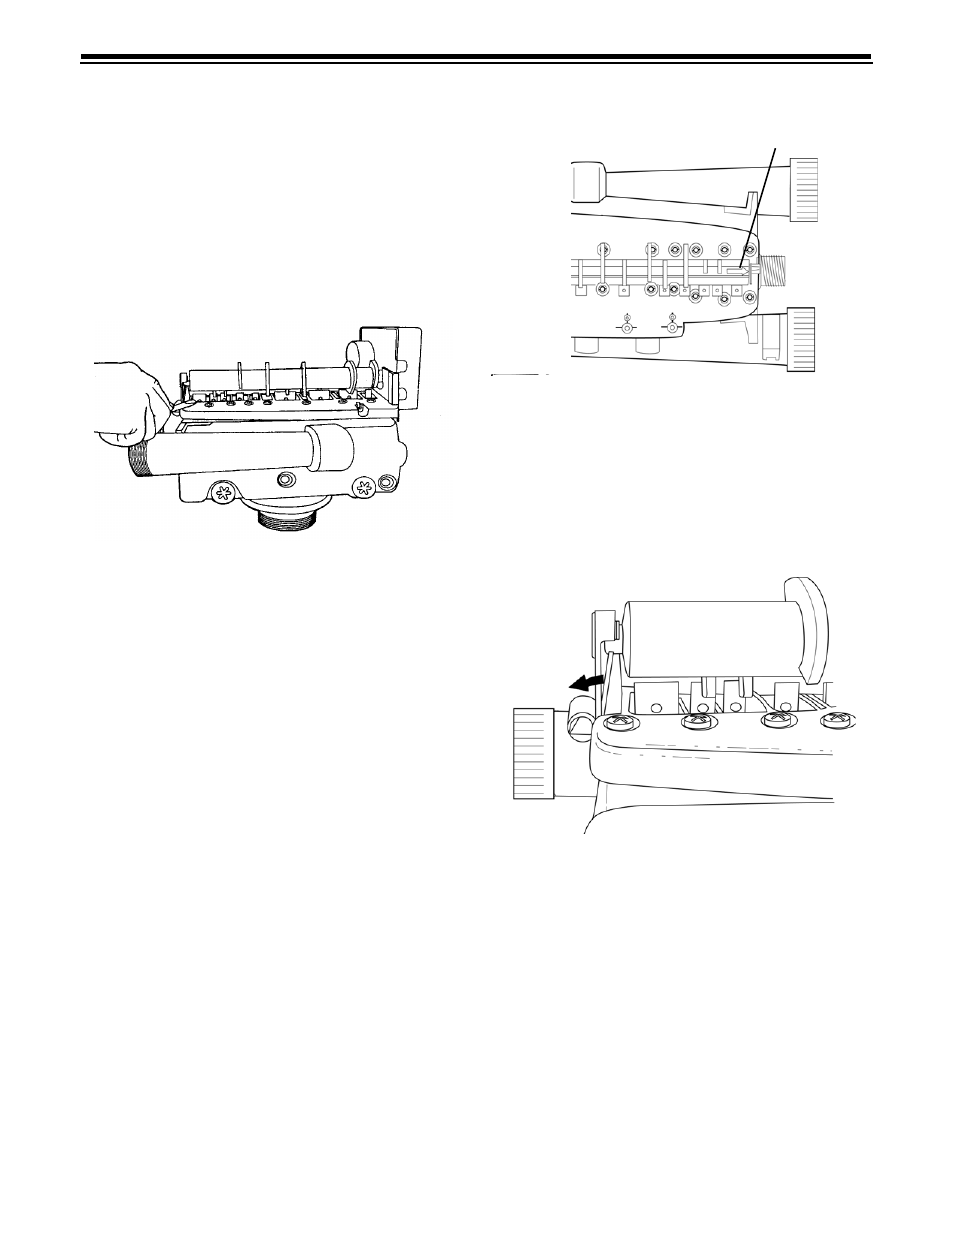
3. Align the indicator arrow on the rear of the
camshaft with the top of the rear hoop of the top
plate (Figure 11).
Figure 11
4. Remove the camshaft by carefully pushing the
securing tab, located at the rear of the camshaft,
away from the camshaft until the tab disengages
from the camshaft. Push the back of the camshaft
down and out to the inlet side of the valve
(Figure 12).
Figure 12
5. Disengage the front of the camshaft from the
output gear of the control.
6. Remove the timer locking pin and lift the control
straight up and off of the valve.
7. To reinstall the camshaft and control, reverse the
above procedures.
Indicator Arrow