Teaching limits using the auto-window feature – Banner U-GAGE QT50U Ultrasonic Sensors User Manual
Page 5
Action
Result
Position the target for the second limit.
Click the TEACH button.
The sensor stores both limits and Output LED turns solid amber.
The sensor returns to Run mode.
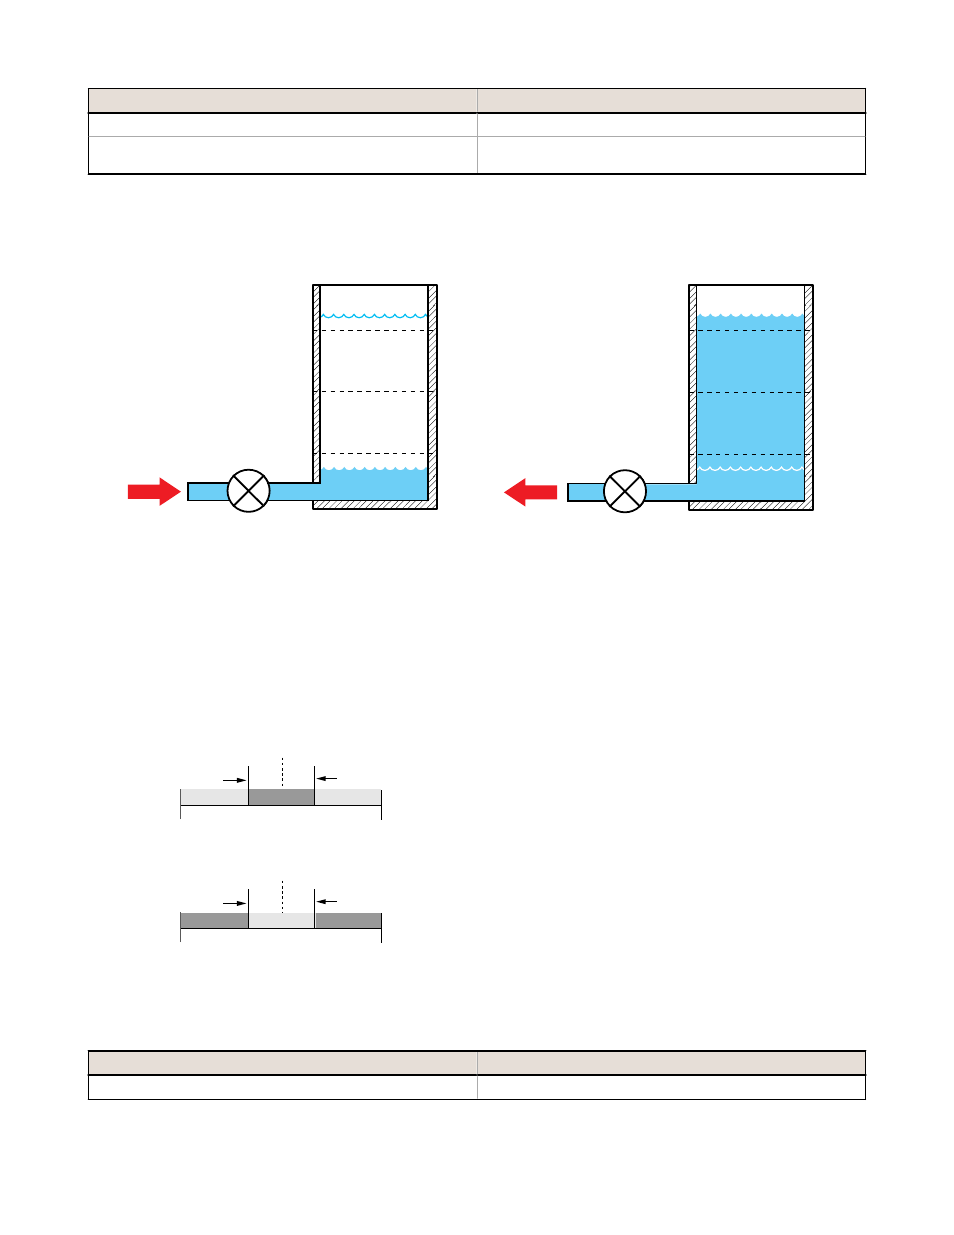
Pump-In Application
(using Normally Open Output)
Pump-Out Application
(using Normally Closed Output)
Initial Tank Level -
Outputs are INACTIVE
Level Drops Below Far Limit -
Outputs ACTIVATE
Level Rises Above Near Limit -
Outputs DEACTIVATE
1
Flow
Flow
Initial Tank Level -
Outputs are INACTIVE
Level Rises Above Near Limit -
Outputs ACTIVATE
Level Drops Below Far Limit -
Outputs DEACTIVATE
Pump Control
Pump Control
Level Rises Above Near Limit -
Output DEACTIVATES
Level Rises Above Near Limit -
Outputs DEACTIVATE
Initial Tank Level -
Output is INACTIVE
Level Rises Above Near Limit -
Outputs DEACTIVATE
Level Drops Below Far Limit -
Output ACTIVATES
Initial Tank Level -
Outputs are INACTIVE
Level Drops Below Far Limit -
Outputs ACTIVATE
Level Rises Above Near Limit -
Outputs DEACTIVATE
Level Rises Above Near Limit -
Output ACTIVATES
Level Rises Above Near Limit -
Outputs DEACTIVATE
Initial Tank Level -
Output is ACTIVE
Level Rises Above Near Limit -
Outputs DEACTIVATE
Level Drops Below Far Limit -
Output DEACTIVATES
Figure 5. Fill-Level Control
The Fill-Level Control mode provides the switching logic required for fill-level, web tensioning control, and similar
applications. In this mode, the output energizes when the target reaches the first sensing window limit, and stays
energized until the target moves to the second limit. The output then de-energizes at the second limit and does not re-
energize until the target moves, again, to the first limit.
Teaching Limits Using the Auto-Window Feature
Output OFF
Output ON
Output OFF
Position
+ 100 mm
Position
- 100 mm
Taught Position
Output ON
Output ON
Output OFF
Position
+ 100 mm
Position
- 100 mm
Taught Position
Normally Closed Output
Normally Open Output
Figure 6. Using the Auto-Window feature for programming
Teach procedures are identical for window-limit and fill-
level control models. Teaching the same limit twice
automatically centers a 200 mm window on the taught
position. To readjust the sensing midpoint, repeat the teach
procedure.
A button click is defined as: 0.04 s. ≤ Click ≤ 0.8 s.
1. Enter programming mode.
Action
Result
Push and hold TEACH push button for 2 seconds.
Output LED turns solid red and the sensor waits for first limit.
2. Teach the first limit.
U-GAGE QT50UVR Series Sensors
P/N 117764 Rev. F
www.bannerengineering.com - tel: 763-544-3164
5