Installation, Oven assembly – Blodgett RE Series User Manual
Page 8
Installation
4
Oven Assembly
DELIVERY AND INSPECTION
All Blodgett ovens are shipped in containers to
prevent damage. Upon delivery of your new oven:
D
Inspect the shipping container for external damĆ
age. Any evidence of damage should be noted
on the delivery receipt which must be signed by
the driver.
D
Uncrate the oven and check for internal damĆ
age. Carriers will accept claims for concealed
damage if notified within fifteen days of delivery
and the shipping container is retained for inĆ
spection.
The Blodgett Oven Company cannot assume
responsibility for loss or damage suffered in
transit. The carrier assumed full responsibility
for delivery in good order when the shipment
was accepted. We are, however, prepared to
assist you if filing a claim is necessary.
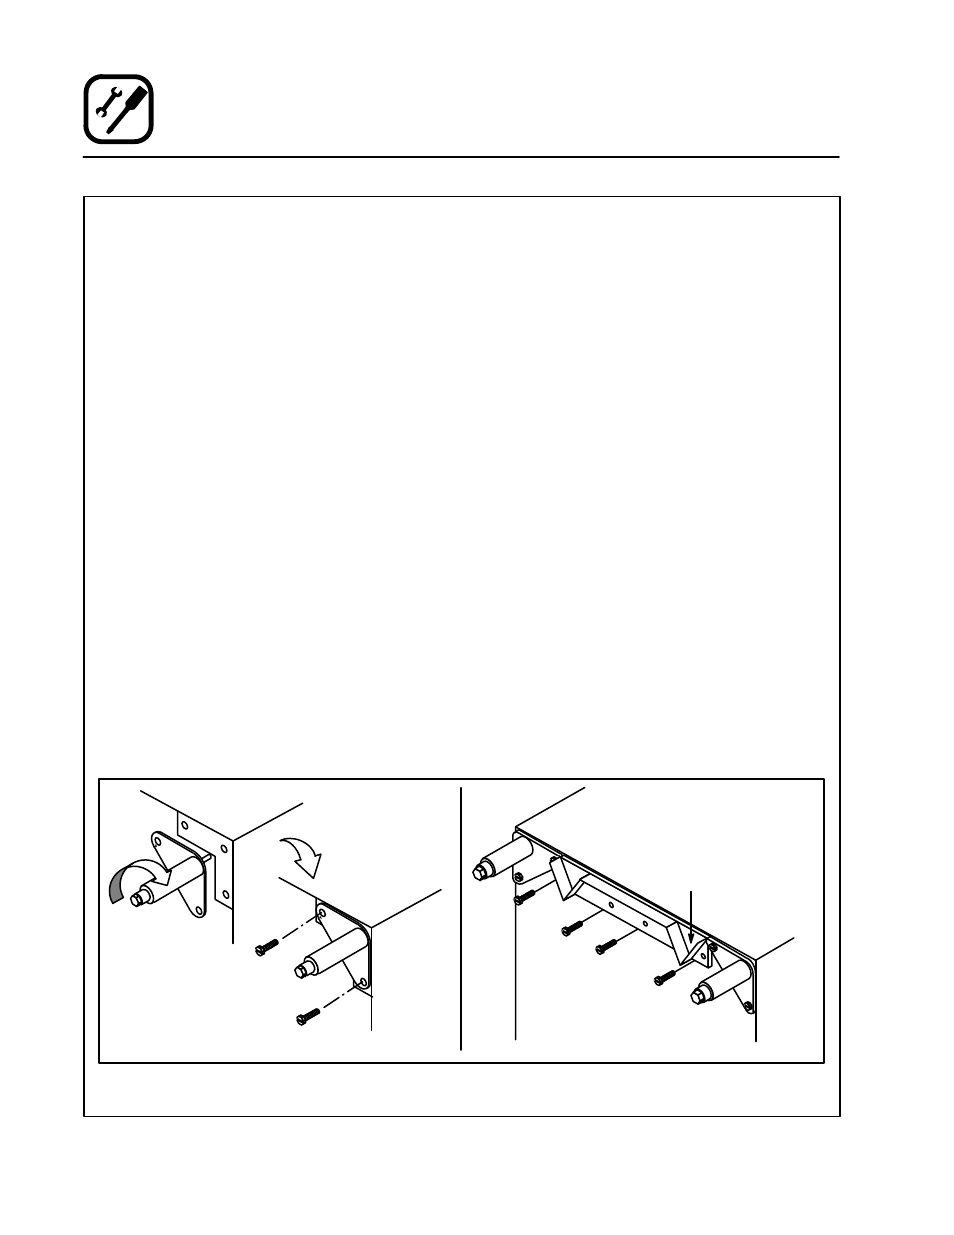
LEGS AND DOCKING ASSEMBLY
1. Remove the trim panel located at the bottom
of the oven, just below the doors.
2. Place the oven on its back.
3. Align the threaded stud in the front legs with
the nut located inside each bottom front corĆ
ner of the oven frame. Turn the legs clockwise
to tighten.
4. Align the two leg plate holes in each leg with
the holes in the oven bottom. Secure the leg
using two 1/2" bolts.
5. Align the docking assembly holes with the
holes in the oven bottom. Hand tighten the
four bolts and nuts supplied with the oven.
6. Tip the oven up on the front legs. Repeat steps
3Ć4 for the rear legs.
NOTE: Be sure to attach each leg with three bolts.
LEVELING THE OVEN
To level the oven screw the leg feet in or out.
1. Screw the adjustable feet all the way into the
leg. Check that the oven is level on the front,
back and sides; if not adjust accordingly.
2. After levelling, the distance from the underĆ
side of the oven to the floor should be close
to 7Ć3/16" (18.3 cm).
NOTE: This measurement is important for
docking alignment of transport cart.
Channel
Opening
Leg Attachment
Docking Assembly
Figure 2