Operation, Oven controls – Blodgett RE Series User Manual
Page 13
Operation
9
Oven Controls
1
2
3
4
5
6
1
2
3
4
5
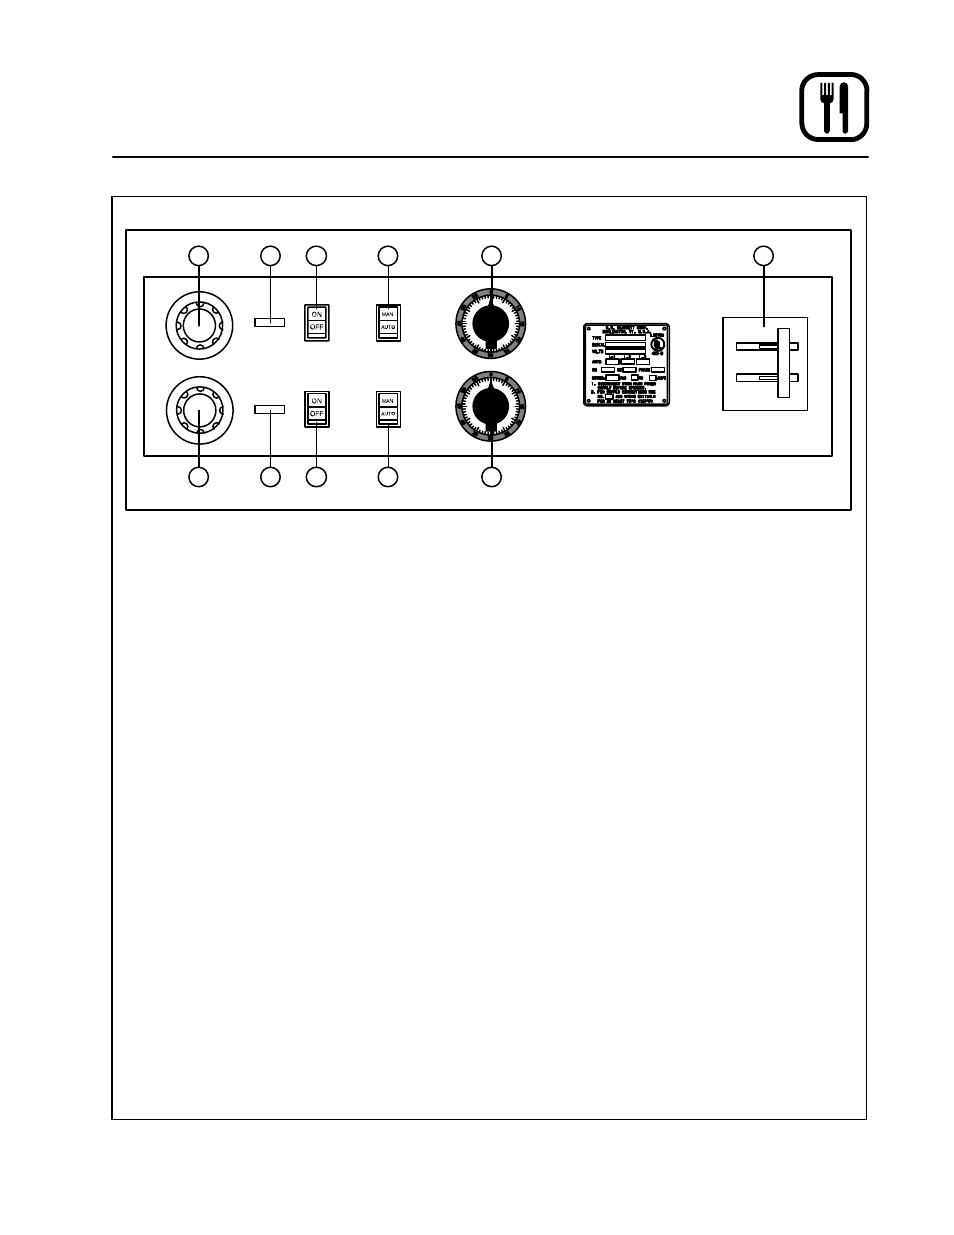
Figure 4
COMPONENT DESCRIPTION
There are two rows of switches and controls on the
the left hand side of the panel. The top set of conĆ
trols operate the upper motor and heating eleĆ
ments. The bottom set of controls operate the lowĆ
er motor and heating elements.
1. THERMOSTAT - Controls oven temperature.
2. OVEN READY INDICATOR LIGHT - When lit
indicates the elements are operating. When
the light goes out the oven has reached operĆ
ating temperature.
3. BLOWER SWITCH - Controls power to the
blowers.
4. COOL DOWN SWITCH - Controls power to
the cool down fans. These switches should be
left in the AUTO position to allow proper autoĆ
matic operation of the blower with the doors
closed. For rapid cool down, use the MAN
position to operate the blowers with the door
open.
5. TIMER - Controls length of the cook time.
6. CIRCUIT BREAKER - Controls power to the
oven.
CONTROL OPERATION
NOTE: The upper section is wired separately from
the lower section. They may be operated
independently or simultaneously.
1. Place the BLOWER switches (3) in the ON
position. Place the COOL DOWN switches (4)
in the AUTO position.
2. Turn the THERMOSTATS (1) to the desired
cook temperature.
NOTE: When the upper and lower controls
are operated as a single unit, both
thermostats should have the same
temperature setting.
3. Preheat until the OVEN READY INDICATOR
light (2) goes out.
4. Load product into the oven.
5. Set the TIMERS (5) for the desired cook time.
6. Remove the product when the time expires.