Cyclopital3D Lighted Print Viewer User Manual
Page 4
7
STEP 2:
• Start IrfanView
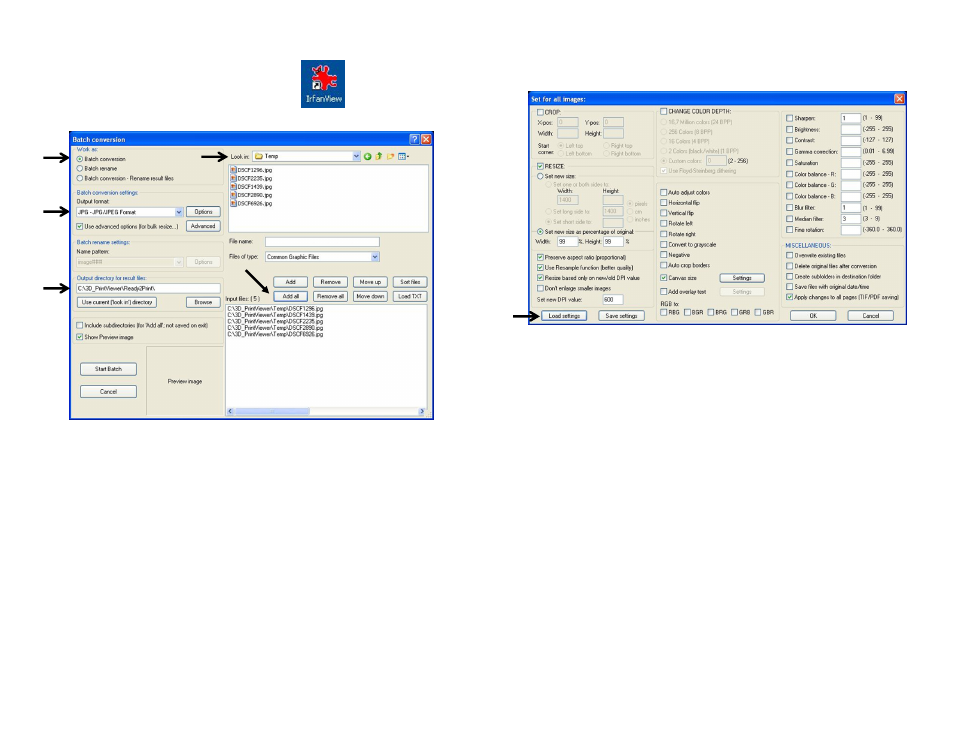
• Click: “File->Batch Conversion/Rename…”
to see screen shown below:
• Set the radio button under “Work as” to “Batch conversion”
• Set “Look in” to the directory that contains the temporary image files
generated by SPM in the previous process. (“Temp” under
“3D_PrintViewer”)
• Click “Add all” and all the images will be added to the “input files” list at
the bottom of the page.
• Set the “Output directory for result files” to the folder you created
“Ready2Print.” This folder will contain the image files you will take or
send to your print service provider.
• Make sure the box for “Use Advanced options for bulk resize…” is
checked.
8
• Click “Advanced” under Batch conversion settings”, you will see the “Set
for all images” dialog
The “Batch conversion settings” should be set as shown above- don’t worry;
you don’t have to set any of this stuff yourself.
• Click “Load Settings” (lower left) and browse for the template file:
“LPV_IV_Tmplt.ini” and open it; this will populate the variables in dialog
box. This file should be found in the 3D_PrintViewer Directory you created.
The important parameters in this box are the “Settings” for the canvas size and
the value for DPI. This step centers the image on the print “canvas” and fills
the borders with black.
• Click “OK” to close the “Set for all images” dialog and revert to the “Batch
conversion” dialog.
• Click “Start Batch” in the “Batch conversion” dialog.
• When the process completes you are finished, click “Exit batch” and close
out of IrfanView.
• Delete the temporary image files (all files in the “Temp” folder under
“3D_PrintViewer”) created by SPM
Note:
Edited photos or .jpg files can be formatted for use with the LPV using a
similar process. Read advanced Concepts for a more detailed explanation.