Cyclopital3D Lighted Print Viewer User Manual
Page 3
5
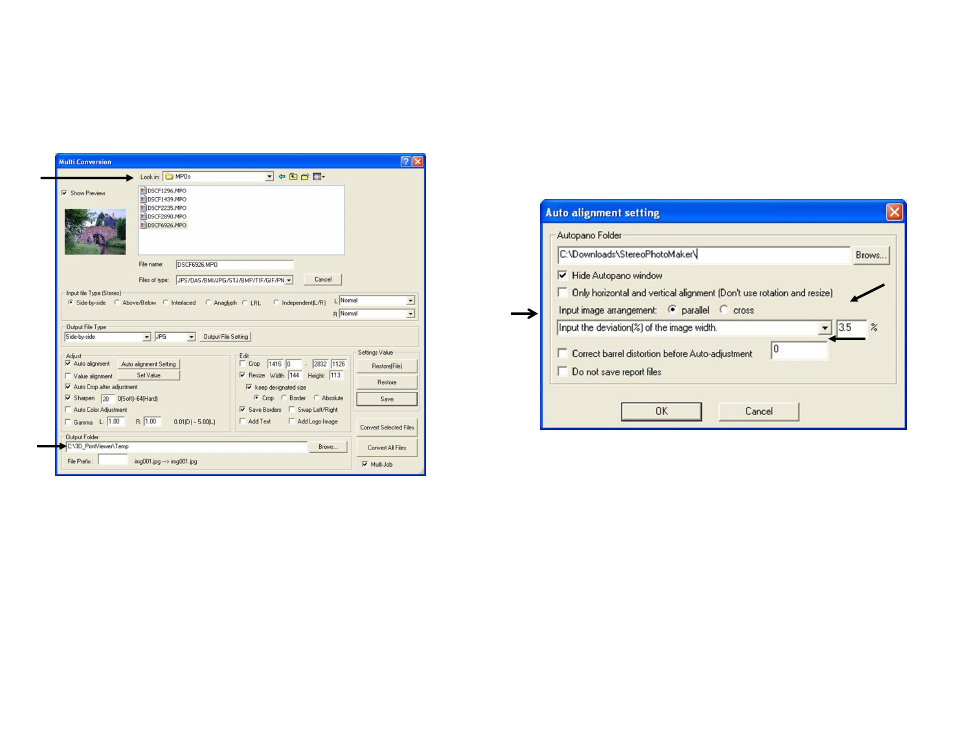
“Restoring” the dialog from the template file in the last step will populate the
Multi Conversion Dialog with parameters appropriate for converting MPO files
from your Fuji W1 or W3 camera to intermediate files that will be further pro-
cessed with IrfanView (shown below). The end result will be .jpg files that are
ready to be printed by a print service provider (recommended) or possibly on
your own high quality printer. Of course, alternate workflow and formatting
options are possible.
• In the “Multi Conversion” Dialog change “Look In” to the folder that con-
tains the MPO images you want to format for use in the Print Viewer.
• The “Output Folder” should be set to the “Temp” folder you created to hold
the temporary image files that will be generated by this step.
The fields in the Multi Conversion Dialog should look similar to what is
shown above. Note that the “Width” field is set to 1441 and the “Height” to
1134, this is done for you when you “Restore(File)” but the fields in the dialog
don’t show the whole numbers, the LS digits are hidden.
• Click the “Auto alignment Setting” button and set the window adjustment
field in the dialog box, as shown on next page (6).
6
• From the drop down list, select “Input the deviation(%) of the image width”
and also set the value to 3.5% as shown below. Important: Performing Auto
Alignment on the MPO images will set the spacing of homologous “far
points” in the prints to the proper distance for the Lighted Print Viewer.
• Note, If images were taken using the Cyclopital3D Auxiliary Lens Adapter,
you may want to check the box to “Correct barrel distortion” and set it’s
parameter appropriately (value is dependent on which lens was used with the
ALA, for Raynox HD-5050 set value to 35).
• Click “OK” to close Auto Alignment Setting dialog and revert to “Multi
Conversion” dialog box.
• Click “Convert All Files” and wait for the conversion process to complete.
Note; if “Multi Job” was checked you will see two processing dialogs, this is
normal. The “Multi Job” will use two cores of a multi-core processor and
image processing will complete twice as fast.
• When image processing is complete, exit the processing dialog(s) and close
SPM. Proceed on to step 2.
IMPORTANT!!!
Unfortunately, the actual value for the percent deviation is
not stored in the .mcv file, so you MUST SET the percentage value in the
Auto alignment setting dialog before you start the batch process in SPM