ClearCube A6106D Blade User Manual
Page 7
Page 7 of 10
P/N G0200152 Rev B, 1.1.12.01.2014
ClearCube Technology, Inc. 3700 W Parmer Lane Austin, TX 78727 (512) 652-3500 www.clearcube.com
BIOS and pre-OS video for configuration and imaging,
Continued
Connecting
devices
(continued)
Step
Action
3
Connect the blade and the zero client to your network.
Step
Action
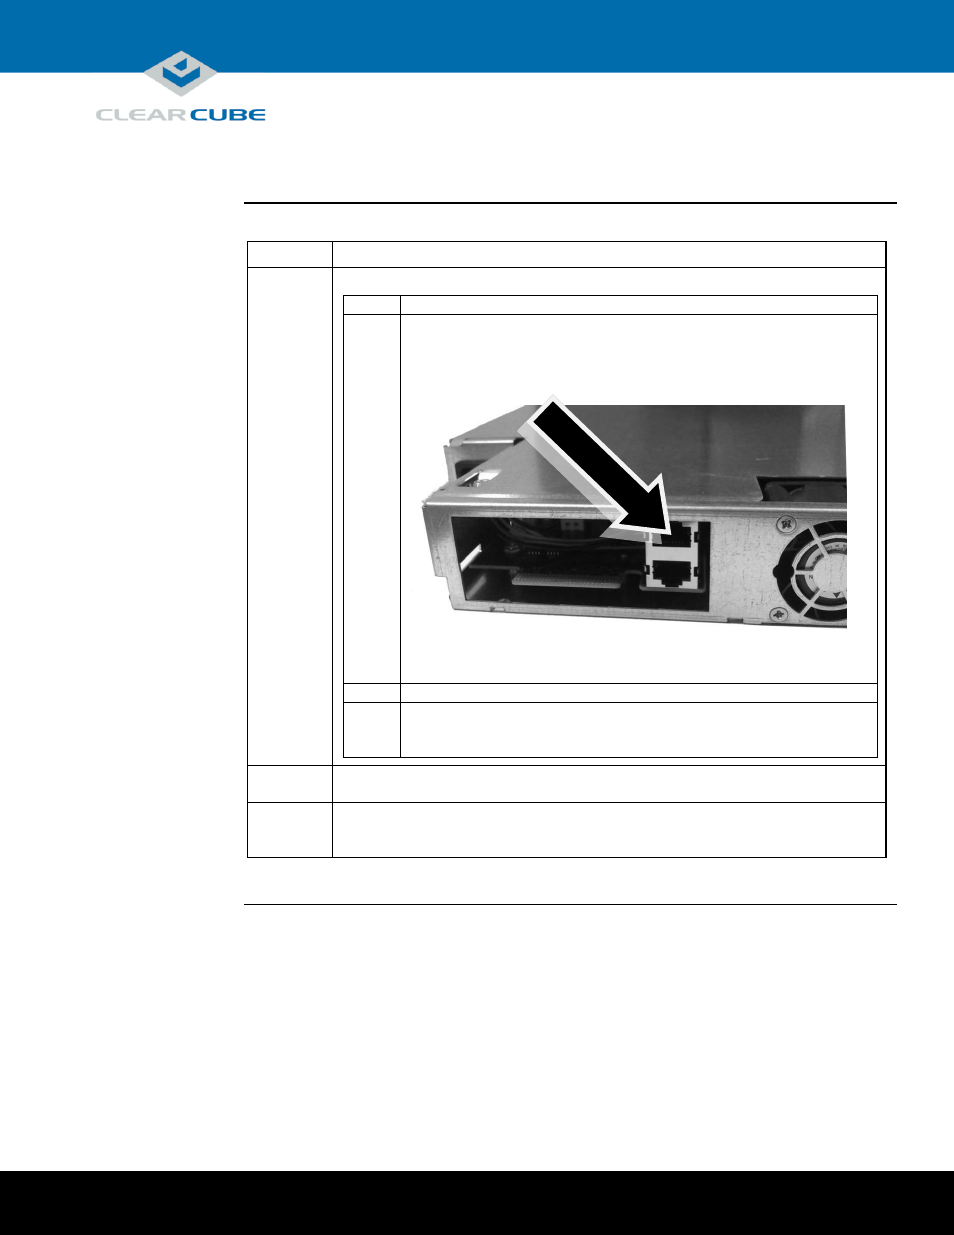
1
Connect an Ethernet cable to the blade’s dedicated PCoIP port (the
right-most port on the rear of the blade—this is the top-most port when
the blade is resting on a table). Connect the other end of the cable to a
switch connected to your network.
Figure 6. The dedicated PCoIP port on the rear of the blade
2
Connect the zero client to the same switch.
3
Optionally, if you are imaging the blade, connect an Ethernet cable to the
left-most Ethernet port on the rear of the blade and connect the other
end of the cable to the switch.
4
Connect monitors to the zero client (two or four depending on the zero client).
Connect a mouse to the zero client.
5
Connect a power cable to the power connector at the rear of the blade and then plug
the cable into a power outlet. Continue by connecting the zero client power adapter
to the client and then plugging the cord into a power outlet.
Next steps: power on devices, create a PCoIP session, and view pre-OS video.
Continued on next page