Power management, Storage drives and carrier – ClearCube A6106D Blade User Manual
Page 3
Page 3 of 10
P/N G0200152 Rev B, 1.1.12.01.2014
ClearCube Technology, Inc. 3700 W Parmer Lane Austin, TX 78727 (512) 652-3500 www.clearcube.com
Power management
Power on and
power off
The power button is located on the lower-right portion of the front panel, shown as 1D in
page 1
Power on: After inserting a blade in a chassis or connecting power for configuration outside of a
chassis, press the power button to power on the blade.
Result: The blade powers on and the display (1E) is illuminated.
Power off: Press and hold the power button for about 3 seconds to power off a blade.
Result: The blade powers off and the display (1E) and indicators turn off.
Reset power
The reset button is located on the lower-left portion of the front panel, shown as 1C in
page 1
When a blade is powered on, press the reset button to reset power.
Result: The blade powers down, the display briefly turns off, and the blade powers on again.
Storage drives and carrier
About A6106D
storage drives
A6106D uses a carrier to mount storage drives—such as hard disk drives (HDD), solid state drives
(SSD), self-encrypting drives (SED), and hybrid drives.
NOTE:
The A6106D blade does not support hot-swap replacement of drives. When configuring
an A6106D blade outside of a chassis, be sure to power down the blade and remove the
power cable before removing drives or servicing any components.
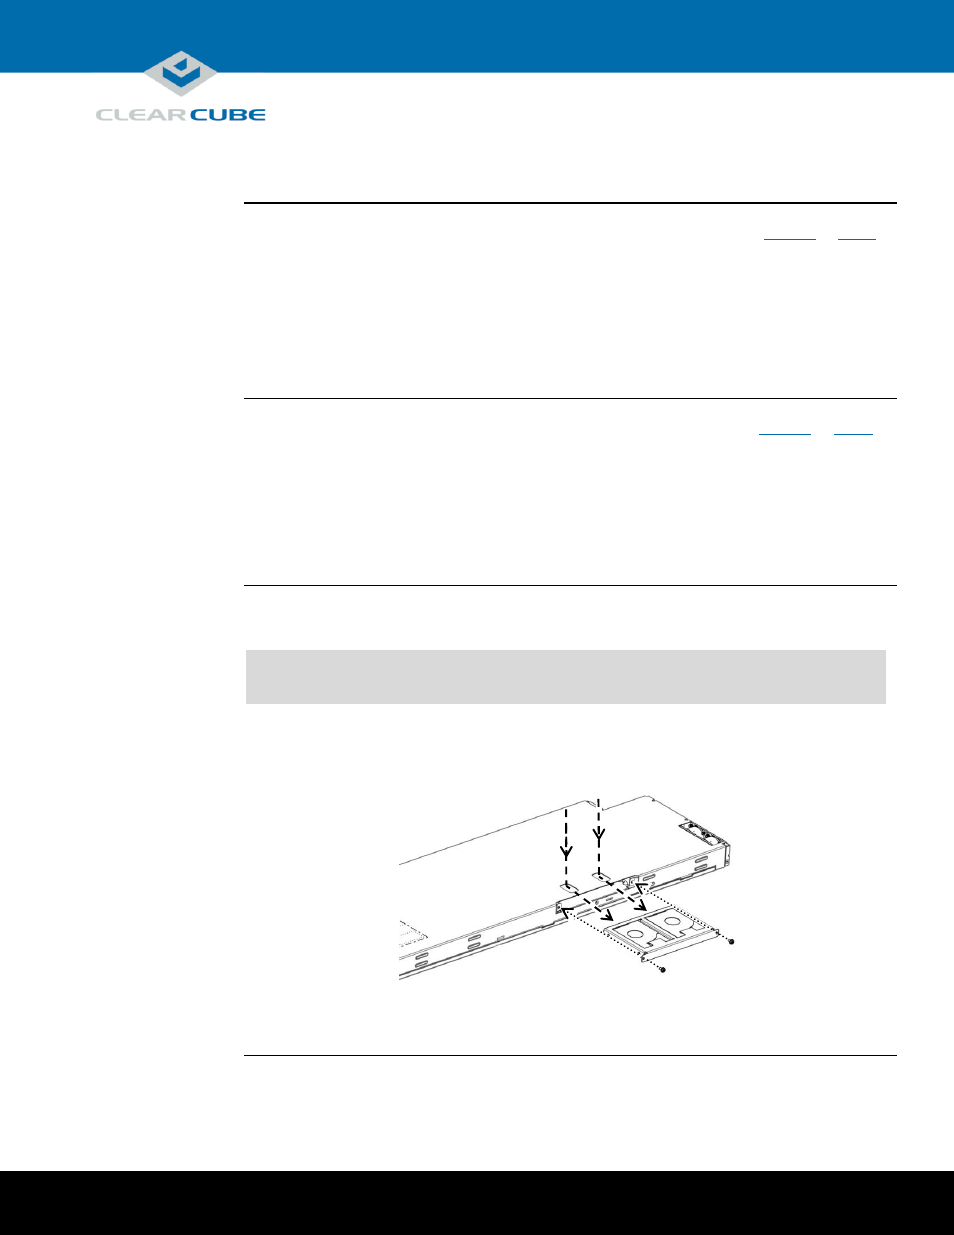
Storage drives do not require power cables or data cables when mounted in the storage drive carrier. Power
and data connectors are housed inside the blade—insert and fully seat the carrier and fasten with screws.
The picture below shows the storage drive carrier.
Figure 3. Removing and attaching the storage drive carrier
Continued on next page
Storage Drive Carrier
Mounting Screws
Finger Holes for Carrier Removal