Bird Technologies BA-310 Series User Manual
Page 24
Bird BA–300/310 Blower Assembly
14
Fan
To replace a fan assembly:
1. Remove the four 8-32 pan head screws from the front and back of
the base frame.
2. Pull the fan guard straight off the bottom.
3. Carefully unsolder the color coded connecting wires. Note the
connections for resoldering.
4. Remove the four fan mounting screws and remove the defective
fan. Be careful not to lose the lipped retaining washers.
5. Insert the replacement fan with the fan blade assembly facing
down, towards the fan guard grill.
6. Insert the mounting screws and retaining washers into the
mounting holes. Turn the washers so that the lipped portion fits
over the rim of the fan frame. Tighten the screws.
+
NOTE: If the fan replaced is the one closest to the power socket,
reattach the green ground wire to the closest mounting screw.
7. Solder the connecting wires to the solder lugs on the motor unit
according to the color coding.
8. Replace the fan guard and screws.
+
NOTE: Before reattaching the blower assembly to the load, check
the fans for free and unimpeded movement of the blades.
9. Connect the unit to ac power. Set the switch to MANUAL or ON
momentarily to check that the fans work properly.
WARNING
Disconnect the unit from all power sources before servicing.
The unit may be energized from multiple sources.
The potential for electric shock exists.
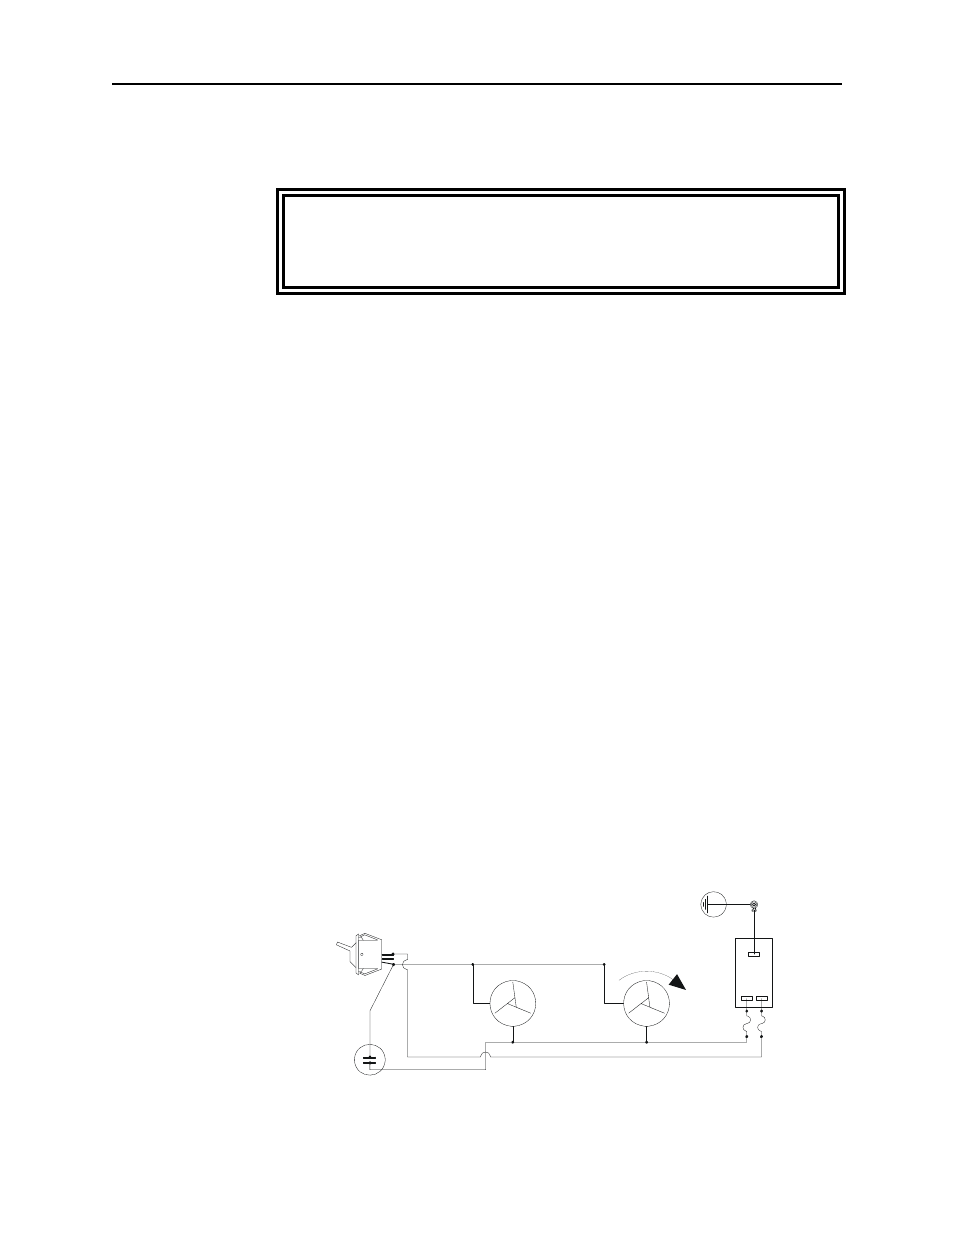
Figure 3
BA–300
Schematic
L1
L2
L1
L2
ROTATION
FANS
N L
GRN/YEL
AC
RECEPTACLE
WHT/YEL
TOGGLE
SWITCH
WHT/BLK
W
H
T
/B
L
K
INDICATOR
LIGHT
WHT/BLK