Rear seal, Figure 8 rear seal – Bird Technologies 8251 Series-Manual User Manual
Page 24
14
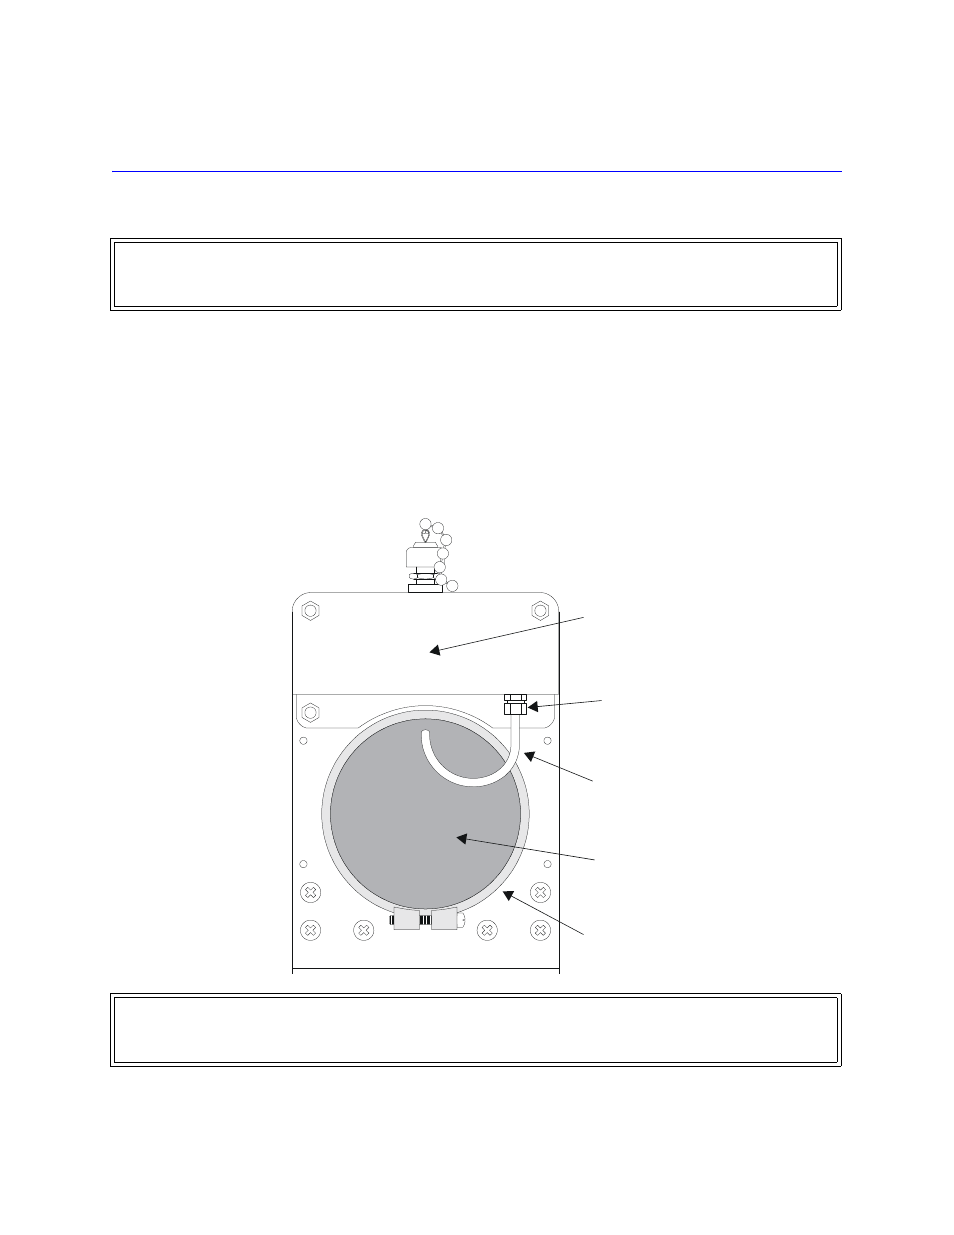
Rear Seal
If the coolant has not been drained from the load, stand the unit on end with the RF connector down before disas-
sembly.
6.
Unscrew the four screws at the corners of the guard cover.
7.
Unscrew the tube nut from the tank nozzle, using a small wrench if necessary, and
pull the nozzle free.
8.
Unscrew and remove the clamping band.
9.
Remove the rear cover, including the attached escape tube and the diaphragm seal.
10. Inspect the diaphragm seal and replace it if it is not pliable or has surface cracks.
11. To reassemble, reverse these steps.
Figure 8 Rear Seal
WARNING
Disconnect the unit from all power sources before servicing. The unit may be energized from multiple sources.
The potential for electric shock exists.
WARNING
The vent plug must be used at all times when the unit is operating or cooling. Failure to do so could result in an
explosion or severe burns.
TUBE
NUT
EXPANSION
TANK
CLAMPING
BAND
ESCAPE
TUBE
REAR
COVER
- SK-4000-TC-Manual (56 pages)
- SK-4000-TC-Datasheet (2 pages)
- SH-36S-Manual (206 pages)
- SH-36S-Datasheet (4 pages)
- SH-36S-PC-Manual (130 pages)
- SH-36S-PC-Datasheet (2 pages)
- SH-36S-PC-Quick Start (2 pages)
- SH-36S-RM-Datasheet (2 pages)
- SA-3600XT-Manual (112 pages)
- SA-3600XT-Datasheet (2 pages)
- AT-500-Manual (73 pages)
- AT-500-Datasheet (2 pages)
- AT-800-Manual (74 pages)
- 89-83F-02-03-Manual (2 pages)
- 89-83F-02-03-Datasheet (1 page)
- 8251 Series-Datasheet (1 page)
- DA10 VHF Series-Datasheet (2 pages)
- DA10 VHF Series-Manual (47 pages)
- 8865SC13-Datasheet (2 pages)
- 8865SC13-Manual (28 pages)
- 8890-300SC13-Manual (28 pages)
- 8921SC13-Manual (28 pages)
- 8931-115SC13-Manual (34 pages)
- BDS-Datasheet (2 pages)
- BDS-Manual (98 pages)
- SCC7 Series-Datasheet (2 pages)
- SCC7 Series-Manual (45 pages)
- MSCC7 Series-Datasheet (2 pages)
- MSCC7 Series-Manual (35 pages)
- SCC8 Series-Datasheet (2 pages)
- SCC8 Series-Manual (47 pages)
- 4020 Series-Datasheet (1 page)
- 4020 Series-Manual (4 pages)
- 4027A Series-Datasheet (2 pages)
- 4027A Series-Manual (6 pages)
- 4027F Series-Datasheet (2 pages)
- 4027F Series-Manual (6 pages)
- 4028 Series-Datasheet (2 pages)
- 4028 Series-Manual (6 pages)
- 7022-Datasheet (4 pages)
- 7022-Manual (27 pages)
- ACM Series-Datasheet (2 pages)
- ACM Series-Manual (40 pages)
- BPME Series-Datasheet (4 pages)