Installing the power supply – Rockwell Automation 2361 24V DC Power Supply Replacement User Manual
Page 4
4
24V DC Power Supply Replacement (for 1250, 1650, and 3000A 1395 DC Drives)
Publication 2361-5.18 - May 1998
Installing the Power Supply
1.
Slide the new power supply into place and screw in the two top
mounting screws.
2.
Raise and secure the flip-down panel with the two set screws.
3.
Screw in the two bottom mounting screws.
4.
Verify that the following terminals are jumpered together:
•
terminals 7 and 8
•
terminals 9 and 10
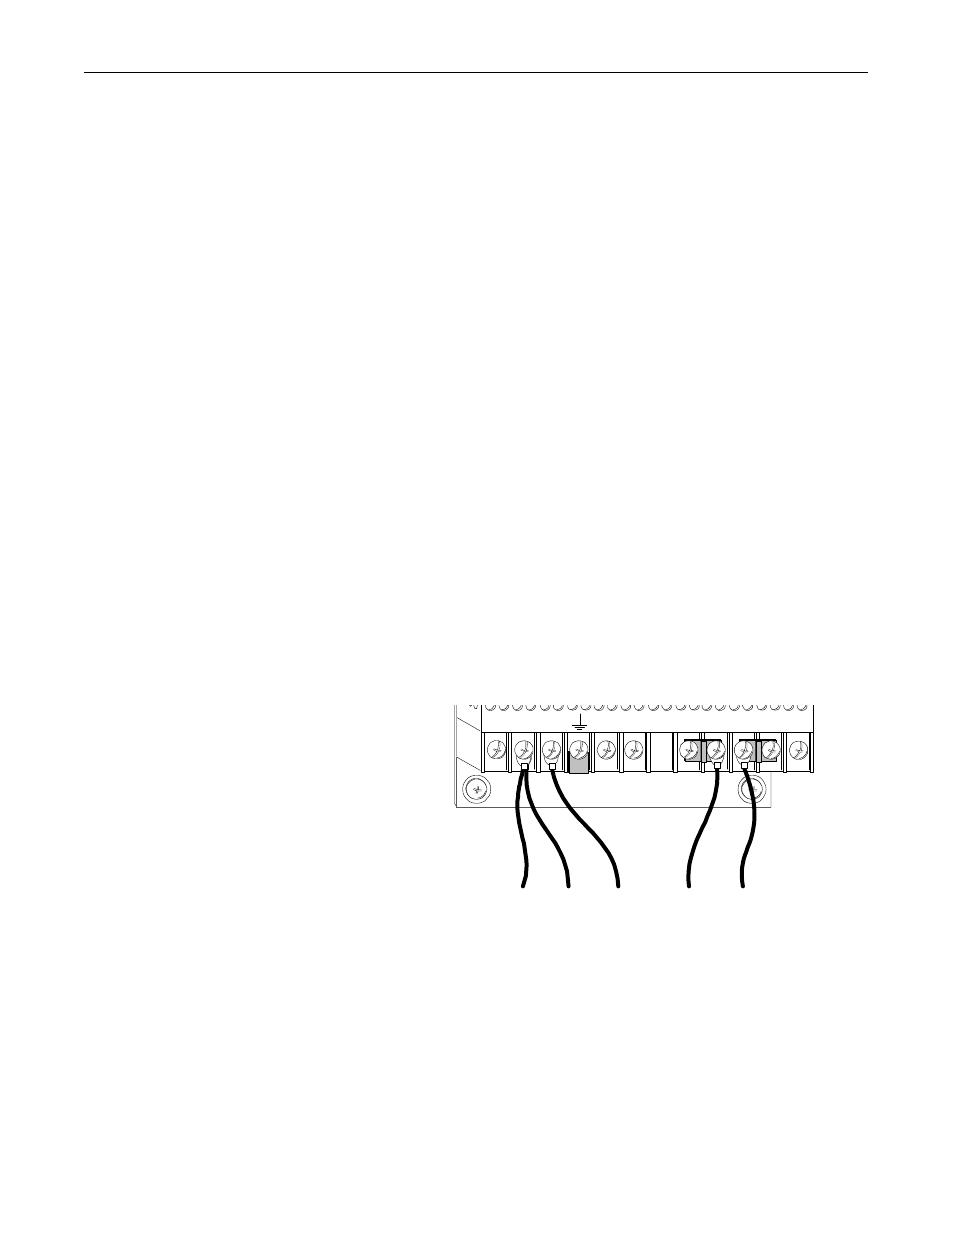
5.
Connect the input and output leads to the respective terminals as
follows:
Note: Failure to properly connect the wires to the power supply
will result in damage to the power supply and/or to the drive.
•
Connect red wire, A9(L1), and black wire, A2-L1, to ter-
minal 1 on the supply
•
Connect white wire, A9(N2), to terminal 2 on the power
supply
•
Connect black wire, A9(-V8), to terminal 8 on the power
supply
•
Connect black wire, A9(+V9), to terminal 9 on the power
supply
A9(+V9)
(blk)
A9(-V8)
(blk)
A9(N2)
(wht)
A9(L1)
(red)
A2-L1
(blk)
1
2
4
5
7
8
9
10