Preliminary steps, Replacing the power supply filter board – Rockwell Automation 2364F Power Supply Filter PCB User Manual
Page 3
Publication 2364F-5.22 March 1999
RGU™ Power Supply Filter Board Replacement
3
Preliminary Steps
Before replacing the power supply filter board, shut off the power; lockout/
tagout the unit; and wait five minutes for the voltage to discharge. Open the
bay door to the power structure.
Replacing the Power Supply
Filter Board
1. Using a meter, test the voltage across the AC line, across the DC bus, and
across the terminals on the power supply filter board.
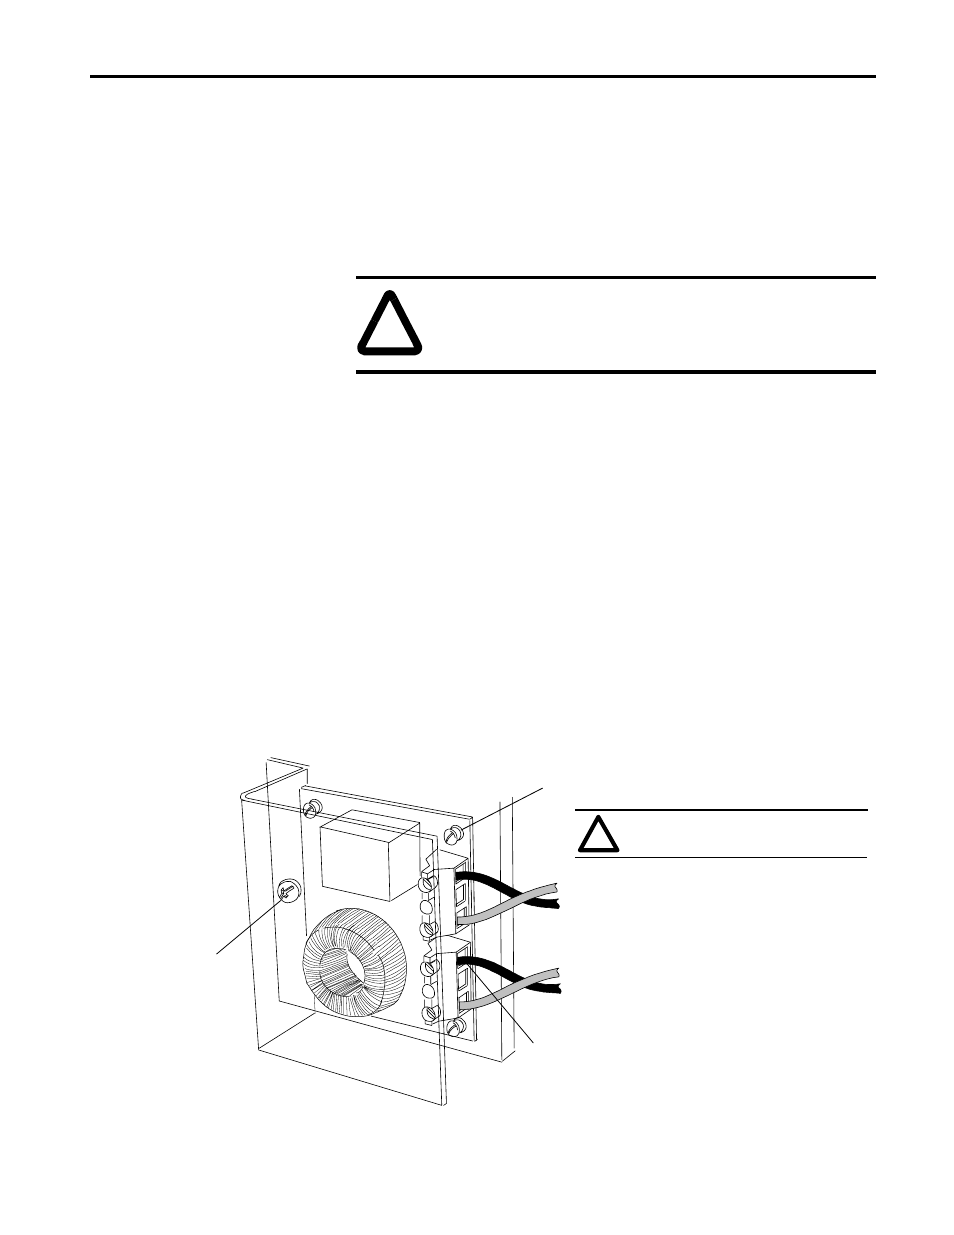
2. Remove the screw which mounts the Lexan™ guard.
3. Disconnect the wires from the two terminal blocks.
4. Loosen the standoff screws and gently pull the board from the standoffs.
5. Firmly press the new board onto the standoffs and secure the standoff
screws.
6. Connect the wires from the gate driver board to TB1-1 (black) and
TB1-2 (red).
7. Connect the wires from the DC bus to TB2-1 (black) and TB2-2 (red).
8. Secure the Lexan guard with the mounting screw.
Figure 1
Replacing the Power Supply Filter Board
!
ATTENTION: If there is any voltage present, remove the
source of the voltage. Check for voltages again before
proceeding to the next step.
Incorrect wiring may result in
!
ATTENTION:
equipment damage.
Lexan mounting
screw
Standoff screw
From
DC Bus
To
Gate Driver
Board
Black wire on top