Install your armorblock lp2 i/o module, Set the node address and baud rate – Rockwell Automation 1792D-0BT16LP ArmorBlock LP2 16 Sourcing Output Module User Manual
Page 3
ArmorBlock LP2 16 Sourcing Output Module
3
1792D-5.49 - August 1999
Install Your ArmorBlock LP2 I/O Module
To install the module:
• Mount the module and attach the unit to the DeviceNet trunk.
• Set the node address and baud rate.
• Connect the output cord sets to the LP2 module.
• Communicate with your ArmorBlock LP2 module.
More detailed information about each of these steps is in the following
procedures.
Mount the Module and Attach the Unit to the Devicenet Trunk
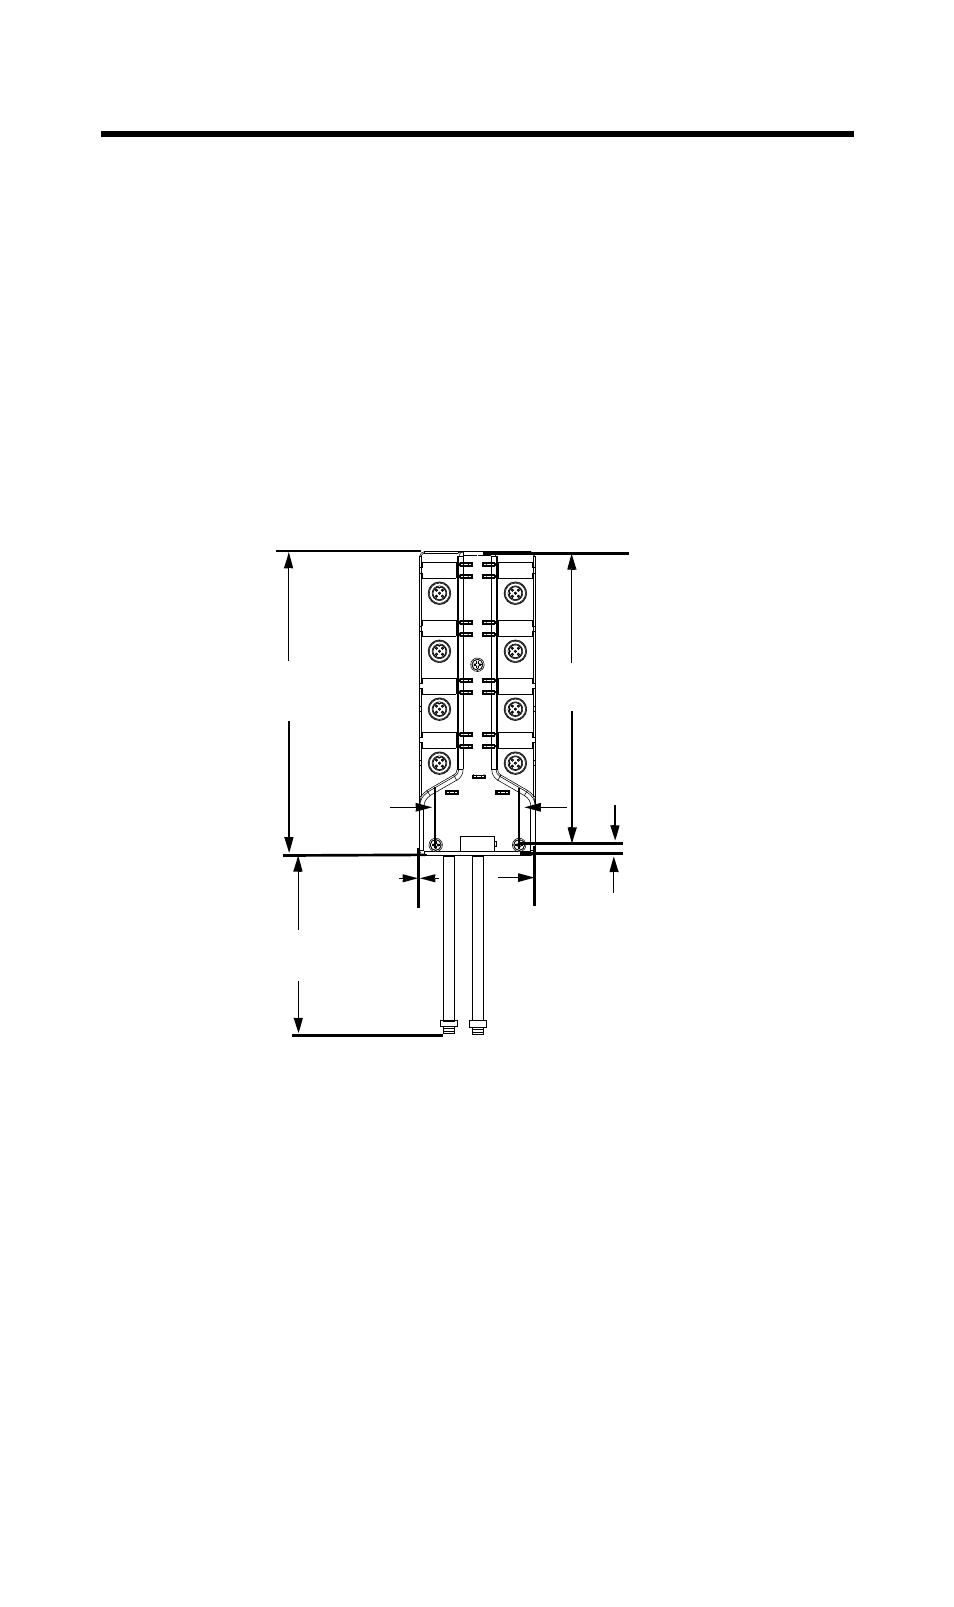
1. Mount the module using the dimensions shown below.
2. Connect the grey DeviceNet cable to the DeviceNet trunk. Use the
1485P-P1R5-MN5R1 T-Part tap to make the connection to round
media. Use the 1485P-P1E4-R5 to connect to the Kwik Link flat media
system.
3. Connect the black auxiliary power cable to your 24V dc power source.
Set the Node Address and Baud Rate
Set the node address using RSNetWorx for DeviceNet
™ software,
DeviceNetManager
™ software, or another software configuration tool. The
module is equipped with AutoBaud detect. AutoBaud lets the module read
the settings already in use on your DeviceNet network and automatically
adjusts to follow those settings.
O-4
O-5
O-6
O-7
O-11
O-10
O-2
O-3
O-13
O-12
O-9
O-8
Network Status
Module Status
O-0
O-1
O-15
O-14
Auxiliary Power
42049
4.21in
107mm
0.25in
6.25mm
12in
305mm
1.95in
49.5mm
6.85in
174mm
2.7in
68.5mm
(width)