Rockwell Automation 1494V-DS400_DSX400 - Series D Variable Depth 400A Disconnect Switch User Manual
Page 2
PN-133642
DIR 42052-156 (Version 03)
Copyright © 2013 Rockwell Automation, Inc. All Rights Reserved. Printed in USA.
ATTENTION: Check for proper operation.
Go to Installation Instruction Sheet 42052-154-01.
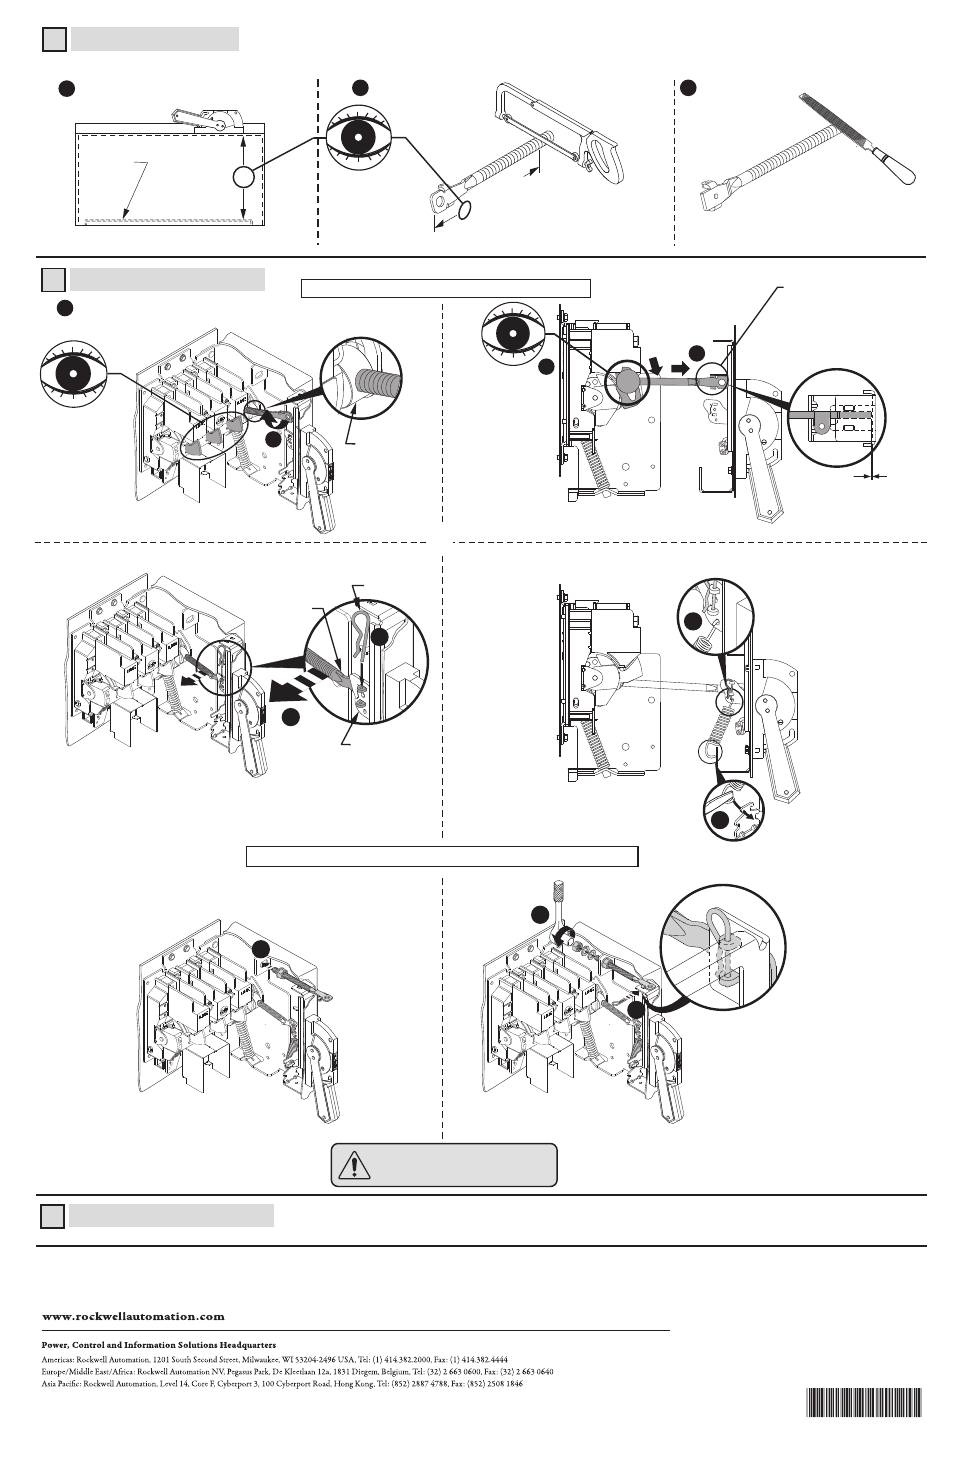
Trailer Fuse Block Installation
5
3
Connecting Rod Installation
4
Cutting Connecting Rod
(Cut (2) Connecting Rods; first rod connects the handle to the switch, second rod provides
stiffening for the enclosure flange)
Measure working depth of enclosure.
Measure, mark and
cut (2) connecting rods.
1
2
Remove burrs
3
N
N minus 3-3/4"
Enclosure
Working Depth
(Inside Flange
of Enclosure to
Mounting Plate)
Mounting
Plate
Drive Bar
2
Rotate connecting rod into
drive bar 16 turns.
3
4
Pull rod up and verify if
rod is touching bottom of
spring bracket. (If not,
rotate rod until it touches
spring bracket)
Zero
Clearance
8
7
Connecting
Rod
Hitch Pin
Primary Link
5
6
First rod connects the handle to the switch
Second rod provides stiffening for the enclosure flange
10
9
11
150 - 200 lb-in
Verify that disconnect switch and handle are in "OFF"
position. (Switch blades will be visible.)
1
Allen-Bradley, Rockwell Software, and Rockwell Automation are trademarks of Rockwell Automation, Inc.
Trademarks not belonging to Rockwell Automation are property of their respective companies.
Publication 1494V-IN102C-EN-E - January 2013