Worldwide representation – Rockwell Automation 1336R REGEN 48,78,180A Precharge Bd. Repl. User Manual
Page 2
Rockwell Automation helps its customers receive a superior return on their investment by bringing
together leading brands in industrial automation, creating a broad spectrum of easy-to-integrate
products. These are supported by local technical resources available worldwide, a global network
of system solutions providers, and the advanced technology resources of Rockwell.
Worldwide representation.
Argentina • Australia • Austria • Bahrain • Belgium • Bolivia • Brazil • Bulgaria • Canada • Chile • China, People’s Republic of • Colombia • Costa Rica • Croatia • Cyprus
Czech Republic • Denmark • Dominican Republic • Ecuador • Egypt • El Salvador • Finland • France • Germany • Ghana • Greece • Guatemala • Honduras • Hong Kong
Hungary • Iceland • India • Indonesia • Iran • Ireland • Israel • Italy • Jamaica • Japan • Jordan • Korea • Kuwait • Lebanon • Macau • Malaysia • Malta • Mexico
Morocco • The Netherlands • New Zealand • Nigeria • Norway • Oman • Pakistan • Panama • Peru • Philippines • Poland • Portugal • Puerto Rico • Qatar • Romania • Russia
Saudi Arabia • Singapore • Slovakia • Slovenia • South Africa, Republic of • Spain • Sweden • Switzerland • Taiwan • Thailand • Trinidad • Tunisia • Turkey • United Arab Emirates
United Kingdom • United States • Uruguay • Venezuela
Rockwell Automation Headquarters, 1201 South Second Street, Milwaukee, WI 53204-2496 USA, Tel: (1) 414 382-2000, Fax: (1) 414 382-4444
Publication 1336 REGEN-5.16 — May, 1998
P/N 189812 (01)
Copyright 1998 Rockwell International Corporation Printed in USA
1.
Remove and lock-out all incoming power to the 1336 REGEN Line Regeneration Package.
2.
Remove the Precharge Unit front cover. Measure the voltage at input power terminals R1–S1–T1 and terminal
block TB1 with a voltmeter to ensure that no voltage is present.
3.
Unplug the contactor cable, input
&
output power wires, sync cable and PE ground wire. Disconnect the
120VAC power connections.
4.
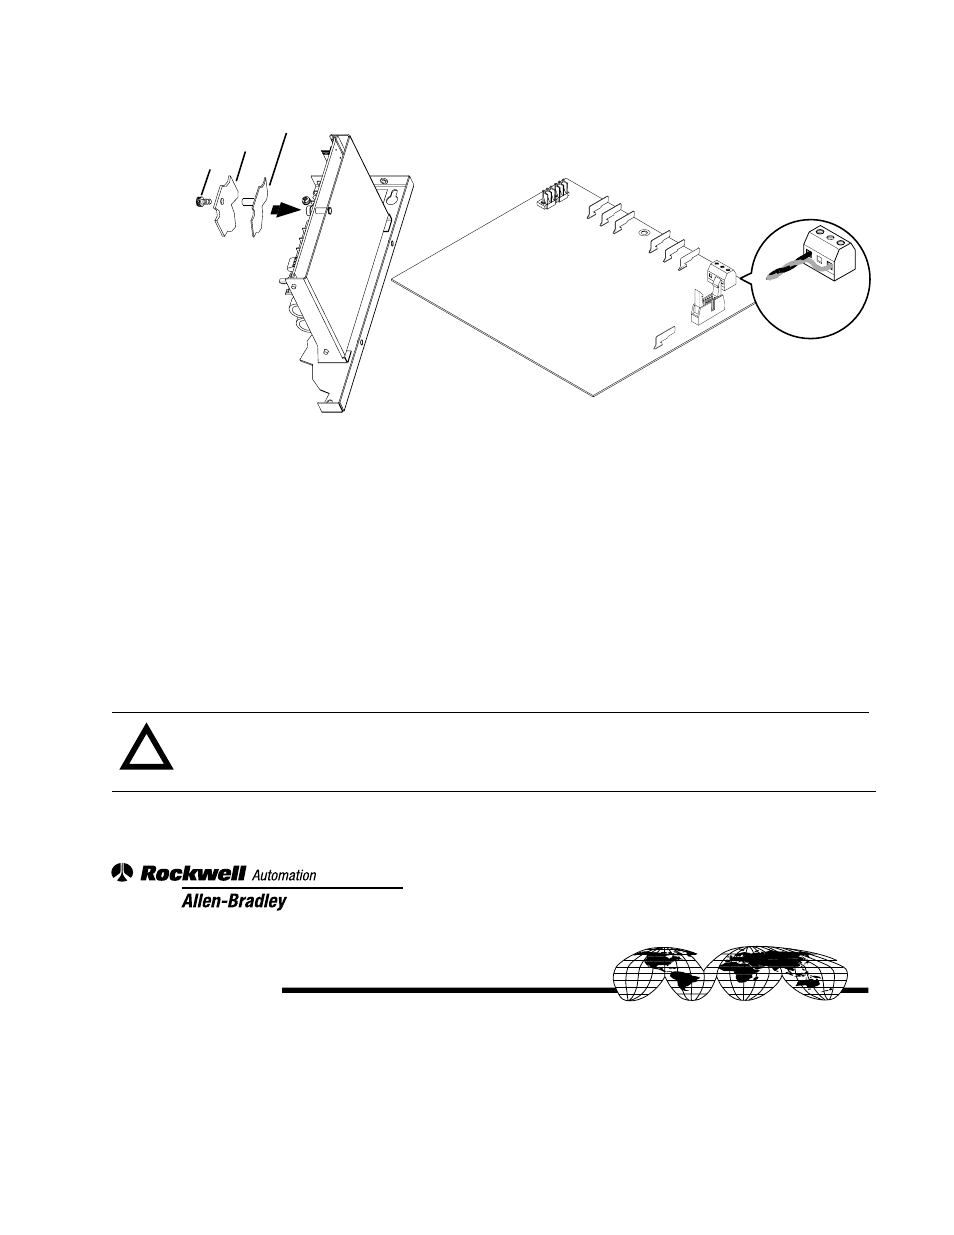
Remove the knurled thumb screw and slide out the old precharge board.
5.
Slide in the new board and reconnect all wires and cables. Ensure that the correct voltage polarity is
maintained.
6.
Slide the new precharge board in place. Reinstall the knurled thumb screw and finger tighten to secure board
in place.
Sync Cable
PE Ground Wire
Contactor Cable
Output Power
Input Power
Slotted Bracket with Welded Spacer
Precharge Board
Knurled Thumb Screw
J2
R
R
1
S
1
T
1
S
T
TB1
J1
P8
1
3
TB1
1 = 120V
AC
3 = 120V
AC Common
!
ATTENTION:
Replace any guards or shields previously removed before reapplying power to the
1336 REGEN Line Regeneration Package. Failure to replace guards or shields may result in death or
serious injury.