Registering the drive – Western Digital WD SmartWare User Manual User Manual
Page 63
WD SMARTWARE SOFTWARE
USER MANUAL
MANAGING AND CUSTOMIZING THE DRIVE
– 59
3.
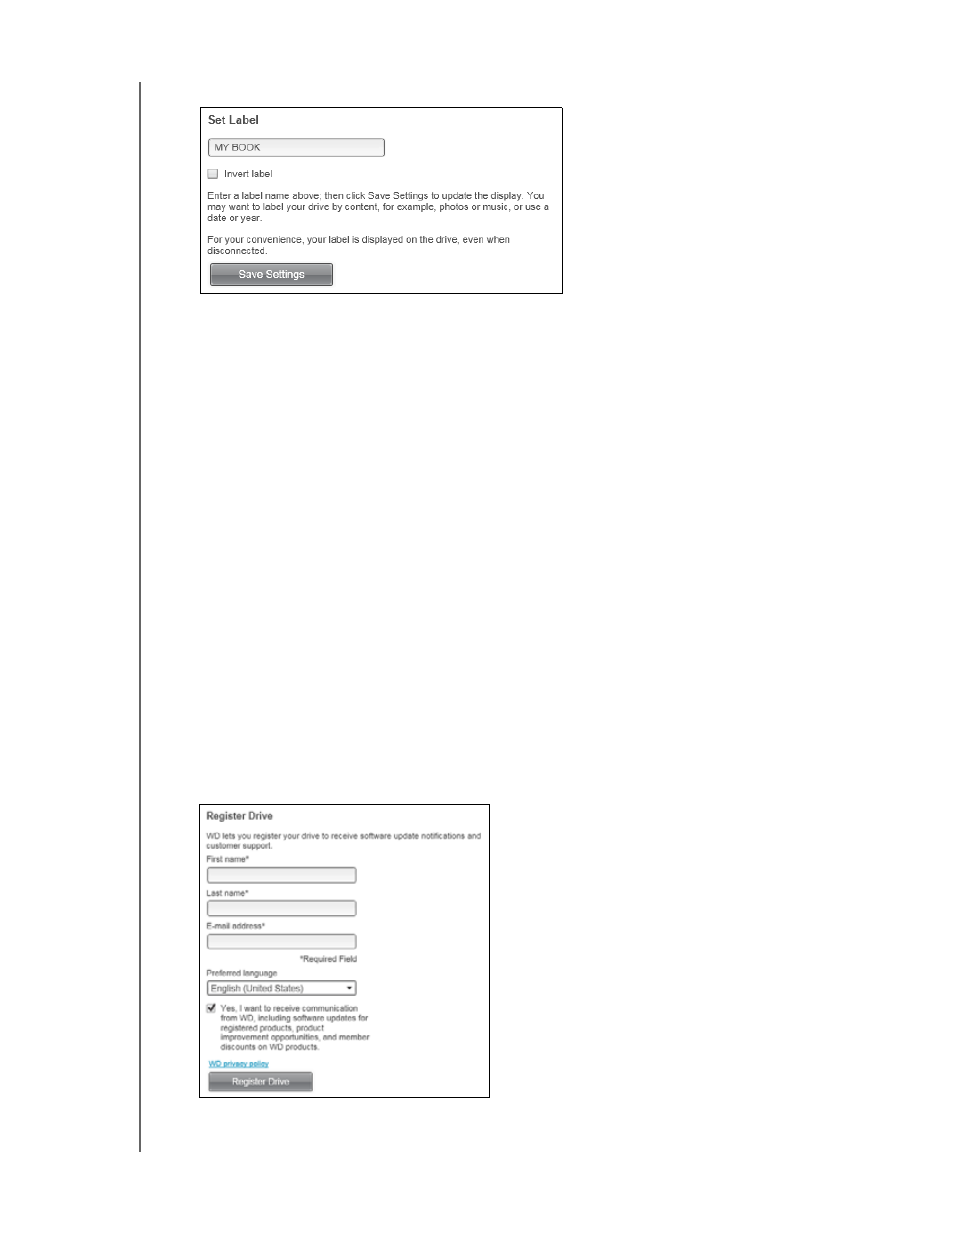
On the Drive Settings screen, click Label to display the Set Label dialog:
4.
On the Set Label dialog:
a. Type a name for the drive in the label box.
b. Select or clear the Invert label check box to establish the label presentation that
you want—dark text against a light background, or vice versa.
c. Click Save Settings.
Registering the Drive
The WD SmartWare software uses your computer’s Internet connection to register your
supported WD drive. Always register your drive to receive free technical support during
the warranty period and be kept up-to-date on the latest WD products.
1.
Make sure that your computer is connected to the Internet.
2.
On the Home screen, if you have more than one backup target device connected to
your computer, select the icon for the one that you want to register.
3.
Click the Settings tab and Set Up Drive to display the Drive Settings screen (see
Note:
If you see the Software Settings screen instead of the WD SmartWare
Settings tab display with the Set Up Drive button, then you must use the
WD Drive Utilities software to register the selected device.
4.
On the Drive Settings screen, click Registration to display the Register Drive dialog: