Using the drive settings drive erase function – Western Digital WD SmartWare User Manual User Manual
Page 60
WD SMARTWARE SOFTWARE
USER MANUAL
MANAGING AND CUSTOMIZING THE DRIVE
– 56
The
WD SmartWare software provides two ways to erase your supported WD drive, depending
on whether it is locked or not:
Using the Drive Settings Drive Erase Function
To erase your supported WD drive
when it
is not locked:
1.
On the Home screen, if you have more than one backup target device connected to
your computer, select the icon for the one that you want to erase.
2.
Click the Settings tab and Set Up Drive to display the Drive Settings screen (see
Note:
If you see the Software Settings screen instead of the WD SmartWare
Settings tab display with the Set Up Drive button, then you must use the
WD Drive Utilities software to erase the selected device.
3.
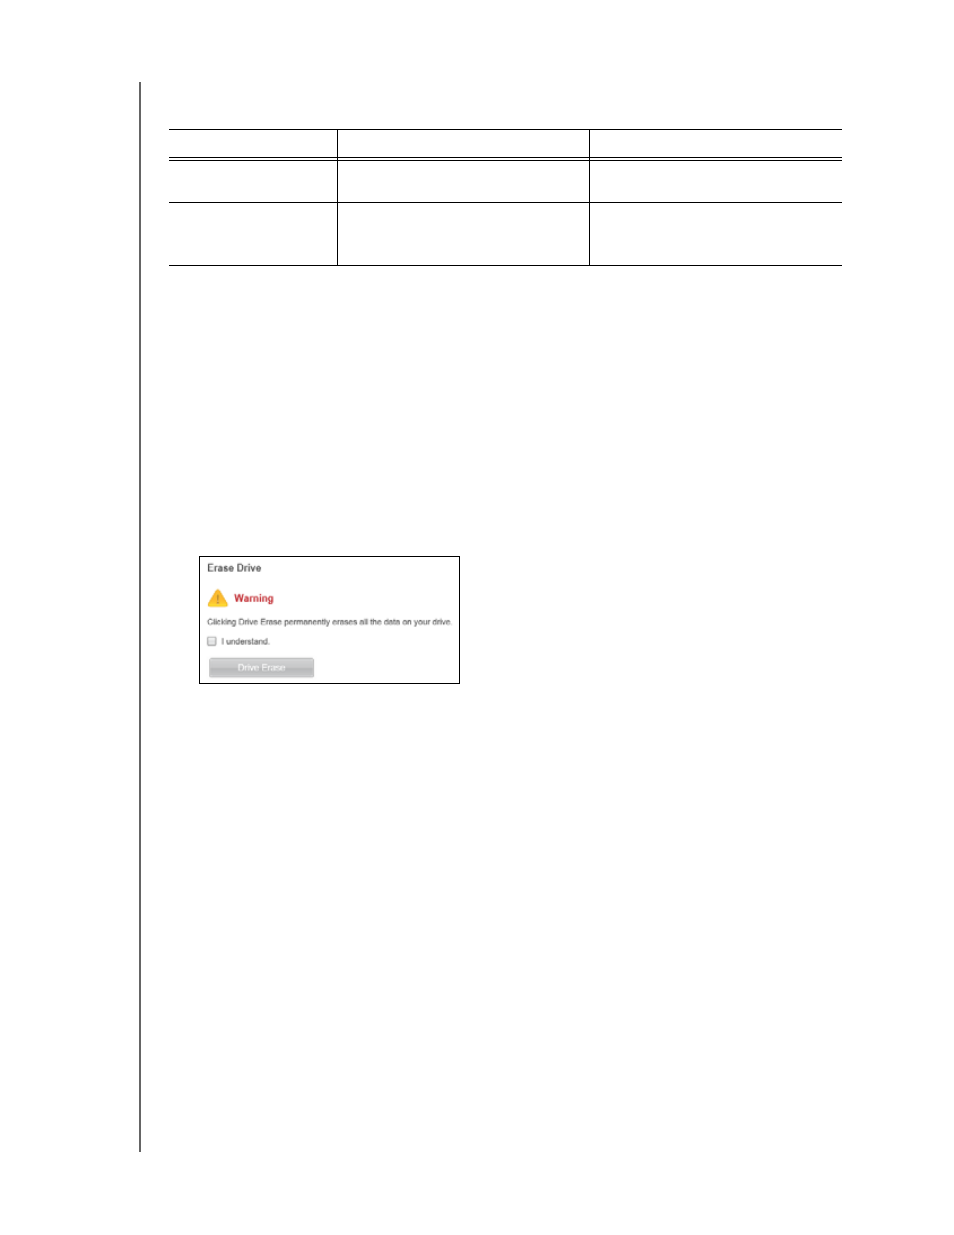
On the Drive Settings screen, click Drive Erase to display the Erase Drive dialog:
4.
On the Erase Drive dialog:
a. Read the warning about the loss of data if you erase your drive.
b. Click the I understand check box to signify that you accept the risk.
c. Click Drive Erase.
After the drive erase operation completes, go to
and see
Knowledge Base answer ID 7 for information about downloading and restoring the
WD SmartWare software and disk image on the drive.
Note:
Erasing your drive also removes your password. If you still want to use a
password to protect your drive, you will need to re-create it after restoring
the WD SmartWare software and disk image. (See “Password Protecting
the Drive” on page 36.)
IF your drive is . . .
AND you . . .
THEN see . . .
Not locked,
Want to erase the drive,
“Using the Drive Settings Drive
Erase Function” on page 56.
Locked,
Have forgotten or lost your
password and must erase the
drive,