Tz custom fit manual_6, Installing the floor covering – WarmlyYours TempZone Custom Mat User Manual
Page 6
Installing the Floor Covering
1) TILE
Before starting, read the tile fl ooring manufacturer’s installation instruction, review any specifi c instructions they may have
with regard to the use of their product with electric radiant heating.
After the mat is secured in the fi rst layer of mortar apply the tile on top of the mat in the normal manner. The thickness of
the thinset layer must be in accordance with the tile and thinset manufacturer’s recommendations.
IMPORTANT
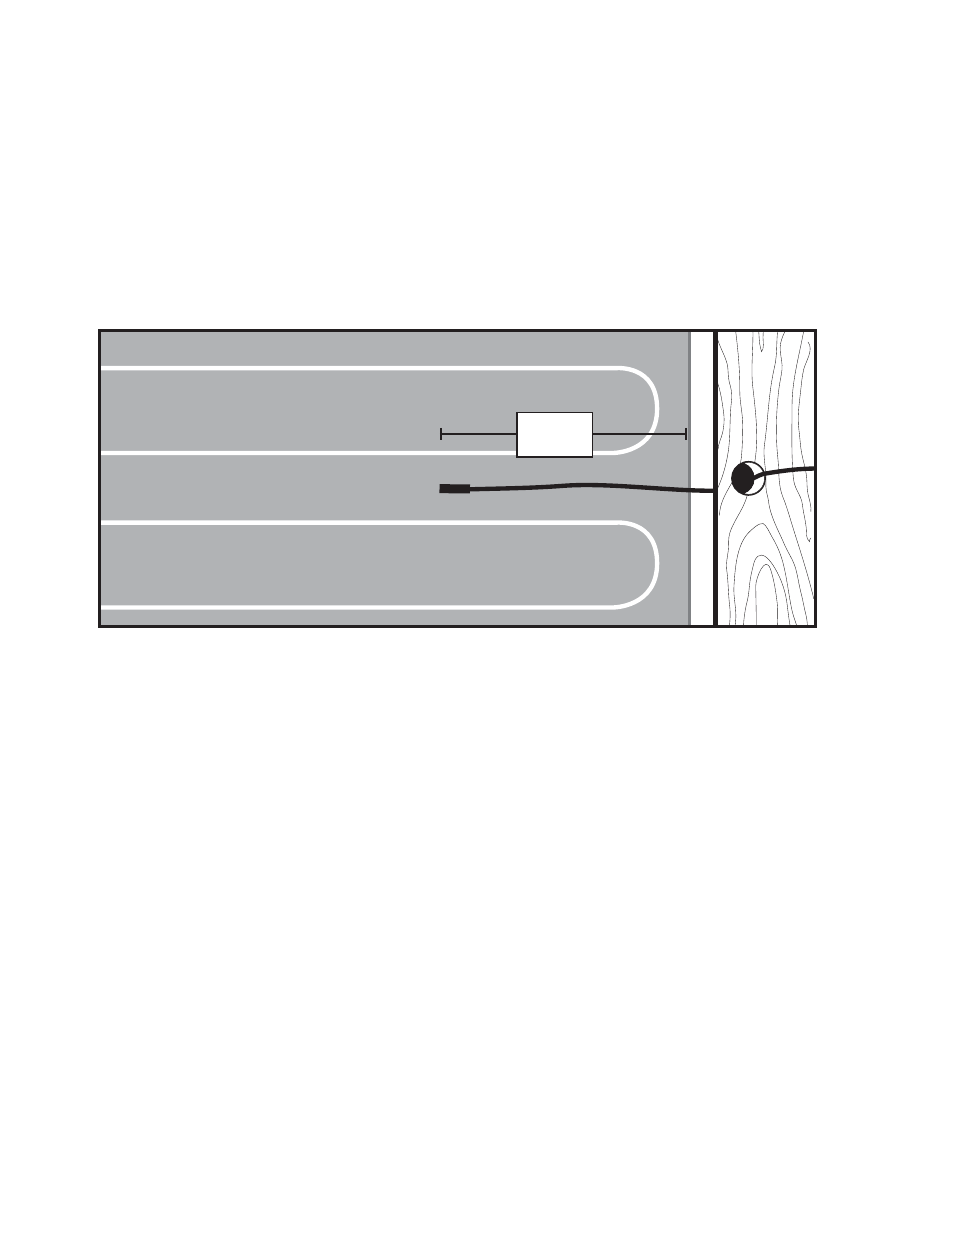
If a thermostat employing a fl oor sensing bulb is to be used, the fl oor sensor must be installed prior to setting the tile in
place. Secure the sensor probe on top of the mat with tape or hot glue. The sensor must be positioned in the middle of
two heating cable runs. The sensor should be 6” from the edge of the mat. Run the sensor wire back into the junction box.
Don’t place the sensor where it will be in direct sunlight. Do not place the sensor wire in the same conduit as the cold lead.
Clean grout lines carefully, scrapers can penetrate and cut into the heating mat below possibly resulting in death or injury
from electrical shock or fi re, mat failure, improper operation or fl oor damage.
Do not drill into fl oors with WarmlyYours mats; drills can cut into the heating mat below, possibly resulting in death or injury
from electrical shock or fi re, mat failure, improper operation or fl oor damage.
Conduct electrical tests as previously described, if there are any problems contact WarmlyYours before proceeding
further.
Thinset and grout materials have cure times, review the recommended cure time from each manufacturer and do not
energize the mat until the materials have fully cured. This cure time may be as long as 28 days.
6”