Vigo VG06051 User Manual
Page 7
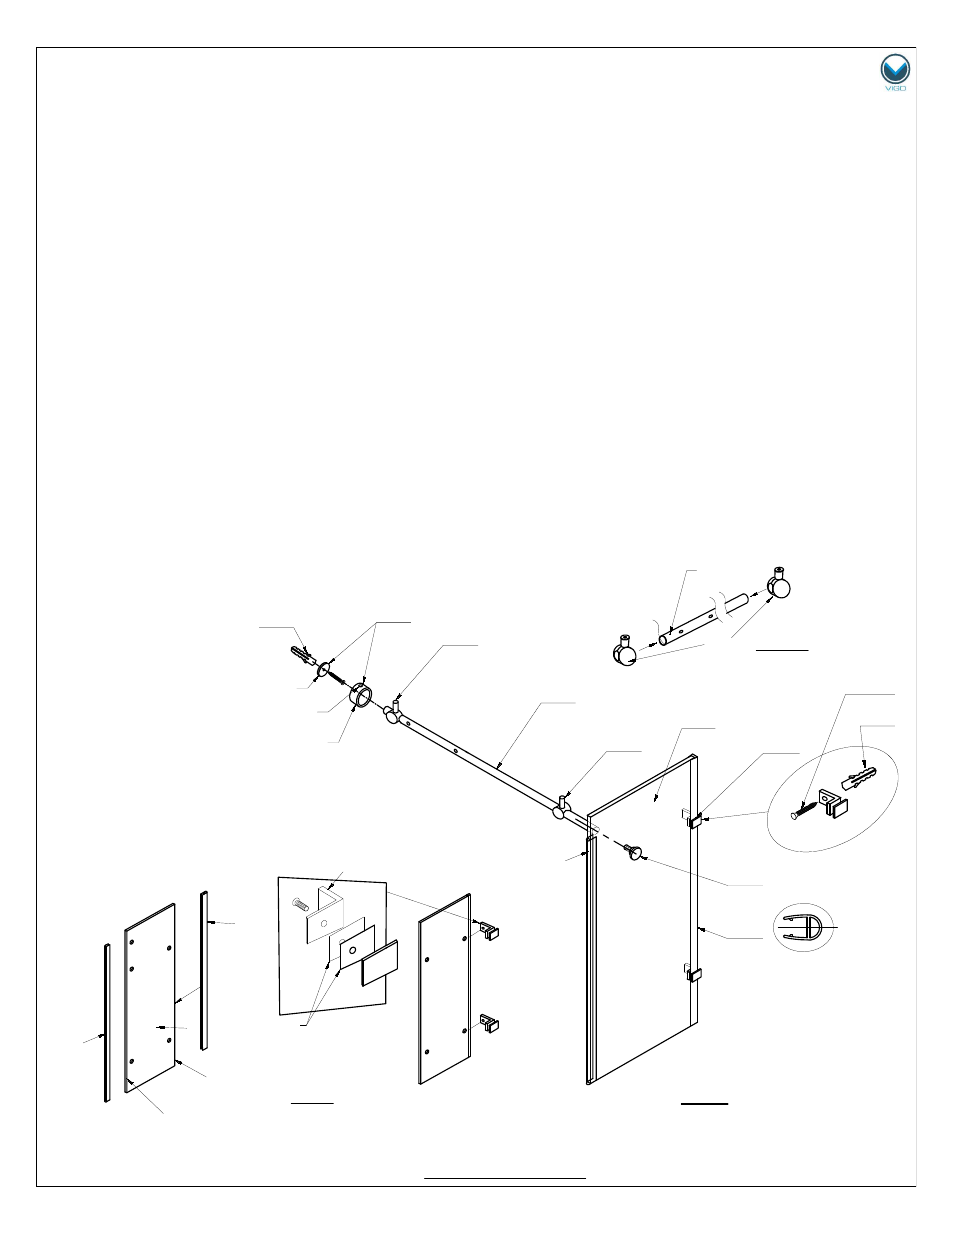
FIG. 4
PLATE
HEX
SCREW
BRACKET BODY
7. Place the side glass panel with the structural rail into desired position. Use the level to
correct position assembly.
8. Mark holes on the wall for the side glass support (#20).
9. Mark the circumference location for the wall mount bracket (#1).
10. Remove the side glass panel (#6) and the structural rail (#16). Drill holes into the wall
where marked and place plastic anchors (#24) in them.
11. Unscrew plate from the wall mount bracket body using the hex key (FIG.4).
12. Place the wall mount bracket plate (#1) to the wall and screw in the plate using 2" screw (#23).
13. Place the side glass panel and the structural rail back to the shower opening.
14. Screw the side glass support to the wall with 1 5/8" screw (#22).
15. Tighten the hex screw on the wall mount bracket body and the structural rail screw.
[SEE FIG.4]
MODEL VG06051
7
FIG.3
THIN
GASKETS
18
WALL
SIDE
DOOR
SIDE
6
20
24
15
16
6
1
24
15
20
22
18
17
15
16
FIG. 3A
18
18
- VG0601 (12 pages)
- VG06012 (12 pages)
- VG06021 (14 pages)
- VG06031 (18 pages)
- VG06041 (17 pages)
- VG06042A (11 pages)
- VG06042B (12 pages)
- VG06029 (14 pages)
- VG08001 (9 pages)
- VG08003 (10 pages)
- VG08004 (8 pages)
- VG08005 (9 pages)
- VG08006 (8 pages)
- VG08007 (10 pages)
- VG08008 (9 pages)
- VG08009 (10 pages)
- VG08010 (10 pages)
- VG03002 (5 pages)
- VG05002 (5 pages)
- VG05001 (5 pages)
- VG03023 (5 pages)
- VG03009 (5 pages)
- VG03018 (5 pages)
- VG01008 (5 pages)
- VG01009 (5 pages)
- VG01015 (5 pages)
- VG01023 (5 pages)
- VG01025 (5 pages)
- VG01028 (5 pages)
- VG01030 (5 pages)
- VG01038 (5 pages)
- VG03003 (5 pages)
- VG03007 (5 pages)
- VG03008 (5 pages)
- VG03013 (5 pages)
- VG03019 (5 pages)
- VG09041K (7 pages)
- VG09041K1 (7 pages)
- VG09030K (7 pages)
- VG09030K1 (7 pages)
- VG09031K (7 pages)
- VG09031K1 (7 pages)
- VG09032K (7 pages)
- VG09032K1 (7 pages)