Stack-On AC-2 Bow Cabinet User Manual
Page 2
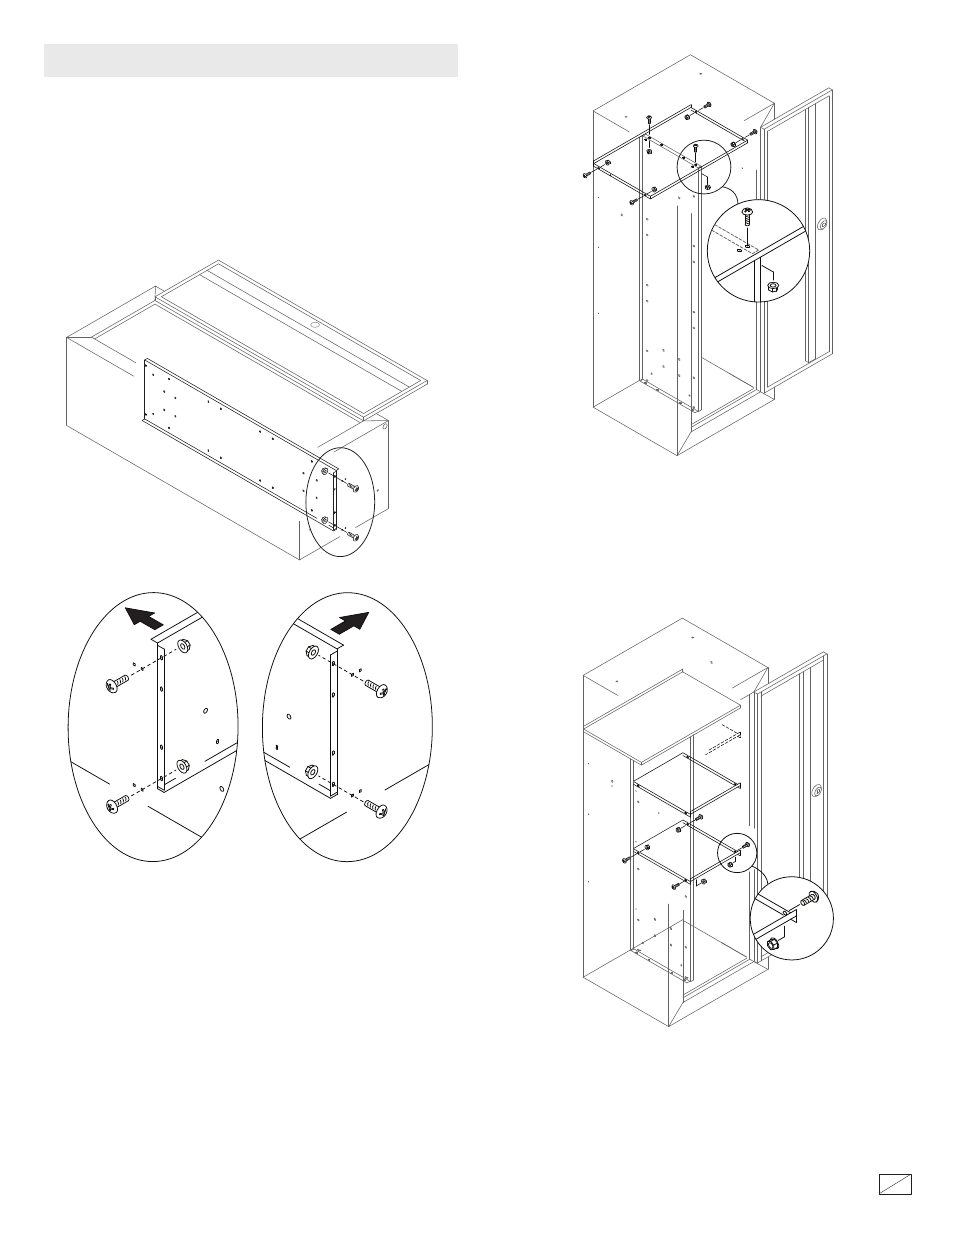
Interior of the cabinet must be assembled before mounting the
cabinet to a wall.
Now tighten all remaining nuts and bolts.
After you have reviewed and selected a shelving configuration (see Cabinet
Configurations) you are ready to assemble the center partition and shelves in
the cabinet. For ease of assembly, do not tighten the nuts and bolts until all the
parts have been assembled.
The top shelf has 2 sets of holes for attaching the center partition. Use the set
of holes that will allow the partition to be centered between the 2 holes. This
will ensure that there is proper spacing for the shelf installation on both sides.
Position the shelf so the front and side flanges point down. Assemble the top
shelf to the center partition and the sides of the cabinet using 6 nuts and bolts.
Lay the cabinet on its back on a protective surface.
Install and tighten the 2 nuts and bolts as shown.
Position the center partition carefully to align the holes on the bottom. The
center partition has two possible positions. You should face the front flange
towards the side you want to mount the shelves as shown. There are also two
sets of mounting holes. Use the left holes when the shelves are on the right.
Use the right holes when the shelves are on the left. This will ensure that the
partition is in the exact center of the cabinet, and that there is proper spacing
for the shelf installation.
1. Center Partition Assembly
2. Top Shelf Assembly
You have the choice of 3 locations for mounting the 2 shelves. You also have
the choice of having the front flange of the shelf to point up or down. Select a
location and assemble each shelf to the center panel and cabinet side using 4
nuts and bolts.
3. Shelf Assembly
Shelves on left
Shelves on right
40298-1202
18
2
SHELVING ASSEMBLY