Brother HL-1060 User Manual
Page 92
CHAPTER IV -28
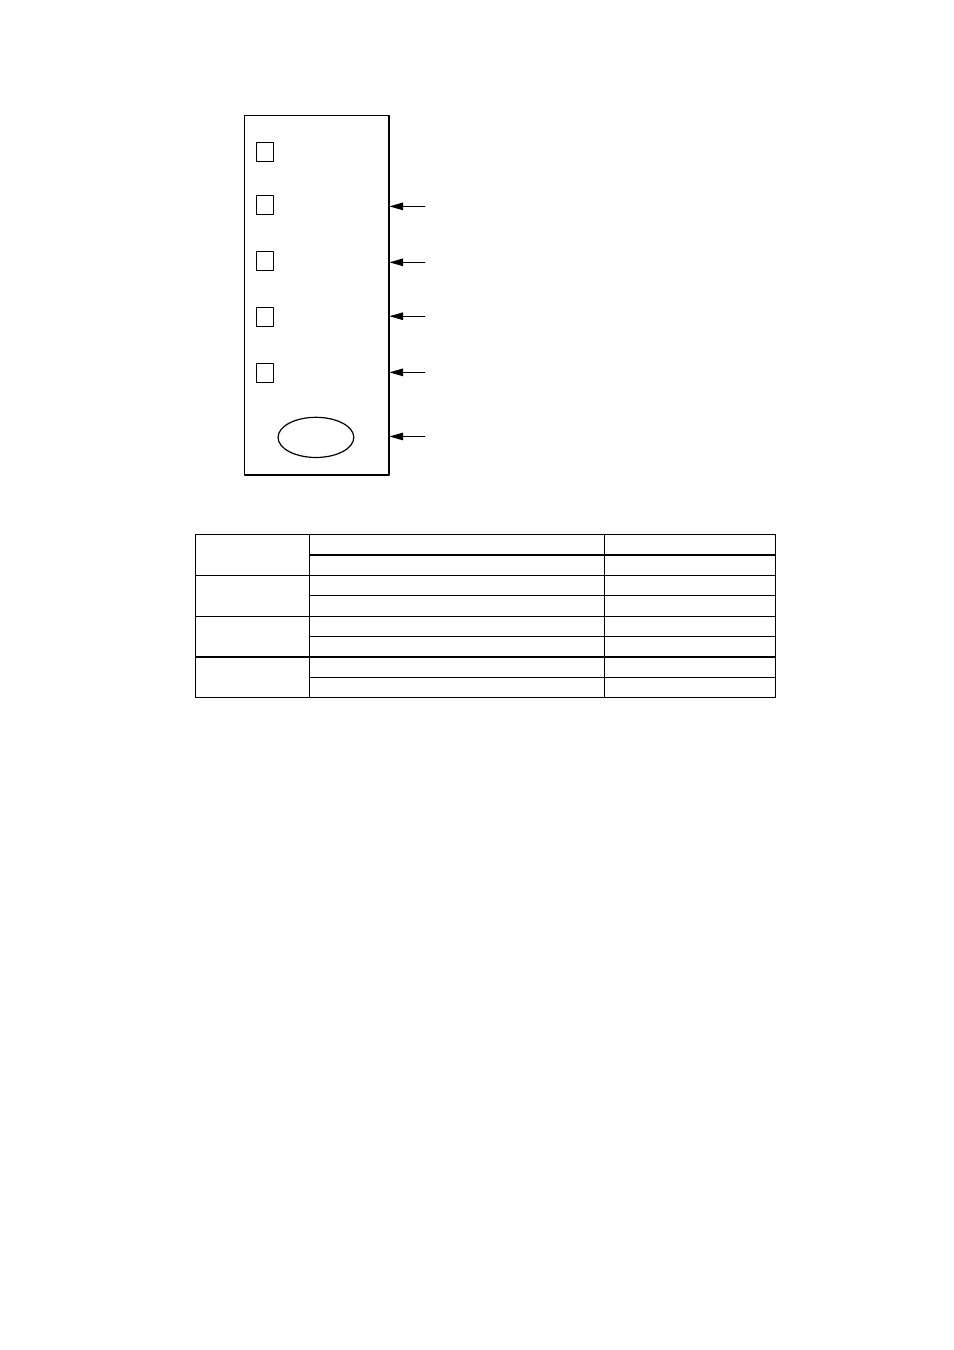
Drum
Feeder2
Alarm
Ready
(Paper)
Data
(Toner)
Paper eject sensor
Registration sensor
Cover sensor
Toner sensor
Switch
Fig. 4.8
Paper eject
ON (Paper is detected.)
Drum lamp ON
sensor
OFF (No paper is detected.)
Drum lamp OFF
Registration
ON (Paper is detected.)
Alarm lamp ON
sensor
OFF (No paper is detected.)
Alarm lamp OFF
Cover
ON (The top cover is closed.)
Ready lamp OFF
sensor
OFF (The top cover is open.)
Ready lamp ON
Toner
ON (The toner cartridge is installed.)
Data lamp OFF
sensor
OFF (No toner cartridge is installed.)
Data lamp ON
The procedure for the factory inspection mode is as follows.
(1)
Turn the printer power switch OFF, open the top cover, and remove the drum unit.
(2)
Turn the printer power switch ON while holding down the control panel switch. The
Drum lamp comes ON.
(3)
Lightly press the panel switch again.
(4)
Check that the Drum(paper eject sensor) and Alarm(registration sensor)
lamps go OFF after all the lamps have been ON.
If the paper eject sensor is ON at this point, the Drum lamp stays ON (error).
If the registration sensor is ON at this point, the Alarm lamp stays ON (error).
(5)
Install the drum unit.
Check that the Data lamp goes OFF.
(6)
Lightly touch the registration sensor actuator.
Check that the Alarm lamp comes ON.
(7)
Close the top cover.
Check that the Ready lamp goes OFF.
(8)
Press the control panel switch.
(9)
If all the sensors are correct, the printer goes back to the Ready status. If any
error is detected, the corresponding lamp stays ON.