Inspection mode – Brother HL-1060 User Manual
Page 91
CHAPTER IV -27
6.
INSPECTION MODE
6.1
Incorporated Inspection Modes
The printer incorporates various inspection modes such as the factory inspection mode
and the test print mode. The inspection mode varies depending on the model of the printer.
This printer supports a factory inspection mode, continuous grid pattern print mode, 3
patterns print mode and NV-RAM value dump mode.
The operation of the inspection mode is as follows.
(1)
Turn off the power switch of the printer.
(2)
With the top cover open, turn on the power switch while holding down the
switch on the control panel.
When you enter this inspection mode, the Drum lamp is ON. Holding down the panel
switch will cause the lamps turn ON in the order Drum
→
Alarm
→
Ready
→
Data
→
Drum. When you release the switch, a mode is selected.
The mode selected is indicated by the lamp which is ON when you release the
switch.
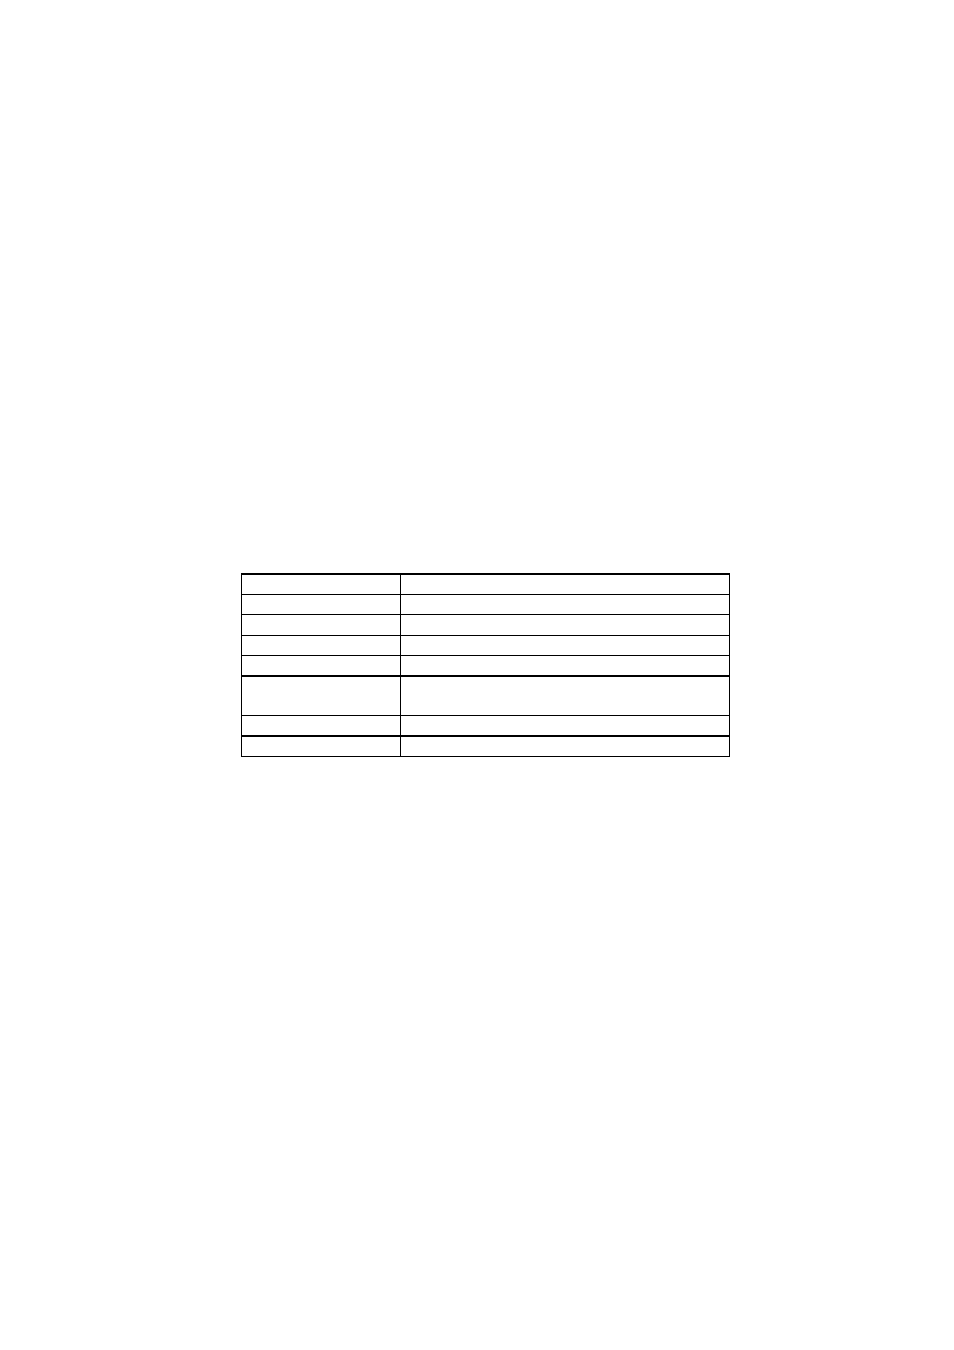
The inspection modes are assigned to the respective lamps as shown below.
Lamp
Type of inspection
Drum
Factory inspection mode
Alarm
Continuous grid pattern print mode
Ready
3 patterns print mode (grid
Æ
zip
Æ
black)
Data
NV-RAM value dump mode
Drum + Alarm
ROM code reprogramming mode (only when
the flash memory is fitted)
Alarm + Ready
RAM check
Ready + Data
4% density pattern print mode
Details of the factory inspection mode are as follows.
This mode is used to check if the sensors in the printer are functioning correctly. In the
process of this inspection, the lamps and the switch on the control panel are also checked.
On entering this mode, the lamps show the status of the respective sensors as follows.