Ht gs s gf kn sch st rs – Retsch PT 100 User Manual
Page 23
Operating the machine
23
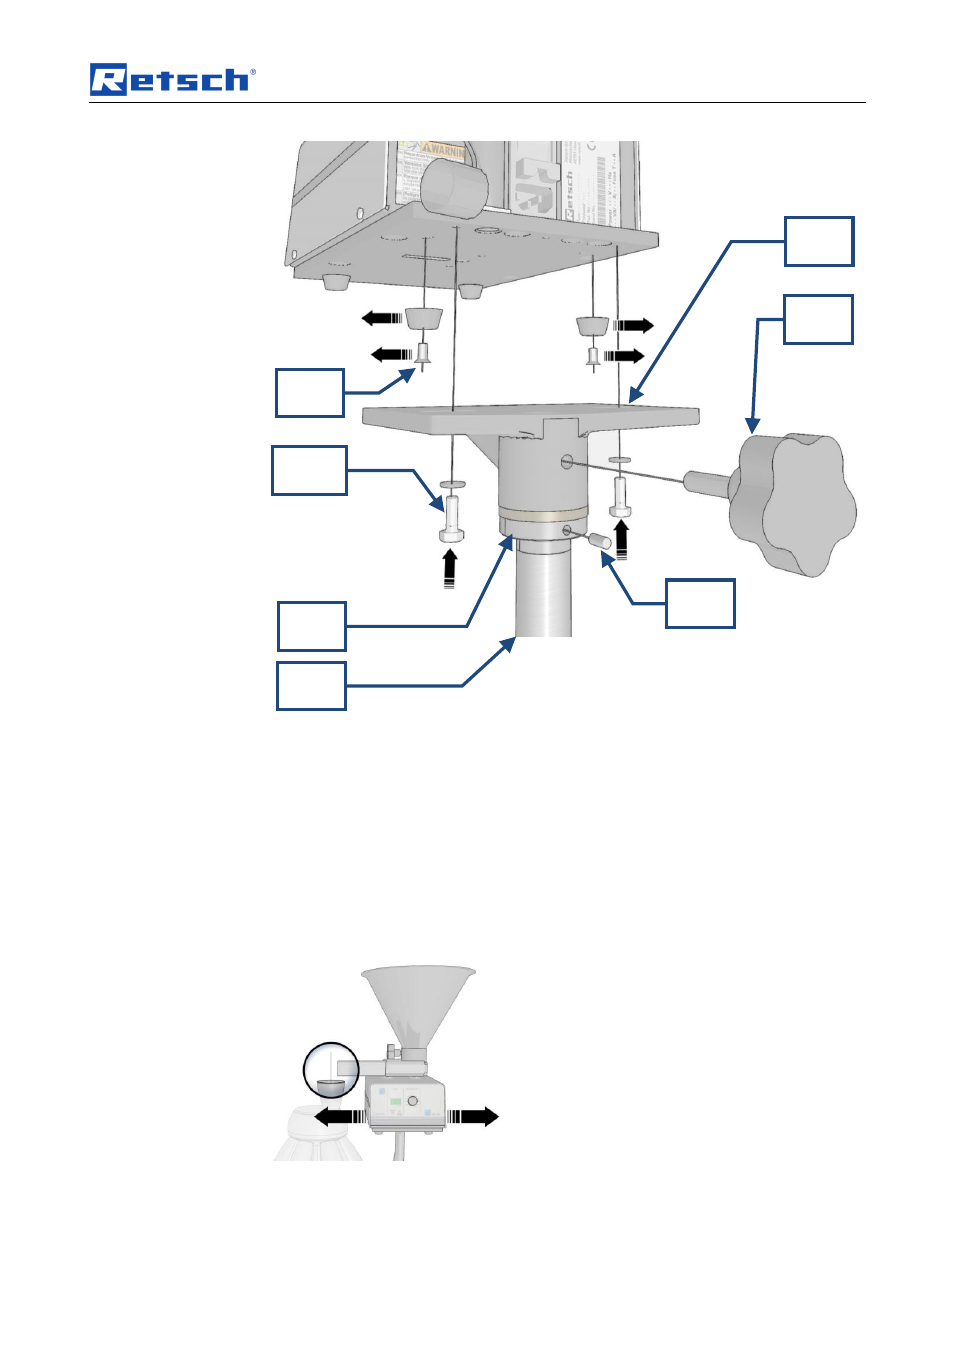
Fig. 2: Mounting the vibratory feeder
–
The support (HT) is already completely pre-assembled with the stand rod (ST).
•
Unscrew the two rubber feet (GF) at the back of the DR100.
•
Loosen the hand screw (KN).
•
Take the support (HT) off the stand rod (ST).
•
Connect the DR 100 and the support (HT) by means of the hexagonal cap
screws and washers (SCH).
Pay attention to the side position of the DR100 vibratory feeder. The position of the
hopper opening varies depending on the dividing head being used.
Fig. 3: Positioning the vibratory feeder
HT
GS
S
GF
KN
SCH
ST
RS
See also other documents in the category Retsch Equipment:
- BB 50 (41 pages)
- BB 100 (24 pages)
- BB 200 (24 pages)
- BB 300 (24 pages)
- Cryomill (68 pages)
- CryoMill Autofill 50l (28 pages)
- DM 200 (20 pages)
- DM 400 (60 pages)
- Emax (67 pages)
- GM 200 (44 pages)
- GM 300 (44 pages)
- MM 200 (32 pages)
- MM 400 (32 pages)
- PM 100 (44 pages)
- PM 400 (36 pages)
- PM GrindControl (48 pages)
- RM 200 (36 pages)
- RS 200 (32 pages)
- SK 100 (24 pages)
- SM 100 (48 pages)
- SM 200 (48 pages)
- SM 300 (44 pages)
- Cyclone - SM 300 (20 pages)
- SR 200 (24 pages)
- SR 300 (24 pages)
- TWISTER (44 pages)
- ZM 200 (32 pages)
- AS 200 jet - Automatic Vacuum Regulation (6 pages)
- AS 200 control - natural frequency (32 pages)
- AS 200 (36 pages)
- AS 200 jet (56 pages)
- AS 200 jet (48 pages)
- AS 200 tap 30.025.0001 (28 pages)
- AS 200 tap 30.025.1001 (28 pages)
- AS 300 (32 pages)
- AS 400 (32 pages)
- AS 400 (28 pages)
- AS 450 basic (40 pages)
- AS 450 basic (44 pages)
- AS 450 control (52 pages)
- DR 100 (40 pages)
- DR 100 (28 pages)
- PP 25 (32 pages)
- PP 40 (28 pages)