Ls r, Operating the machine, 15 removing and inserting the rotor – Retsch TWISTER User Manual
Page 26: Caution
Operating the machine
26
Pos : 7. 38 /00005 Ü berschrif ten/ 1. 1 Ü bersc hrift en/ 1. 1 Übersc hrift en BD A/ 11 Rotor ent nehmen und ei ns etz en @ 3\ mod_1284537943606_9. doc @ 23413 @ @ 1
5.15 Removing and inserting the rotor
Pos : 7. 39 /00004 Warnhinweis e/ V0058 VOR SICHT Sc hnitt verletzung sc harfe Kanten an R oto und Sieb (Z ykl on Mill T wist er) @ 3\ mod_1288857787413_9.doc @ 23960 @ @ 1
CAUTION
5.V0058
Danger of injuries caused by cuts
Sharp cutters of the rotor and sharp edged sieve
–
The sharp edges of the rotor and sieve may lead to hands being cut.
•
Use protective gloves when replacing the rotor or sieve and when
cleaning the grinding chamber.
Pos : 7. 40 /00004 Warnhinweis e/ V0054 VOR SICHT Q uetsc hungen und Prell ung en Beweglic he Teil e R otor Behält er (SM 300, SM 200, SM 100) @ 3\ mod_1282743271379_9.doc @ 22859 @ @ 1
CAUTION
6.V0054
Contusions and bruising
Moving parts
– receptacle and rotor
–
The receptacle and rotor may fall down after removal and cause injury.
•
Be careful and put the parts down safely.
•
Do not place any objects on the device.
Pos : 7. 41 /00010 Bedi enungsanleit ung en Kapitels ammlungen/T wis ter Mill ( 2011) /0015 Z yklon Mill T wis ter Bedi enung/ 1505 N IR Modul R otor ent nehmen und ei ns etz en @ 3\ mod_1284365243611_9. doc @ 23196 @ @ 1
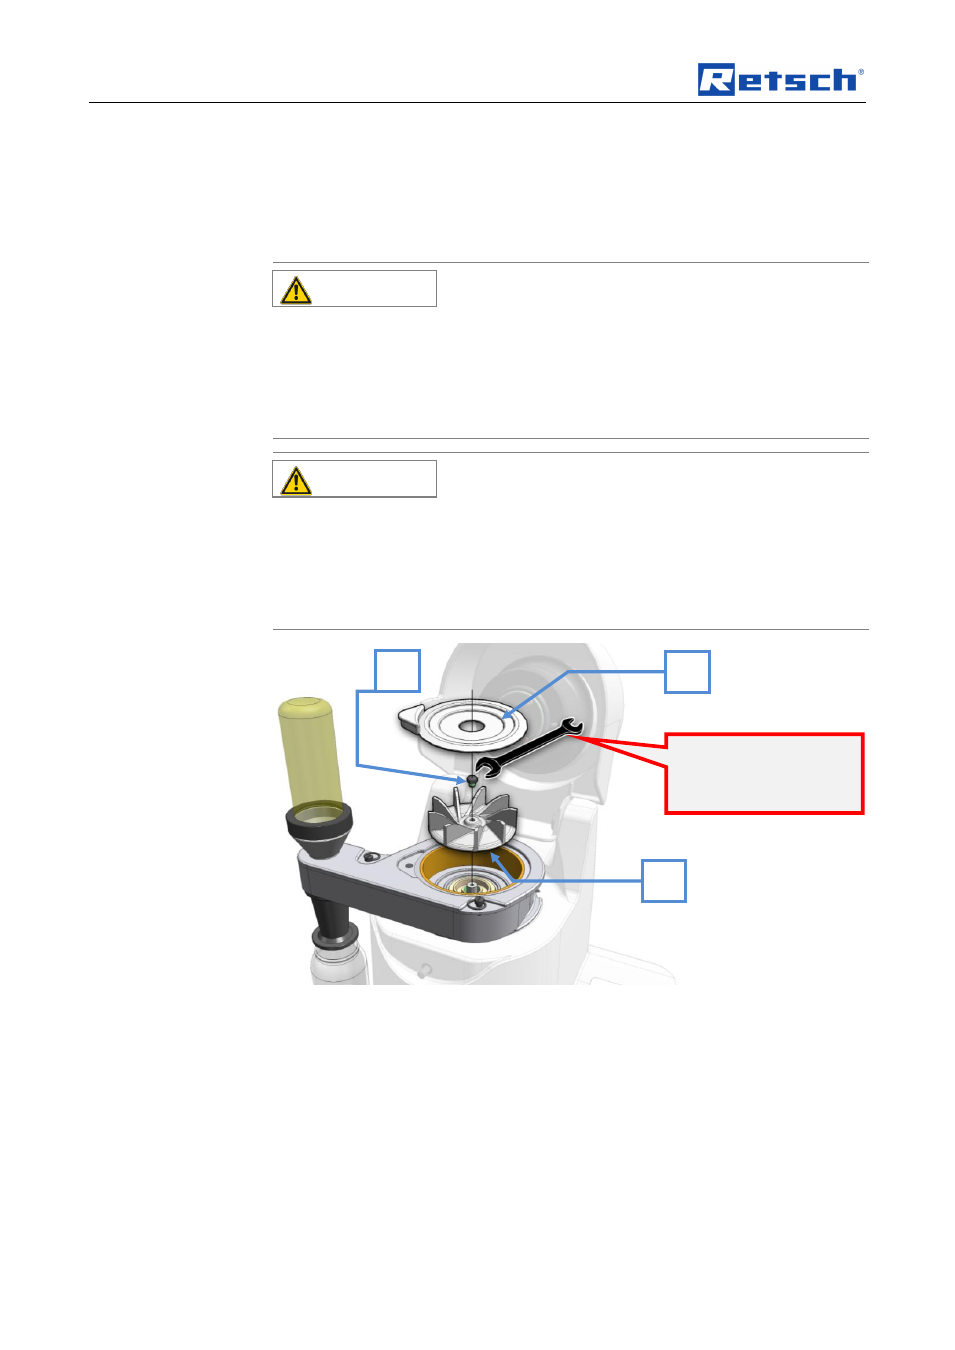
Fig. 18: Replacing the rotor
•
Remove the grinding chamber cover (L).
•
Unscrew the rotor screw (S).
•
Remove the rotor (R).
L
S
R
NOTICE
Tighten to approx. 2Nm
- 3Nm (hand tight).