Maintenance/service – MacDon 872 Combine Adapter User Manual
Page 24
24
MAINTENANCE/SERVICE
RETRACTING TINE DRUM
Tine Pitch Adjustment
Tines should be fully extended on the front side of
the drum and full retracted on the rear (feeder
house) side.
Tine pitch can be adjusted to change the
aggressiveness of the tines. More aggressive tine
pitch means the tines stay extended for longer as
they approach the feed chain on the combine.
Less aggressive means the tines retract sooner.
IMPORTANT: Always maintain a minimum 3/8”
(10 mm) clearance to header with top link fully
retracted.
To adjust tine pitch, reposition bolts (A) in cam
plate at right side of adapter. Angling the cam plate
further up at the front decreases tine
aggressiveness. Angling the cam plate down at the
front increases tine aggressiveness.
Tine Installation
Depending on deck size, some tines may have
been removed from the drum at the factory to suit
the recommended header side draper opening
size. Should header side draper opening be
widened to suit bulky crops, install tines on outer
ends of drum as required to aid feeding. Always
check clearances after adding tines, and maintain
2” (50 mm) gap from tines to side drapers. When
adding or replacing tines, install hair-pin (C) as
shown, with head leading in direction of drum
rotation and clamping side of pin inboard.
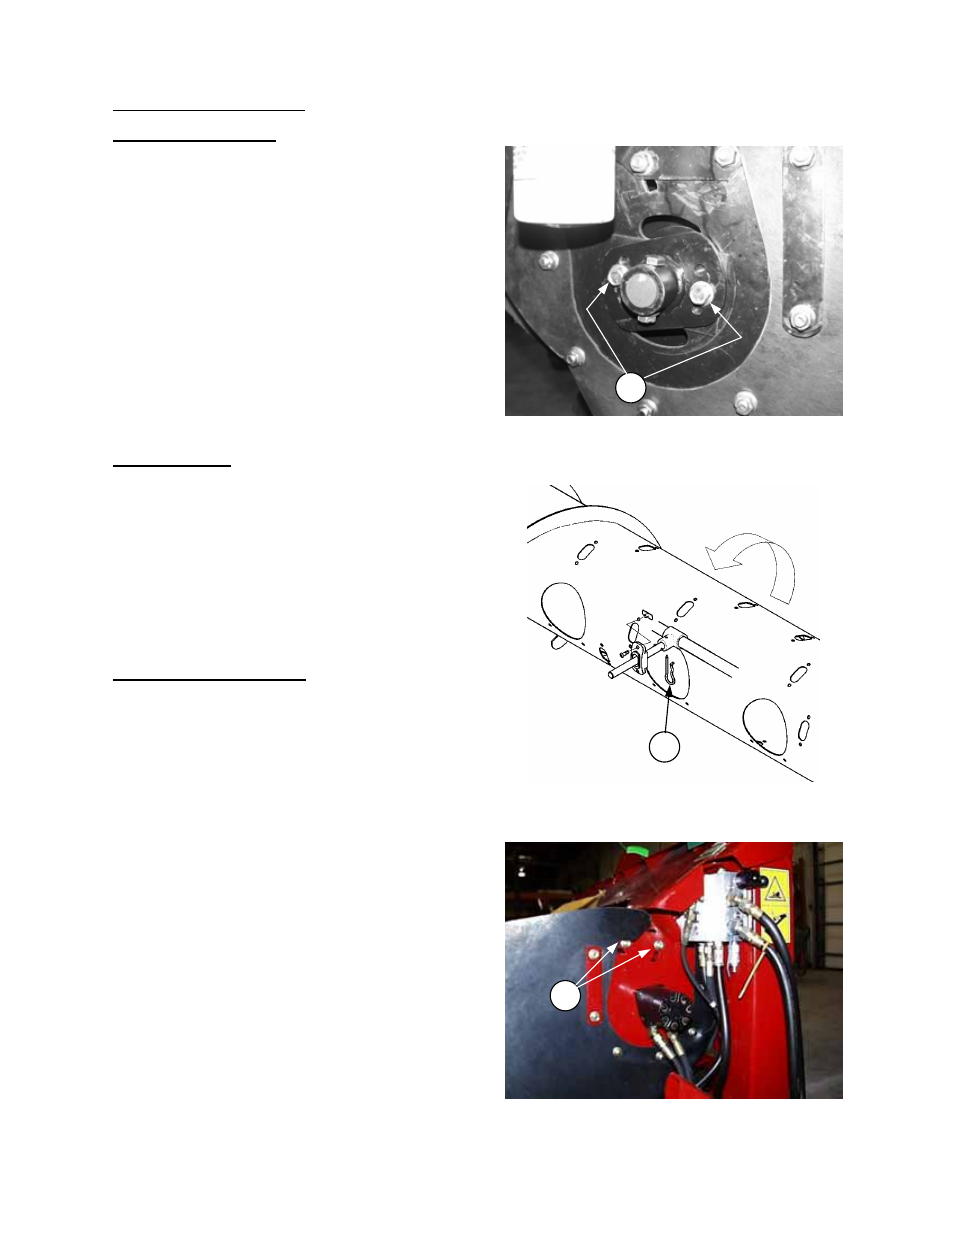
Drum Fore-Aft Adjustment
To adjust drum fore-aft position, loosen two
mounting bolts (B) each side and swing drum fore-
aft in rear slot. Tighten bolts to secure the position.
In general, there should be 1 to 2 inches (25 to 50
mm) clearance between adapter drum and
combine feed drum, with combine feed drum
floated up.
NOTE: For best performance, dust shields should
be removed from combine whenever possible. If
dust shields are not removable, adapter drum
should be within ¼ to ¾ inches (6 to 19 mm) of the
dust shield.
NOTE: Always check drum clearance to header
frame after adjusting header angle. Flattening the
header angle will reduce the clearance to the drum
fingers.
Windrowing – When laying a windrow out the end
of the header, move the drum back to clear header
backsheet when it is moved across the center
opening. In some cases it will be necessary to also
remove one row of tines from drum to provide
adequate clearance. See page 14 for procedure to
stop drum rotation when windrowing, and secure
drum if necessary.
For a complete list of steps to convert to windrowing
mode, see “End Delivery” in the Operation section
of your Header Operator’s Manual.
TINE PITCH ADJUSTMENT
A
DRUM FORE-AFT ADJUSTMENT
B
C
TINE INSTALLATION