D. jumpers, Fixed-baud modes – Pololu Qik 2s12v10 User Manual
Page 11
The 3×2 header strip can be soldered to the jumper pins as shown above, which lets you make use of the included
shorting blocks, and the included terminal blocks lock together to make a single, 6-pin strip that you can solder to
the power side of the board.
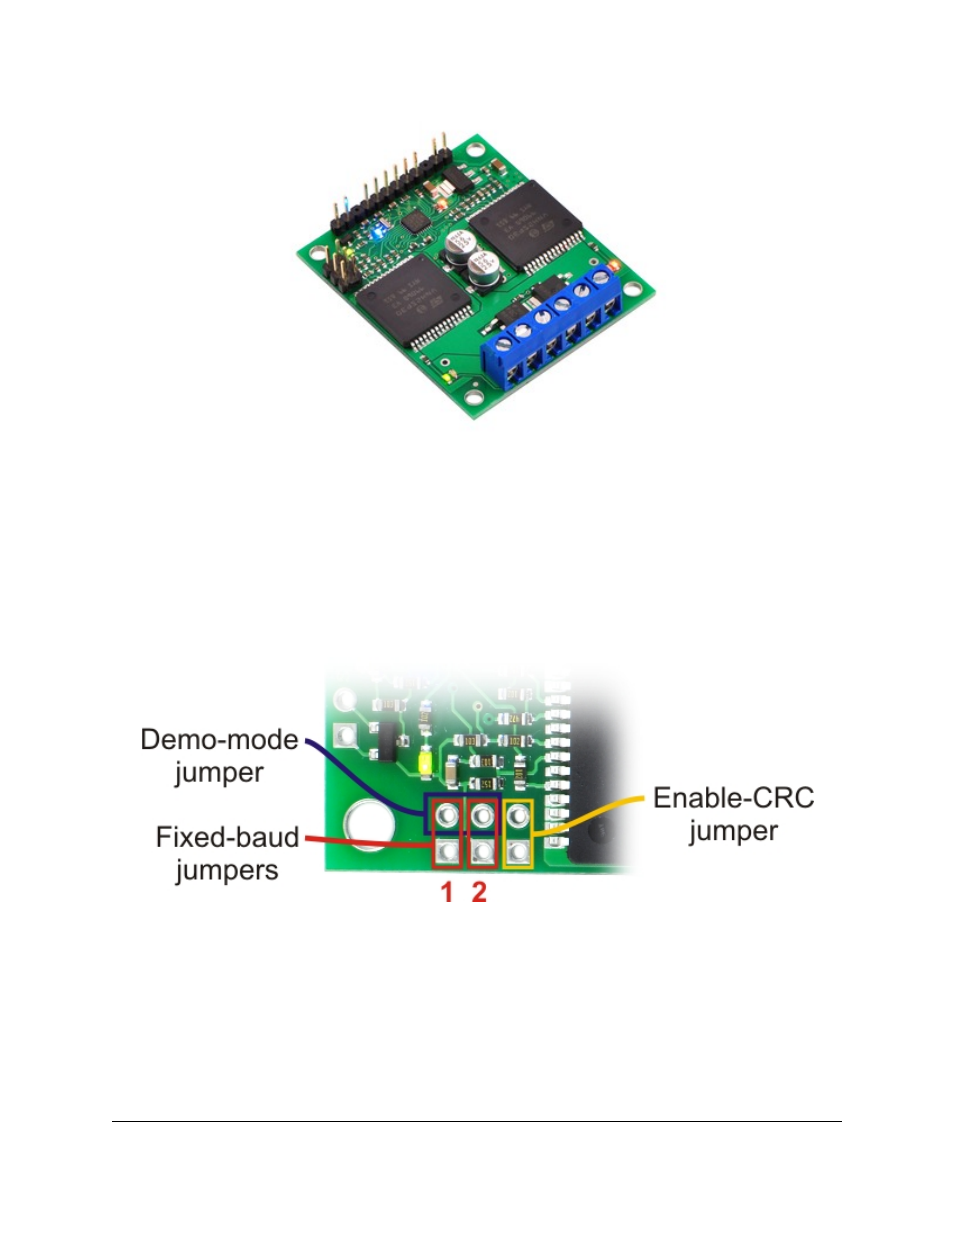
3.d. Jumpers
The qik jumpers allow you to easily alter the behavior of the device. These jumpers can be left off for most
applications. If you use a jumper, it must be in place when the unit first starts up; changing the jumpers while
the unit is running does not take effect until the qik is reset or power is cycled. The only exception to this is the
removal of the demo mode jumper while the qik is in demo mode, which takes the qik out of demo mode.
Fixed-Baud Modes
The jumpers labeled BAUD1 and BAUD2 on the bottom of the qik (i.e. the two closest to the logic connection
side of the board) can be used to set the qik to fixed-baud mode when a shorting block is in place across one or
both jumper locations. When neither of these jumper locations has a shorting block, the qik is in auto-detect mode
and determines the baud rate automatically when it receives the first 0xAA (170 in decimal) byte. If you have a
noisy serial connection or find that the automatic baud detection is not working well for your application, you can
use a shorting block or some other jumper to ground pins BAUD1 and/or BAUD2 (the circular pads right next to
Qik 2s12v10 User's Guide
© 2001–2012 Pololu Corporation
3. Connecting the Qik
Page 11 of 33