Fitting metal cabinet plastic cabinet, Ac mains connection – Paxton I/O board with 2A/12V DC boxed power supply User Manual
Page 2
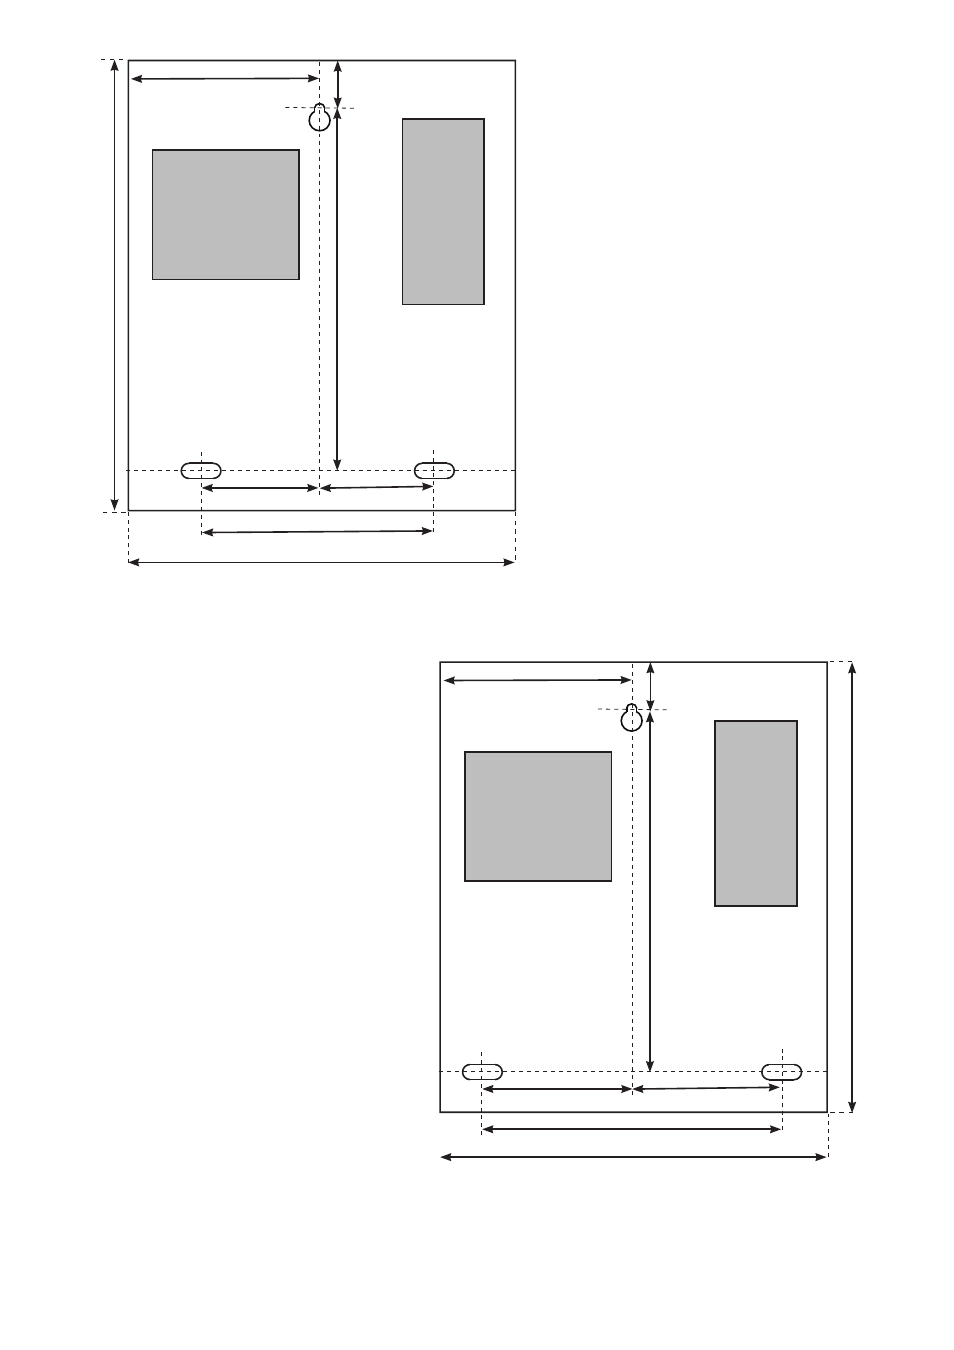
1. Screws and wall plugs are provided in a fitting
kit. With reference to the diagrams, determine
where the top, central mounting position is required
and drill a hole suitable for a No 8 wall plug.
2. Tap in one of the wall plugs.
3. Put in one of the long screws, leaving a suitable
gap to the wall surface and slide the cabinet over it.
4. Mark the hole positions for the lower 2 screws.
5. Remove the cabinet and drill the additional holes.
6. Tap in the 2 wall plugs and hang the cabinet back
onto the top screw.
7. Secure the cabinet with the 2 lower screws.
8. Tighten the top screw.
Fitting
Metal Cabinet
Plastic Cabinet
A detachable figure 8 power cable is
provided with the unit. This is pre-
stripped at one end for connection to a
fused spur.
Anchor points are supplied inside the
case to secure the incoming mains cable.
(cable tidy/ties are provided) There are
also 'knock-outs' in the case to allow
convenient access for the cable.
Ensure that the supplied compression
gland is used when passing the mains
cable through any holes in the cabinet.
AC Mains Connection
Cabling
The power supply is double insulated and
requires no additional earth connection.
The PSU's battery function will not work
until this unit has first been connected
to the mains supply. It is the loss of this
supply that switches the unit to battery
power.
This product is not suitable for retail sale. All warranties are invalid
if this product is not installed by a competent person.
232 mm
68 mm
116 mm
25 mm
320 mm
268 mm
68 mm
136 mm
236 mm
196 mm
118 mm
18 mm
320 mm
284 mm
98 mm
98 mm