Paxton Easyprox nano starter kit User Manual
Page 2
Page 2
s
s
e
c
c
A
n
o
t
x
a
P
Net2 Logon
User name:
OK
Cancel
Password:
Log onto Page
Net2
Net2
09:00
Net2 Access
Control
s
P axton Access
T his ba tt er y pack is t o b e
r eplac ed with P ax t on A cc ess
par t numb er
746-003 only .
6V
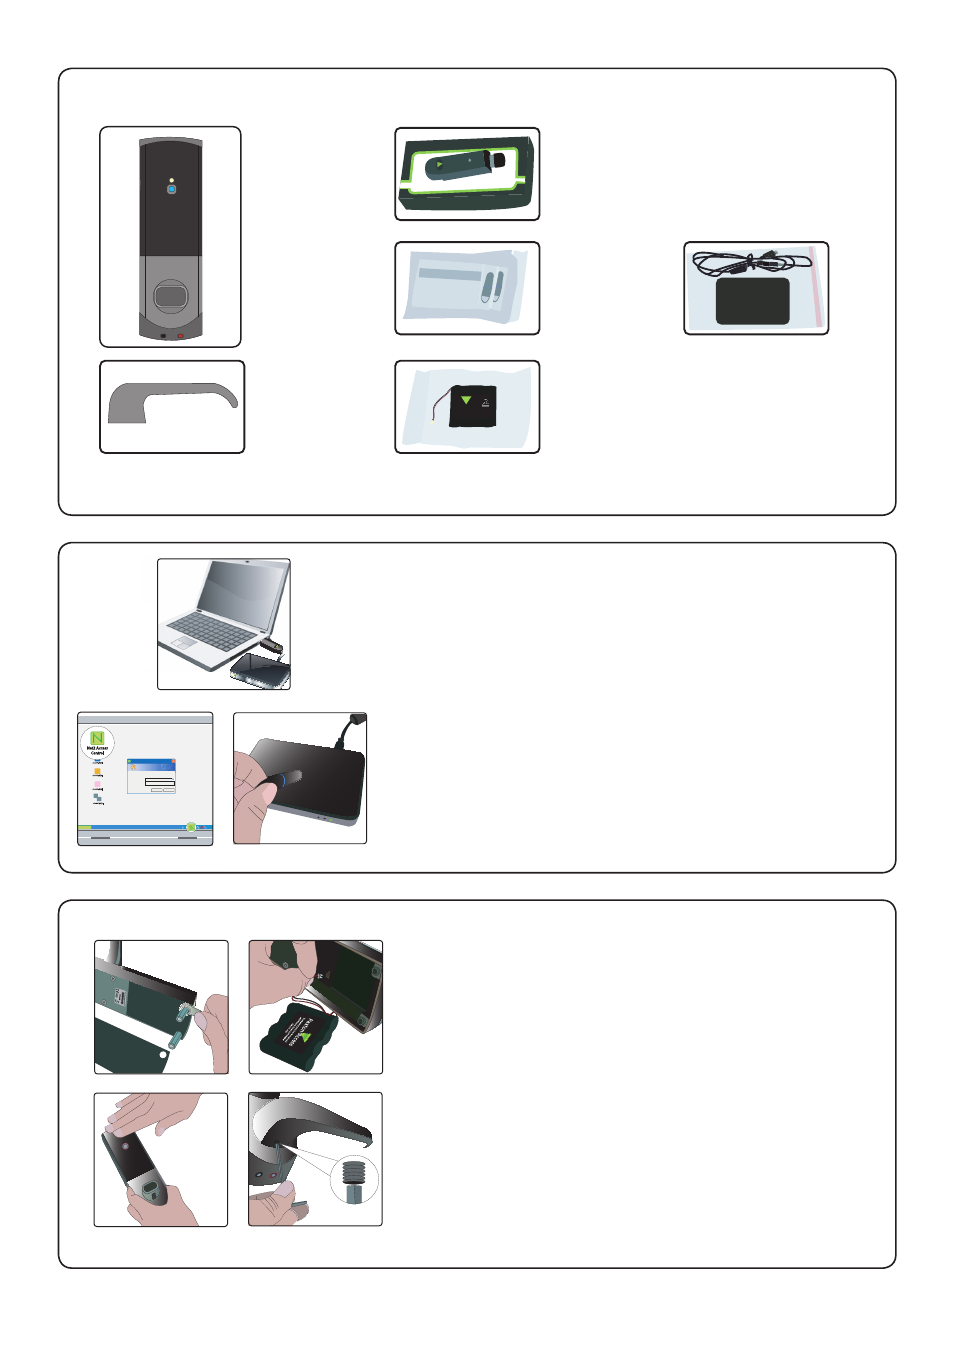
Identify the parts.
Setting up the PC
Powering up the Easyprox
1 - Front lock assembly
2 - Handle
3 - Net2Air dongle
4 - User tokens
5 - Battery pack
6 - Desktop reader
(underneath main packaging)
1. Plug the dongle into a spare USB port.
2. Plug the desktop reader into a spare USB port.
3. Download the software using the link provided.
4. Run the Net2 application - The Net2 Server 'S' icon
will display in the System tray.
5. Log in to the application - Password = net2
6. Present a token to the Desktop reader.
7. The 'Add user' page will open. - The token number
is displayed in the 'Token number' box.
8. Add a user name and select 'All hours-all doors' as
the access level.
9. Click 'Add user' and 'Close'. The user record will display.
Use this same token through the remaining sections of
this guide.
1. Remove the plastic access plate at the rear of the unit
by removing the top standoff screws.
2. Push the battery pack lead onto the white power plug.
3. Fit the battery pack into the unit and replace and secure
the access plate. - The unit will beep twice.
4. LED Indication - Move your hand over the reader and
the Red LED will flash. This function is used to turn on
the proximity reader to read a token.
5. Slide on the handle and fix with the grub screw.
- Moving the handle will now also flash the Red LED.
Battery terminals are located on the base to power the
unit should the internal battery pack fail during service.
The handle is free to move and does not engage with the
lock spindle until access has been granted by presenting a
valid user card.
1
2
3
4
5
6