Maintenance – Multiquip HHNG5 User Manual
Page 30
page 30 — HHNg5 RIDe-ON TROWeL • OpeRaTION maNuaL — Rev. #0 (07/16/13)
MAIntEnAncE
CHeCkINg THe DRIve BeLT
The drive belt needs to be changed as soon as it begins
to show signs of wear.
dO NOT reuse a belt under any
circumstances. Indications of excessive belt wear are
fraying, squealing when in use, belts that emit smoke or a
burning rubber smell when in use.
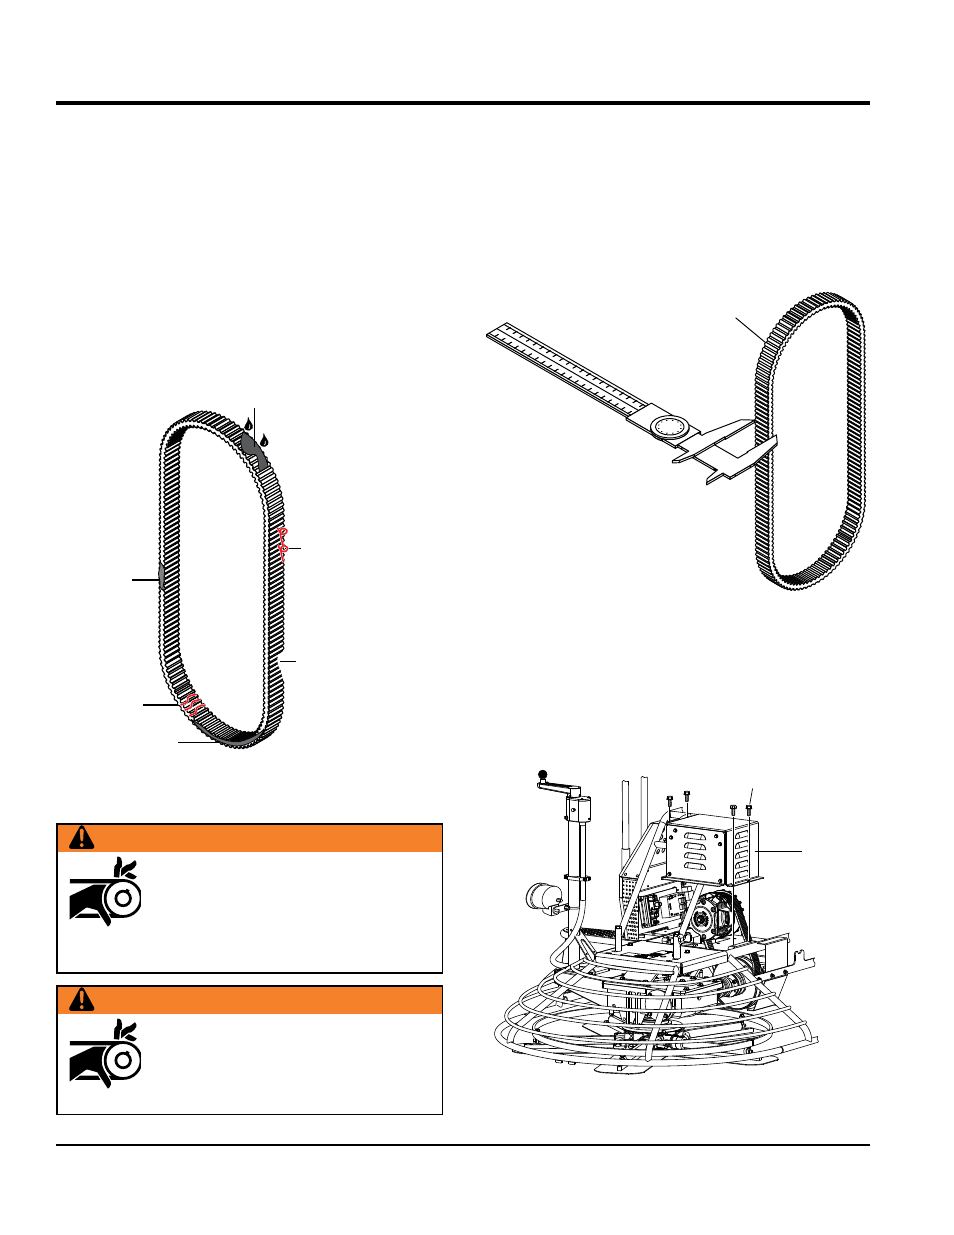
To gain access to the drive belt (Figure 23), remove the
drive belt guard cover, then visually inspect the drive belt
for signs of damage or excessive wear. If the drive belt is
worn or damaged, replace the drive belt.
Figure 23. Drive Belt Inspection
CRACKS
SIDEWALL
WEAR
OIL SOAKED
MISSING RUBBER
GLAZED
CORD FAILURE
wARNiNG
dO NOT attempt to insert hands or tools into
the drive belt area while the engine is running
and the safety guard has been removed.
Keep fingers, hands, hair and clothing away
from all moving parts to prevent bodily injury.
wARNiNG
dO NOT remove the drive belt guard cover
until the muffler has cooled. Allow the entire
trowel to cool down before performing this
procedure.
BeLT meaSuRemeNT
Long life can be expected with this drive assembly as long
as the drive belt is kept properly aligned.
The clutch will not shift correctly if the drive belt width is
below 1.14". Measure the CVT drive belt (Figure 24) every
100 hours of use to make sure it is within the specified
tolerance.
Figure 24. Belt Measurement
RemOvINg THe DRIve BeLT
11. Remove the retaining screws (4) that secure the drive
belt guard (Figure 25) to the trowel frame.
Figure 25. Drive Belt Guard Removal
CVT BELT
CALIPERS
DRIVE
BELT GUARD
RETAINING
SCREWS (4)