Maintenance – Multiquip HHN34TVD User Manual
Page 25
HHN34TVD RIDe-ON TROWeL • OpeRaTION maNuaL — ReV. #2 (01/10/11) — page 25
Maintenance
When performing maintenance on the trowel or engine,
follow all safety messages and rules for safe operation
stated at the beginning of this manual.
See the engine manual supplied with your machine for
appropriate engine maintenance schedule and
troubleshooting guide for problems.
maINTeNaNCe SCHeDuLe
Daily (8-10 Hours)
1. Check the fluid levels in the engine and gearboxes, fill
as necessary.
2. Check V-belt.
Weekly (30-40 Hours)
1. Relube arms, thrust collar and steering links.
2. Replace blades if necessary.
3. Check the engine air filter and change as necessary.
monthly (100-150 Hours)
1. Remove, clean, reinstall and relube the arms and thrust
collar. Adjust the blade arms.
2. Replace gearbox lubricant after the first 100 hours of
operation. Replace every 500-600 hours.
3. Check drive belt for excessive wear.
4. Replace engine oil and filter as necessary, see engine
manual.
yearly (500-600 Hours)
1. Check the arm bushings, thrust collar bushings, shaft
seals and belts. Replace if necessary
2. Check pitch control cables for wear.
WaRNINg
Accidental starts can cause severe injury
or death.
aLWayS place the ON/OFF switch in the
OFF position before performing maintenance.
Disconnect negative battery cable from
battery before servicing.
aLWayS allow the engine to cool before
servicing.
NeVeR attempt any maintenance
work on a hot (muffler, radiator, etc.) trowel.
3. Replace gearbox lubricant.
4. Check and adjust blade speed.
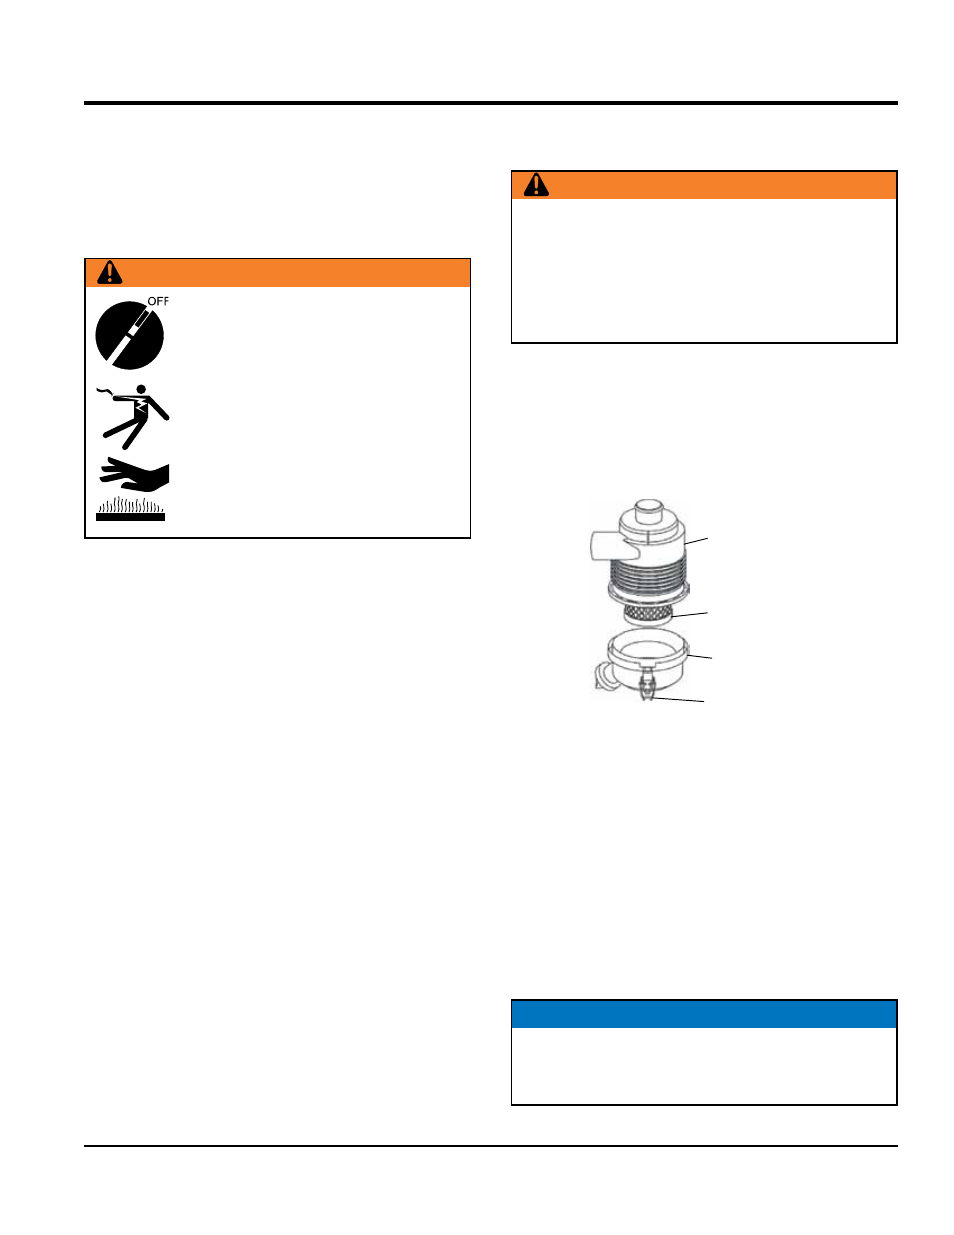
aIR CLeaNeR (DaILy)
The Vanguard 34 hp turbo diesel engine is equipped with
a replaceable, high-density paper air cleaner element.
Check the air cleaner daily or before starting the engine.
Check for and correct heavy buildup of dirt and debris along
with loose or damaged components (Figure 12).
Figure 12. Air Cleaner Components
1. Unlock the cover clamps and remove cover.
2. Remove cartridge from air cleaner body.
3. Clean cartridge by gently tapping the end with the
handle of a screwdriver. Replace cartridge if very dirty
or damaged.
4. Carefully clean out the air cleaner cover.
5. Install cartridge in body.
6. Install cover and lock cover clamps.
WaRNINg
Certain maintenance operations or machine
adjustments require specialized knowledge and skill.
Attempting to perform maintenance operations or
adjustments without the proper knowledge, skills or
training could result in equipment damage or injury to
personnel. If in doubt, consult your dealer.
AIR CLEANER
BODY
CARTRIDGE
COVER
LATCHES
(COVER CLAMPS)
NOTICE
Operating the engine with loose or damaged air cleaner
components could allow unfiltered air into the engine
causing premature wear and failure.