Wrs-5200 — assembly instructions – Multiquip WRS5200 User Manual
Page 20
PAGE 20 — WRS 5200 RIDE-ON ROLLER SCREED — PARTS MANUAL — REV. #2 (08/09/02)
Task 10.
Place the power unit on the appropriate end and the roller
screed is ready to use.
D.
HANDLING
1.
Moving the Machine
WARNING!
Your Whiteman roller screed was designed to be moved
and handled in several ways. Casters that can be lowered
are provided to move the machine on and off forms and for
moving short distances. When using the casters and
moving short distances, the power unit may be left on the
roller screed.
If lifting the roller screed is planned for transporting or other
reasons, some precautions should be followed.
WARNING!
⇒ When lifting the roller screed to load for transporting or
other purposes, the power unit should be taken off.
⇒ Care should be taken to lift the machine correctly. With
a fork lift, one end at a time can be lifted onto the trans-
port. Lifting straps should be placed around the top pipe
in the 5’ end sections. Figure 10 illustrates the recom-
mended lifting points.
⇒ Care should These lifting positions are the same for both
ends. Attach a lifting strap to one of these points. The
safety snap pins in the top turnbuckles of the truss sec-
tions are not designed to carry the weight of the ma-
chine during lifting. The top of the truss sections should
always be kept in compression. Lifting with straps or
forks from center sections may damage the machine or
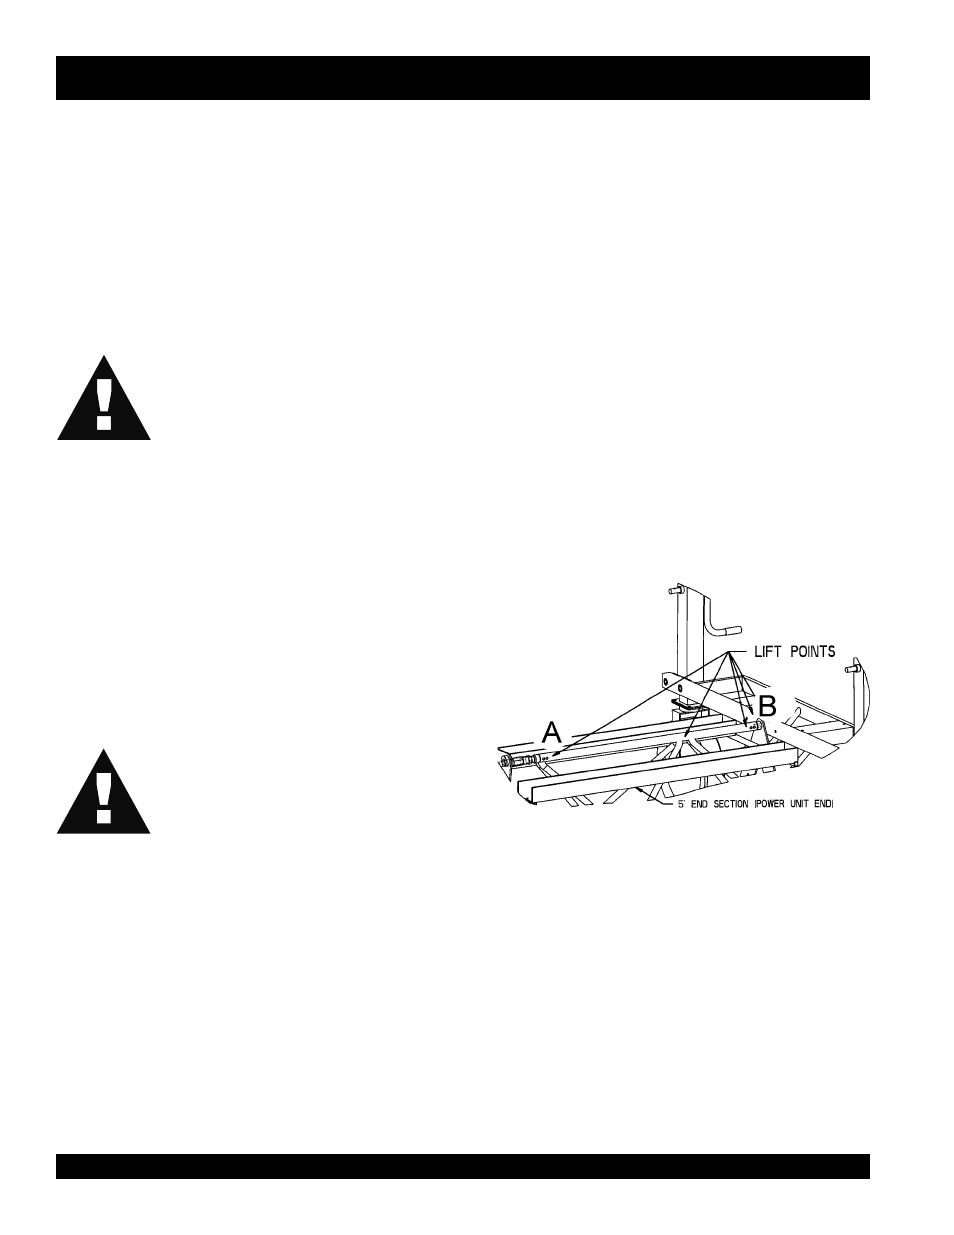
bend these pins. Figure 11 shows lifting points A & B.
Lifting point “B” can be used with any screed length while
lifting point “A” should only be used for screed lengths
longer than 32 feet.
Figure 11. Lifting Points
WRS-5200 — ASSEMBLY INSTRUCTIONS
NEVER TRANSPORT SCREED WITH
THE POWER UNIT ON THE MACHINE
.
DO NOT ATTEMPT TO LIFT THE SCREED
FROM THE MIDDLE SECTIONS.