How to use gage length de-extenders, How to use gage length de-extenders 37 – MTS Axial Extensometers User Manual
Page 37
Configuration
37
How to Use Gage Length De-Extenders
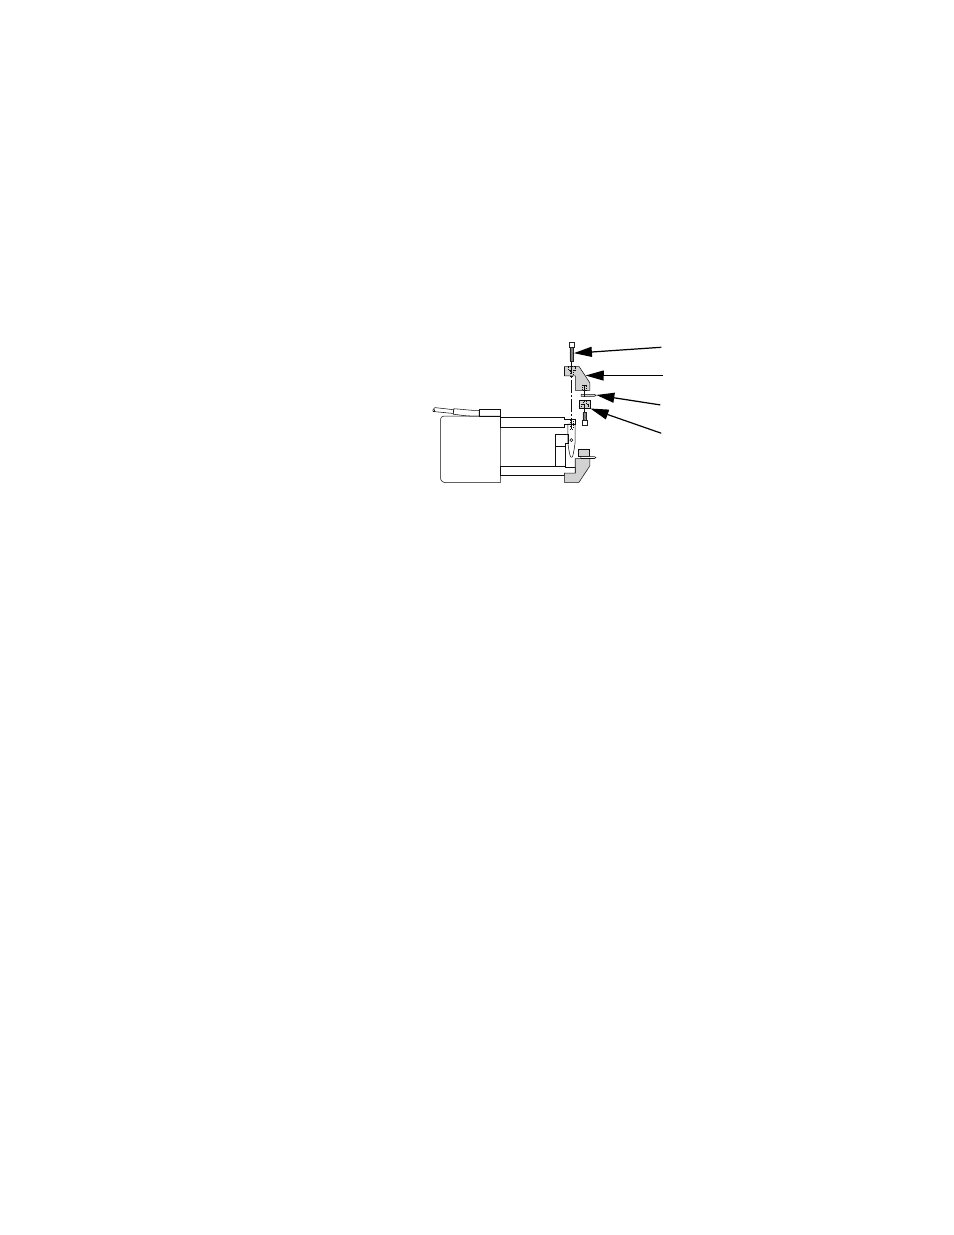
Gage length de-extenders let you change where the extensometer
contacts the specimen. The following figure shows a typical gage length
de-extender.
The following procedure describes a typical gage length de-extender
installation. Actual installation may vary. See the installation drawing
accompanying the gage length de-extender for specific details.
1. Zero the arms of the extensometer. Depending on the extensometer,
this can be accomplished using the zero pin, stop block, or a special
fixture.
2. Remove the existing knife edge hold-down or quick attachment
adapter from the upper arm of the extensometer. Take care not to
loosen the spring attachment hooks and knife edges.
Note
A knife edge hold-down and spring attachment hook for small
diameter specimens are already attached to the de-extender.
3. Loosely attach a gage length de-extender to one arm of the
extensometer. Use the socket head cap screws which secured the
fixtures removed in Step 2.
4. While pressing the de-extender against the end of the extensometer
arm, tighten the two socket head cap screws.
5. Repeat Step 3 and Step 4 for the other extensometer arm.
6. Follow the appropriate procedure and recalibrate the extensometer.
m
MODEL
xxx.xxx-xx
Each gage length de-extender
comes with a knife edge hold-
down, knife edge and spring
attachment hook already
installed.
De-extender
Knife Edge
Cap Screw
Hold-down