Mayline Talon Tables v1 User Manual
Page 3
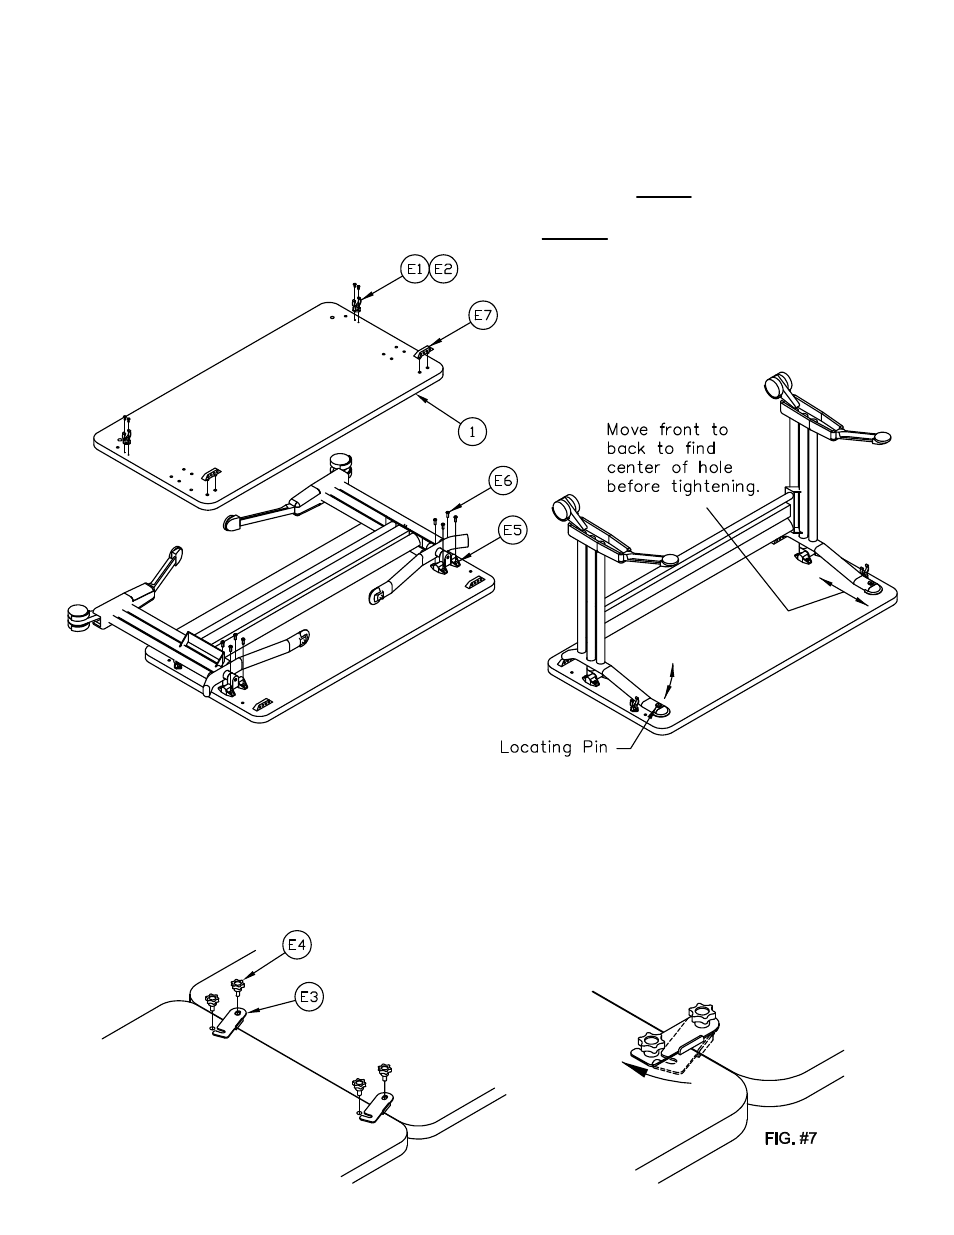
FIG. #4
FIG. #3
FIG. #5
3. Place the Top (1) face down on a clean, flat surface. Attach Plastic Inserts (E7) by aligning the stubs
with the pre-drilled holes in the Top. Tap firmly with a hammer until inserts are tight against the Top. See
Fig. #3
4. Attach Leg Clips (E1) into the pre-drilled holes in the Top using Screws (E2). See Fig. #3
5. Position the Base Assembly as shown in Fig #4. With a 4mm or 5/32" Allen Wrench install eight Screws
(E6) through the Mounting Bracket (E5) into the metal inserts in the Top. Do Not tighten at this time. Adjust
the frame so the Locating Pin properly seats itself into the center of the locating hole in the Top. See Fig.
#5. Return to the eight Screws (E6) and tighten at this time. Caution: Over tightening may cause damage
not covered by warrantee.
(3)
FIG. #6
6. Attach Ganging Brackets with tables in upright, leveled and approximate position. Insert
Knobs (E4) through the Ganging Brackets (E3) into the metal inserts in the Top. Do not tighten
Knobs at this time. See Fig. #6
7. Rotate the Ganging Bracket (E3) under the Knob (E4). Tighten Knobs. See figure #7.