7 replacing the glass anti-roll plate, Replacing the glass anti-roll plate, Daily operation – Leica Biosystems CM1100 User Manual
Page 21
21
Leica CM1100 – Cryostat
I
wrong: anti-roll guide positioned too low
II
wrong: anti-roll guide positioned too high
III
right: anti-roll guide correctly positioned
In position III the anti-roll plate is correctly adjusted.
It is recommended to first preadjust it at a great sec-
tion thickness (e.g. 10 μm) and then approach the re-
quired section thickness reducing the value in 5 μm
increments and slightly readjust the anti-roll plate in
height with the knurled knob (9, Fig. 20.2).
The glass anti-roll guide is resistant to ac-
etone.
For cleaning the knife holder, domestic deter-
gents can be used.
8.
Daily operation
•
To raise the anti-roll plate (to move it towards the
blade), turn the knurled knob (9, Fig. 20.2) counter-
clockwise.
•
To lower the anti-roll plate (to retract it from the
blade), turn the knurled knob (9, Fig. 20.2) clockwise.
If the anti-roll plate is positioned incorrectly to the blade
edge, problems I and II will occur. Position III shows
the correct position of the anti-roll plate.
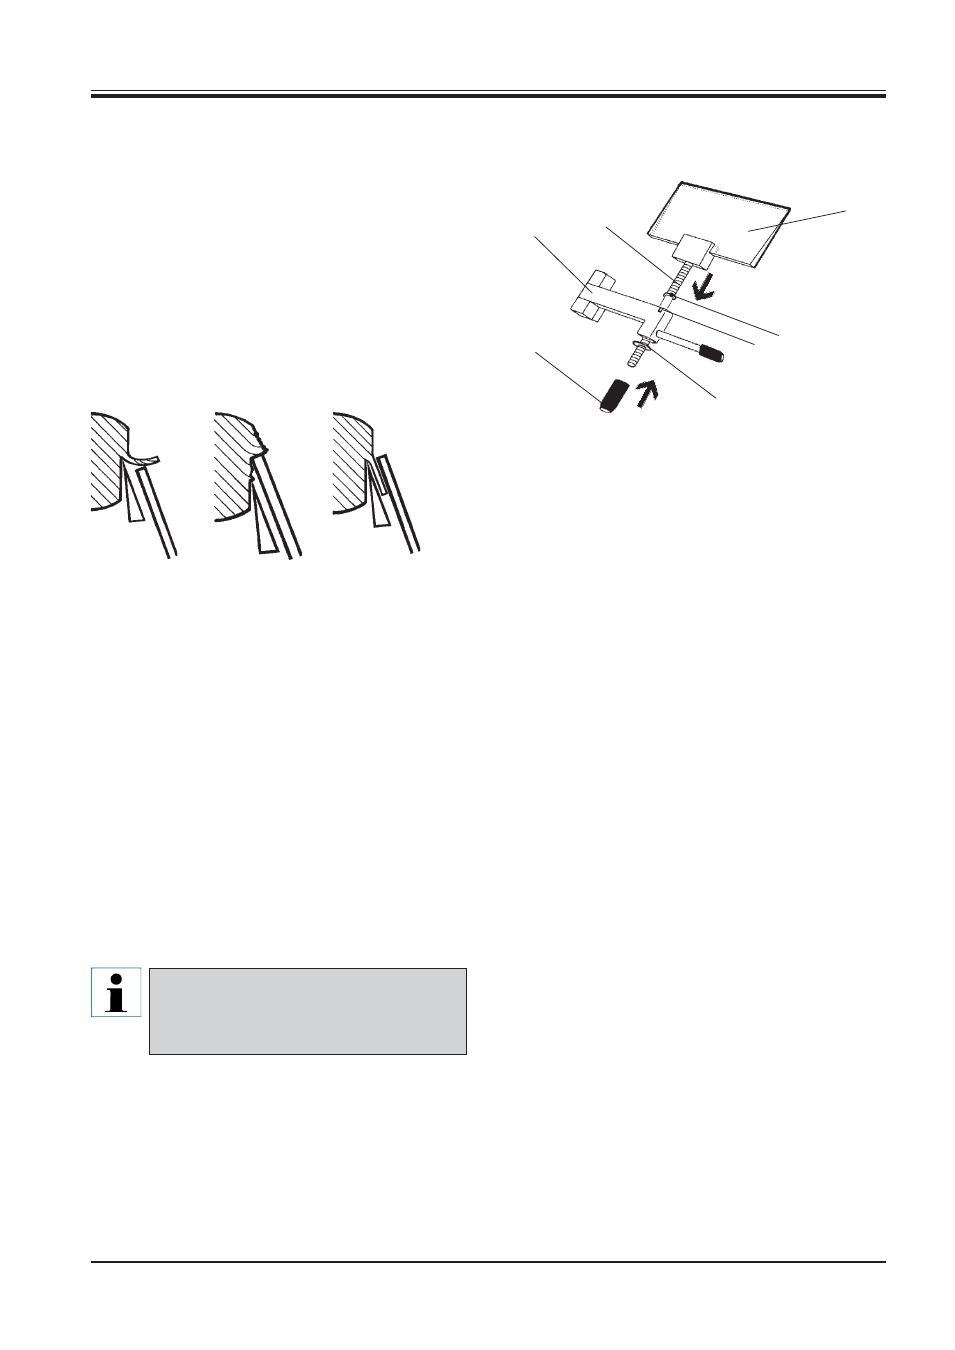
8.2.7 Replacing the glass anti-roll plate
Fig. 21.2
•
Remove the anti-roll guide from the blade by turn-
ing it to the left.
•
Unscrew the knurled knob (4).
•
Remove the white plastic washer (6) and pull the
anti-roll plate with the shaft up out of the swivel arm.
Install the new anti-roll plate:
•
Insert the shaft (2) of the glass anti-roll plate (1) in
the hole of the swivel arm (3) from above ensuring
the pin (6) is located in the notch (7).
•
Place the white plastic washer (5) on the shaft (2)
from below.
•
Screw the grip (4) on to the shaft (2) from below.
After installation, the anti-roll guide needs to be read-
justed as described at 8.2.6.
1
2
4
3
5
6
7
III
I
II
Fig. 21.1