Installation continued – Garland GF SENTRY SERIES INFRA-RED SALAMANDER BROILERS User Manual
Page 12
Part # 4526026 Rev. 03 (06/12/14)
Page 12
INSTALLATION Continued
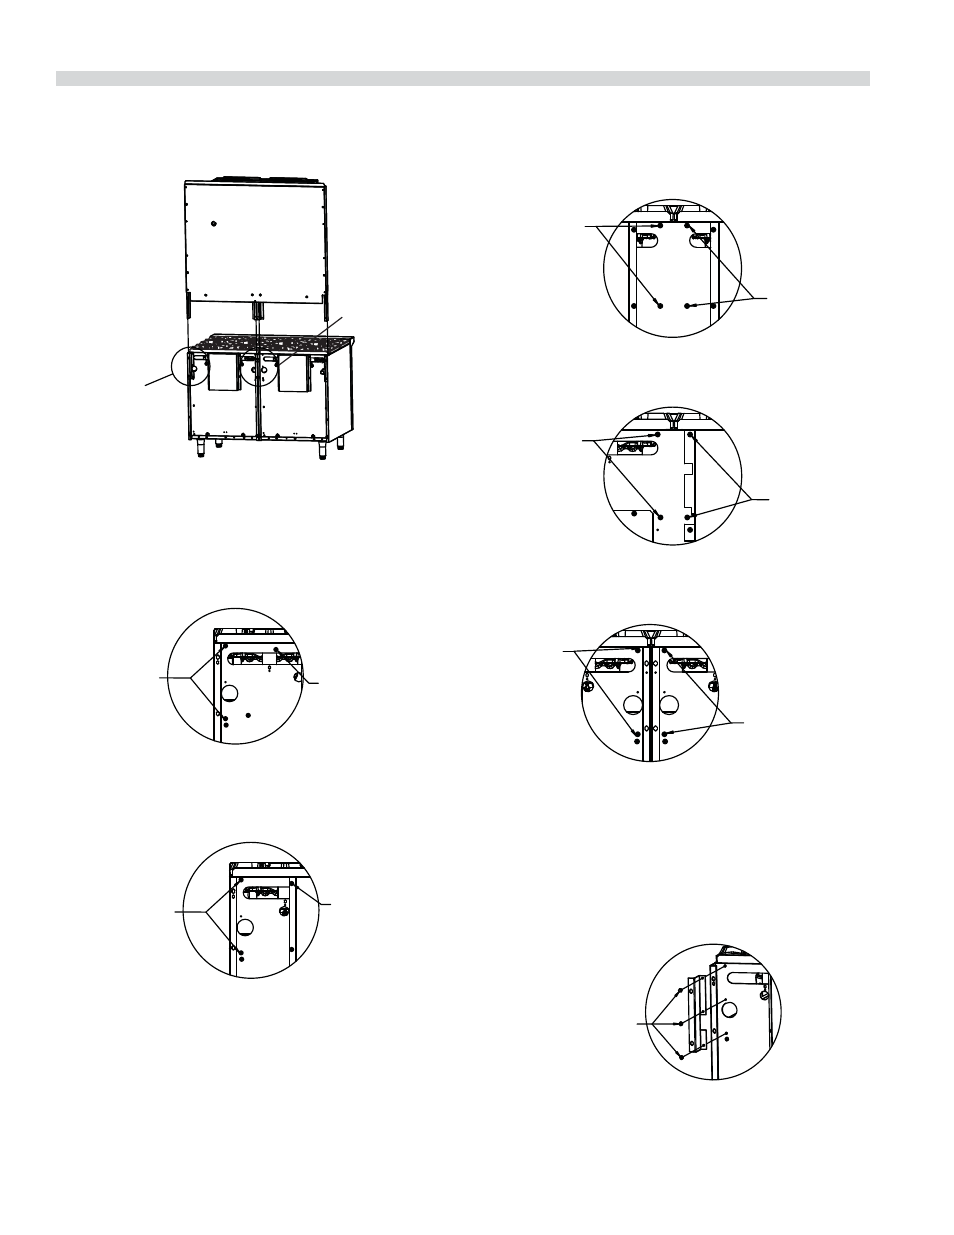
DETAIL
I
DETAIL
II
48" RANGE
Figure 2 – With area detail defi ned for 48 inch ranges.
1. Remove screws (a total of 10) from back of oven on both
sides of the range (detail I) and center (detail II) as shown
for each range model:
REMOVE
2 SCREWS
BOTH SIDES
REMOVE
1 SCREW
(BOTH SIDES)
DETAIL I
48" RANGES WITH
STANDARD OR CONVECTION OVENS
AND STORAGE
REMOVE
2 SCREWS
(BOTH SIDES)
REMOVE
1 SCREW
(BOTH SIDES)
DETAIL I
FOR 48" RANGES
WITH 2 SPACE SAVER OVENS
REMOVE
2 SCREWS
REMOVE
2 SCREWS
IF REQUIRED
REMOVE
2 SCREWS
REMOVE
2 SCREWS
(IF REQUIRED)
DETAIL II 48" RANGES
WITH STANDARD OVEN AND STORAGE
DETAIL II 48" RANGES
WITH CONVECTION OVEN AND STORAGE
REMOVE
2 SCREWS
REMOVE
2 SCREWS
DETAIL II
FOR 48" RANGES
WITH 2 SPACE SAVER OVENS
2. For all 48” ranges install the left and right support
brackets (part # 4523226 and 4523227) by re-inserting
the 2 screws removed in step 1 and one additional screw
(on both sides of the range).
DETAIL I
ALL 48" RANGES
INSERTED
SCREWS
Model GFIR48 – 48” Ranges